background image


Manuale d’istruzioni 
Instruction handbook  


14 

► 

Remove the cover in Teflon, clean the bar with alcohol and then apply the new Teflon cutting 
the  exceeding  part  to  the  two  extremities.  Put  the  bar  in  the  guide  and  then  connect  the 
cables. 

8.


MAINTENANCE 

1.


Before any cleaning, maintenance and repair operation, is needed to disconnect the outlet 
from the general electrical system. 

2.


The  maintenance  operations  must  be  carried  out  from  qualified  people.  For  any  repairs 
operation, is needed to address to a 

 Technical Center Authorized from the WAAGE


s.r.l.

  It’ 

is needed to use only original spare parts. A good vacuum  and welding quality of the bags 

depends on the cleaning of your. We recommend to control the conditions of the welding bar. 
Do not use in any circumstances tools or knives in order to clean up the welding bar. 

9. SOSTITUZIONE OLIO POMPA ( MODELLO SV 1 

– 3 )


Procedure 
Put off the device ignition switch and pull out the plug. 
Unscrew the oil draining cap. 

Let  the oil drain away for at least 10 minutes. 
Twist on the draining cap. 
Remove the screw top loosening the 4 fixing screws. 

Execute the oil replenishment above the half of the windowpane level. 
It is advisable to replace oil at every 500 hours work.


Oil recommended by the manufacturer:  
Lubricating oil for vacuum pumps BV 32 


1 oil level pilot                                                                 4 oil replenishment cap 
2 oil draining cap 

3 oil draining grid 


Summary of Contents for SV-FOOD

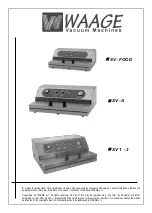
Page 1: ...nsenso scritto della WAAGE s r l Copywrites by WAAGE s r l All rights reserved No part of this may be reproduced in any form by Photostat microfilm xerography or any other means or incorporated into a...

Page 2: ...tomatica 6 1 5 Funzione semiautomatica 7 SOSTITUZIONE DEL TEFLON DI COPERTURA BARRA SALDANTE 8 MANUTENZIONE 9 PROBLEMI E SOLUZIONI 10 DICHIARAZIONE DI CONFORMITA __________ INDEX __________ 1 INTRODUC...

Page 3: ...a della presente apparecchiatura giunto a fine vita organizzata e gestita dal produttore L utente che vorr disfarsi della presente apparecchiatura dovr quindi contattare il produttore e seguire il sis...

Page 4: ...i Non immergerlo in acqua Non affidarne l uso ai bambini o a persone non qualificate Staccare la spina prima di effettuare qualsiasi operazione diversa dal confezionamento Quando l apparecchio non vie...

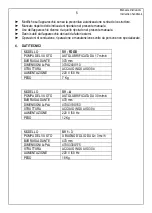
Page 5: ...te da persone non specializzate 4 DATI TECNICI MODELLO SV FOOD POMPA DEL VUOTO AUTOLUBRIFICATA DA 17 m min BARRA SALDANTE 370 mm DIMENSIONI LxPxA 370X240X110 STRUTTURA ACCIAIO INOX AISI 304 ALIMENTAZI...

Page 6: ...macchina sia la stessa della Vostra rete elettrica Inserire e disinserire la spina nelle presa elettrica sempre ad apparecchio spento Posizionarel apparecchiosuunsolidopianodilavoroorizzontaleinmodoc...

Page 7: ...o 4 Regolare il tempo di saldatura a circa 3 4 secondi ruotando il temporizzatore saldatura 5 Inserire il pezzo da confezionare nel sacchetto 6 Posizionare il sacchetto sotto l apposita barra di accia...

Page 8: ...alcool quindi applicare il teflon nuovo tagliando la parte eccedente ai due capi Riporre la barra nelle guide ricollegando i cavetti 8 SOSTITUZIONE OLIO POMPA MODELLO SV 1 3 Procedura Spegnere l appar...

Page 9: ...ldante 10 PROBLEMI E SOLUZIONI Dopo aver inserito l interruttore generale della macchine non parte 1 Verificare che la spina sia ben inserita alla presa elettrica ed eventualmente controllare i contat...

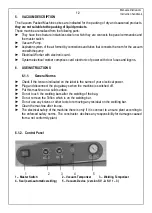
Page 10: ...any other operation Turn off the switch and disconnect the plug if you don t use the machine Use only original spare parts for repair and parts replacement 3 VACUUM PACKED 3 1 1 Employment The Vacuum...

Page 11: ...EELING POWER 220 V 50 Hz WEIGHT 7 Kg MODEL SV A VACUUM PUMP AUTOLUBRIFICATA DA 30 m min SEALING BAR 470 mm DIMENSION LxPxA 470X310X150 STUCTURE IN STAINLESS STEEL ACCIAIO INOX AISI 304 FEELING POWER 2...

Page 12: ...logons 6 USE INSTRUCTIONS 6 1 1 General Norms Check if the tension indicated on the label is the same of your electrical power Plug and disconnect the plug always when the machine is switched off Put...

Page 13: ...the time of welding to about seconds turning the welding temporizer 5 Put the good in the bag 6 Put the bag turned to elle under the stainless steel bar 7 Lower the cover pressuring on it until it is...

Page 14: ...l spare parts A good vacuum and welding quality of the bags depends on the cleaning of your We recommend to control the conditions of the welding bar Do not use in any circumstances tools or knives in...

Page 15: ...inside of the electrical card The machine gets the vacuum in the bag but it does not make the welding Verify if at the moment of the insertion of the welding through the push button there are flashin...

Page 16: ...92 91 368 CEE 93 44 CEE e 93 68 CEE corresponds to the requirements of the Council Directive 89 392 CEE 91 368 ECC 93 44 ECC e 93 68 ECC correspod au exigences de la directive 89 392 CEE 91 368 CEE 93...

Reviews: