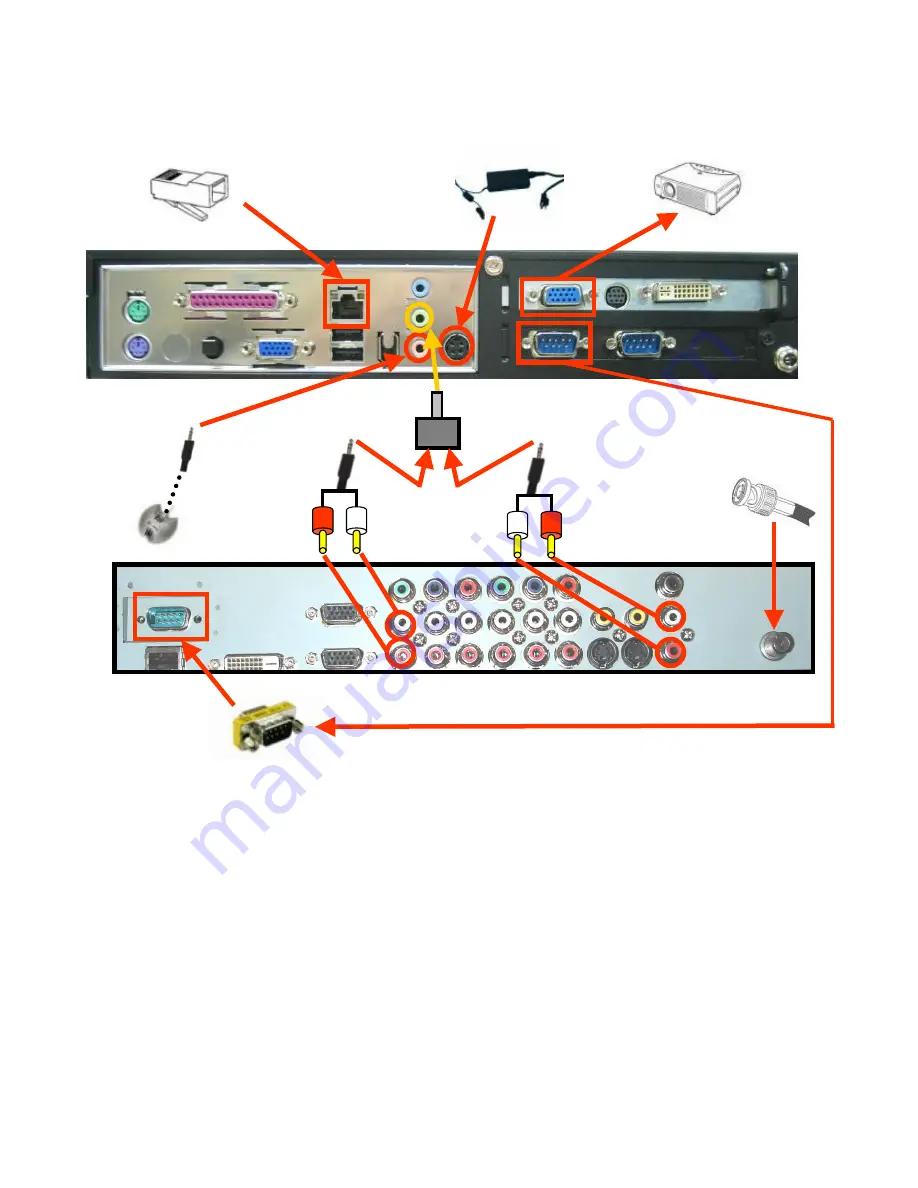
11. Audio
10. Audio
9b. LCD
Control
13. Microphone
14. Cable TV
17. VGA to external projector
15. IP/LAN network
16. Power
adapter
Attaching VTEL Backpack to LCD Flat Panel
Cable Assembly Continued
9a) Attaching Gender Changer (GC) to 9-pin male connector on LCD panel. First, remove nuts
(if present) from GC. Second, attach GC to panel and tighten nuts
.
Note: it’s a tight fit.
You may need to loosen the panel connector’s hold-down nuts to lower them in order
to thread with GC’s screw. When you tighten GC’s screws it will also tighten the panel
connector’s hold-down nuts.
9b) Screw in each end of the LCD panel control cable. Be sure to use the lower COM port (COM 1)
on the PC
10) Plug one end of this audio cable into the Y-splitter. Match the red and white jacks
to their left-most audio receptacles on LCD
11) Plug one end of this audio cable into the into the Y-splitter. Match the red and white jacks
to their right-most audio receptacles on LCD
12) Plug the Y-splitter into the green mic jack on the PC.
13) Plug in microphone into pink jack on the PC
14) If available, plug in your coaxial cable TV feed for TV viewing
15) Attach your RJ-45 IP/LAN network cable to either port on PC
16) Attach the power cable here and plug the AC side into a surge protector
17) If available, attach an external VGA display/projector to the PC.
9a Gender
Changer
12. Y-Splitter


