Starting a VIRB Video Slideshow
You can view a slideshow of the videos and images on
the VIRB action camera.
1
From the
VIRB®
screen, select
.
2
Wait a few seconds for the thumbnail images to load.
3
Select a video or image.
4
Select
Options
>
Start Slideshow
.
To stop the slideshow, selcet
Options
>
Stop Slideshow
.
VIRB Action Camera Settings
NOTE:
Not all options and settings apply to all camera
models.
Select
Vessel
>
VIRB®
>
Options
.
Name
: Allows you to enter a new name for the VIRB
action camera.
Recording
: Starts and stops recording.
Take Photo
: Takes a still photograph.
Playback
: Allows you to view video recordings and
photos.
Freeze
: Pauses the camera image.
Sleep
: Puts the VIRB action camera into a low power
mode to conserve battery power. Not available on the
VIRB 360 camera.
Video Setup
: Sets up the video (
).
Edit Overlays
: Adjusts the data shown on the screen
).
VIRB Action Camera Video Setup Settings
NOTE:
Not all options and settings apply to all camera
models.
Select
Vessel
>
VIRB®
>
Options
>
Video Setup
.
Aspect
: Sets the video aspect ratio.
Video Mode
: Sets the video mode. For example, you can
select the Slow-Mo option to shoot slow motion videos.
Video Size
: Sets the size or pixel dimensions of videos.
Video FPS
: Sets the frames per second.
Video Timestamp
: Adds the date and time a video was
recorded.
Photo Timestamp
: Adds the date and time a photo was
taken.
Photo Size
: Sets the size or pixel dimensions of photos.
Field of View
: Sets the zoom level.
Lens Mode
: Sets which lens or lenses the camera uses
while shooting video.
Mirror
: Allows you to flip or mirror the video.
Rotation
: Allows you to rotate the camera angle.
Adding the VIRB Action Camera Controls to Other
Screens
Before you can control a VIRB action camera with
the chartplotter, you must connect the devices using a
wireless connection (
Connecting a Wireless Device to the
You can add the VIRB action camera control bar to other
screens. This allows you to start and stop recording from
other functions in the chartplotter.
1
Open the screen to which you want to add the VIRB
action camera control bar.
2
Select
Options
>
Edit Overlays
>
Bottom Bar
>
VIRB
Bar
.
When viewing a screen that has the VIRB action camera
controls, you can select
to open the full screen view of
the VIRB action camera.
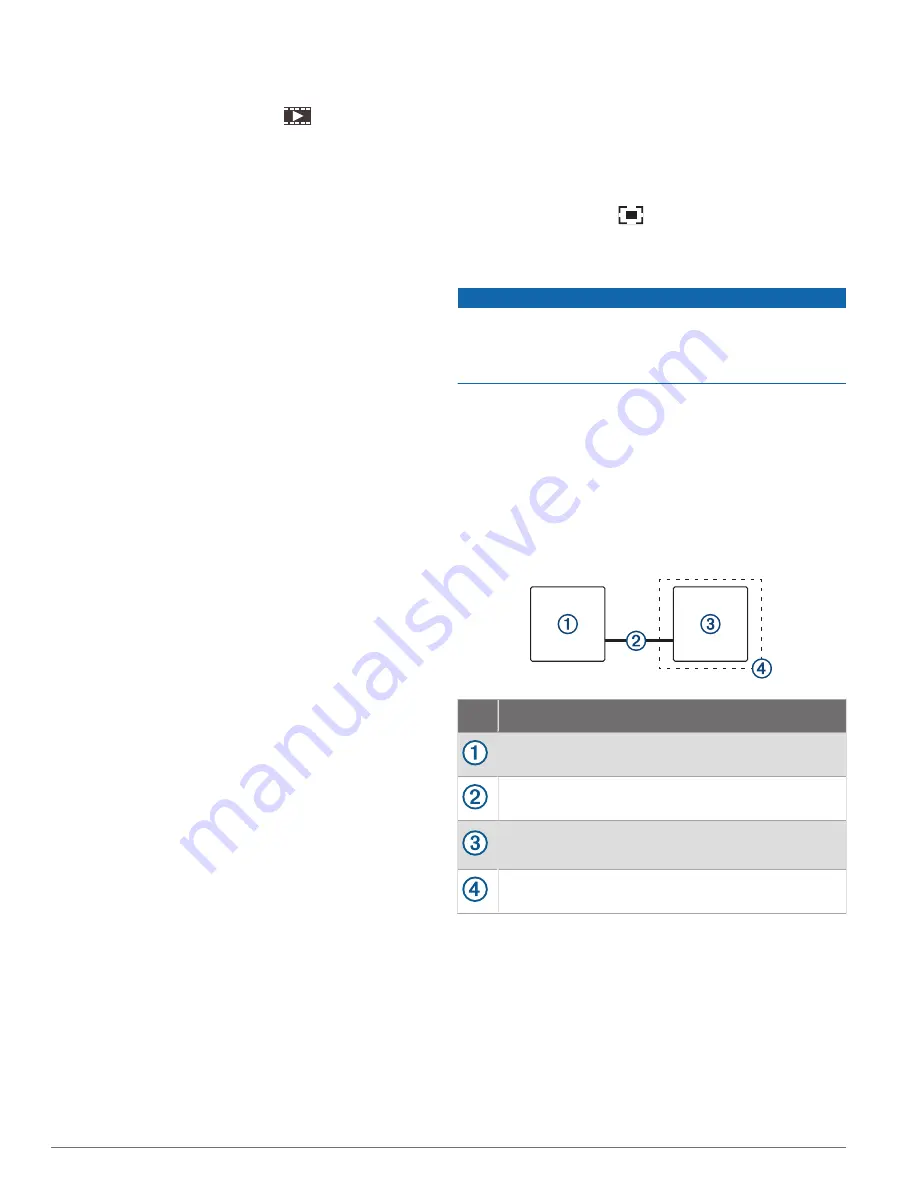
HDMI Out Video Considerations
NOTICE
To prevent corrosion due to moisture, you must use
Garmin GPSMAP
®
accessory cables when connecting the
chartplotter to the video display. Using different cables
voids your warranty.
The B12 chartplotter models have HDMI out capability to
duplicate the chartplotter screen on another device, such
as a television or monitor.
The Garmin GPSMAP HDMI accessory cable is 4.5 m
(15 ft.) long. If you need a longer cable, you should use
an active HDMI cable only. You need an HDMI coupler to
connect the two HDMI cables.
You must make all cable connections in a dry
environment.
Item Description
B12 chartplotter
GPSMAP HDMI cable (HDMI OUT)
Display with an HDMI In port, such as a computer
or television
Dry environment, protected from moisture
Pairing the GC
™
100 Camera with a Garmin
Chartplotter
Before you can connect a wireless device to the
chartplotter wireless network, you must configure the
Viewing Video
79


