background image


Note: Gamma is a Prescribed Medical Device.  

To be used only with the guidance of  
Therapist or Prescribing Practitioner.  

Please read these instructions carefully before use. 

All User


GB


Section 2     

Pages 9 - 21  

Technical User 

-  


Physiotherapist, Occupational Therapist.  


Section 3     

Pages 23 - 27 

Home User 

-   

Home or School Carer. 


Section 4    

Pages 29 - 33    

Re-Issue 

-   

Stores Personnel.  


FOR FREE ADVICE ON THE USE OF THIS PRODUCT, PLEASE CONTACT OUR SALES SUPPORT TEAM 

Jenx Limited, Wardsend Road, Sheffield, S6 1RQ, Tel: +44 (0)114 285 3376  Fax: +44 (0)114 285 3528 [email protected] www.jenx.com 

Ver; 004 June 2009 SJB


Section 1     

Pages 2 - 8 

All Users 

-   


Safety Information


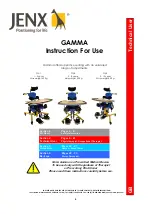
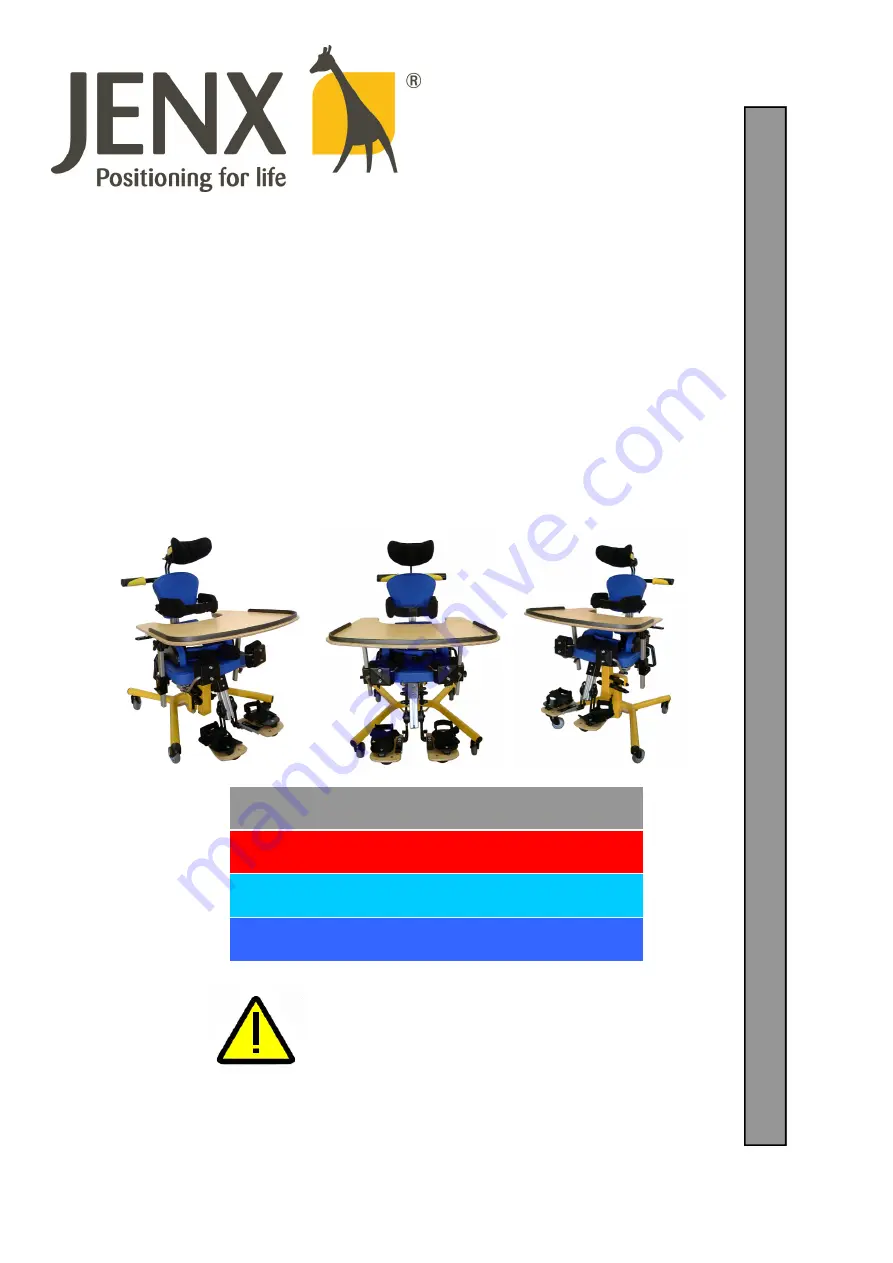
GAMMA  

Instruction For Use 

 Gamma offers supportive seating with an unrivalled 

range of adjustments. 

GA1 

1 - 5 years 

Max weight 45 Kg 

GA3 

5 - 10 years 

Max weight 45 Kg 

GA2 

3 - 8 years 

Max weight 45 Kg 

Summary of Contents for GAMMA GA1

Page 1: ...er Section 4 Pages 29 33 Re Issue Stores Personnel FOR FREE ADVICE ON THE USE OF THIS PRODUCT PLEASE CONTACT OUR SALES SUPPORT TEAM Jenx Limited Wardsend Road Sheffield S6 1RQ Tel 44 0 114 285 3376 Fa...

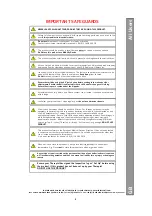
Page 2: ...using the 45 pelvic strap before you begin to make any other adjustments Ensure the belt is adjusted for each child and for changes of clothing Ensure the straps are routed under the hip pads Assemble...

Page 3: ...and belts to suit the child Adjust to suit changes in clothing Ensure a fingers width between the belt and the child to prevent over tightening or the child moving to an inappropriate position Never u...

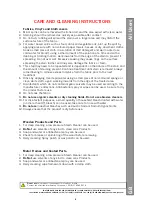
Page 4: ...7 Disinfectants which do not contain organic solvents may be used according to the manufacturer s directions Antibacterial spray or wipes can be used be sure to dry the product before use 8 Do not soa...

Page 5: ...ecks Check all nuts and bolts are secured and that none is missing Check all mechanical movements operate fully Check the structure of the product for signs of fatigue or splintering Castors Lift base...

Page 6: ...upational Therapist Do not perform any other adjustment than instructed to do so The Home User section of this guide gives the adjustments needed to aid the daily use only Any other adjustments are on...

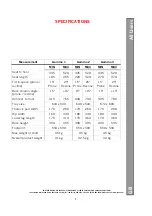
Page 7: ...t length 185 265 220 320 270 370 Tilt in space prone recline 15 Prone 25 Recline 15 Prone 25 Recline 15 Prone 25 Recline Back column angle prone recline 15 15 15 15 15 15 Armrest to floor 415 765 440...

Page 8: ...discontinued Jenx Limited reserves the right to replace with a new model of a similar quality and price The warranty does not cover the product for repair or replacement due to failure or damage thro...

Page 9: ...ist or Prescribing Practitioner Please read these instructions carefully before use Section 2 Pages 9 21 Technical User Physiotherapist Occupational Therapist Section 3 Pages 23 27 Home User Home or S...

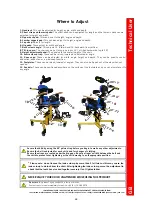
Page 10: ...or height angle and depth 5 Lap strap Adjusts for length 6 Hip pads These adjust for width and angle 7 Back column angle This adjusts 15 forward and 15 backward from vertical 8 Tilt in space The chair...

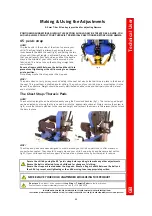
Page 11: ...appropriate channel Simply remove the screw in fig 8 move the thoracic pad bar to the required height and re insert the screws in the relevant holes to lock the bars in place WHY The pelvic strap not...

Page 12: ...ngle of these pads will help to keep your child s hips in a position with the correct amount of abduction or adduction WHY Set the seat depth to suit the child s upper leg length Ensure there is some...

Page 13: ...round so that it faces forward It can also be removed altogether if necessary Making Using the Adjustments The Upper Back Pad HOW The upper back pad can be adjusted by loosening the index clamp fig 11...

Page 14: ...clamp WHY The lumbar support pad helps to support and maintain the correct position of the pelvis By making sure that this pad is set correctly your child s posture can be managed more effectively The...

Page 15: ...the Allen key slide the knee cup off the bar select the desired channel choice of two height settings and re tighten the bolt To alter the distance between the knee cups loosen the wing nut under the...

Page 16: ...elow the armrest fig 20 allows the height to be altered The grade scale on the arm rest carrier makes it easy to get the two arm rests at the same height This is important because the tray fixing requ...

Page 17: ...ards Remember to re tighten the black wing nut again to lock the back column WHY Setting the back angle independently of the seat allows you to control the angle of the hips For children with an exten...

Page 18: ...r the seat hold the handle bars and depress the pedal Gently guide the chair to the desired height If the child is not heavy enough to cause the seat to lower unassisted apply gentle pressure to the t...

Page 19: ...bination of thoracic supports and hip supports to keep the spine straight This helps to prevent the child sitting with a curved spine A Multi grip version of the Gamma is available Multi grip supports...

Page 20: ...ALES SUPPORT TEAM Jenx Limited Wardsend Road Sheffield S6 1RQ Tel 44 0 114 285 3376 Fax 44 0 114 285 3528 info jenx com www jenx com Technical User GB Optional Accessories Flip Away Thoracic Pads Flip...

Page 21: ...Sheffield S6 1RQ Tel 44 0 114 285 3376 Fax 44 0 114 285 3528 info jenx com www jenx com The activity frame allows the parent or therapist to hang activity equipment over the surface of the tray in a p...

Page 22: ...22...

Page 23: ...eld S6 1RQ Tel 44 0 114 285 3376 Fax 44 0 114 285 3528 info jenx com www jenx com Gamma offers supportive seating with an unrivalled range of adjustments GA1 1 5 years Max weight 45 Kg GA3 5 10 years...

Page 24: ...ad bar to the required height and re insert the screws in the relevant holes to lock the bars in place Ensure two fingers space between the thoracic supports and the child s armpit and a finger width...

Page 25: ...6 and lifting the footplate upwards To replace the footplate pull down until they click in to place Fig 4 Fig 5 Fig 6 Making Using the Adjustments Your Therapist has set the adjustments for this prod...

Page 26: ...ttach the tray ensure the black tabs are horizontal fig 11 and the arm rests are both at the same height and angle Place the nuts on the underside of the tray into the required holes in the tray arms...

Page 27: ...en the seat is level or slightly prone TIP When the chair is occupied To lower the seat hold the handle bars and depress the pedal Gently guide the chair to the desired height If the child is not heav...

Page 28: ...28...

Page 29: ...st or Prescribing Practitioner Please read these instructions carefully before use Section 2 Pages 9 21 Technical User Physiotherapist Occupational Therapist Section 3 Pages 23 27 Home User Home or Sc...

Page 30: ...els and levers are in good condition and fitted securely 4 Check the product and any accessories fully for any sign of wear and tear or distortion 5 Check that all the functions of the product are wor...

Page 31: ...ood condition and not showing signs of wear 4 Stability Is the product stable on an even surface no rocking 5 Screws Nuts and Bolts Are there nuts and bolts missing or damaged 6 Swivels Castors Are th...

Page 32: ...ed to Serviceline must have a clearly visible batch number All Serviceline products are returned to Jenx for thorough tests and inspections that include Structure Mechanics Mobility Upholstery and Fix...

Page 33: ...own into Mandatory work which has to be done to make the product safe cosmetic work and work required to bring the product to original specification When the quotation is approved the product will be...

Page 34: ...TS PLEASE CONTACT OUR SALES SUPPORT TEAM Jenx Limited Wardsend Road Sheffield S6 1RQ Tel 44 0 114 285 3376 Fax 44 0 114 285 3528 info jenx com www jenx com Technical User Physiotherapist or OT Product...

Reviews: