4.Advanced User Guidebook
52
(4)
Push the
Decode
button on the front panel. Select bus type as CAN. set
parameters based on the characteristics of the signal. When the parameters are set
correctly, the information carried by the signal will be displayed.
Tip:
If there are repetitive menu items in both trigger menu and decoding menu, you
can set anyone of them, the other will be changed synchronously.
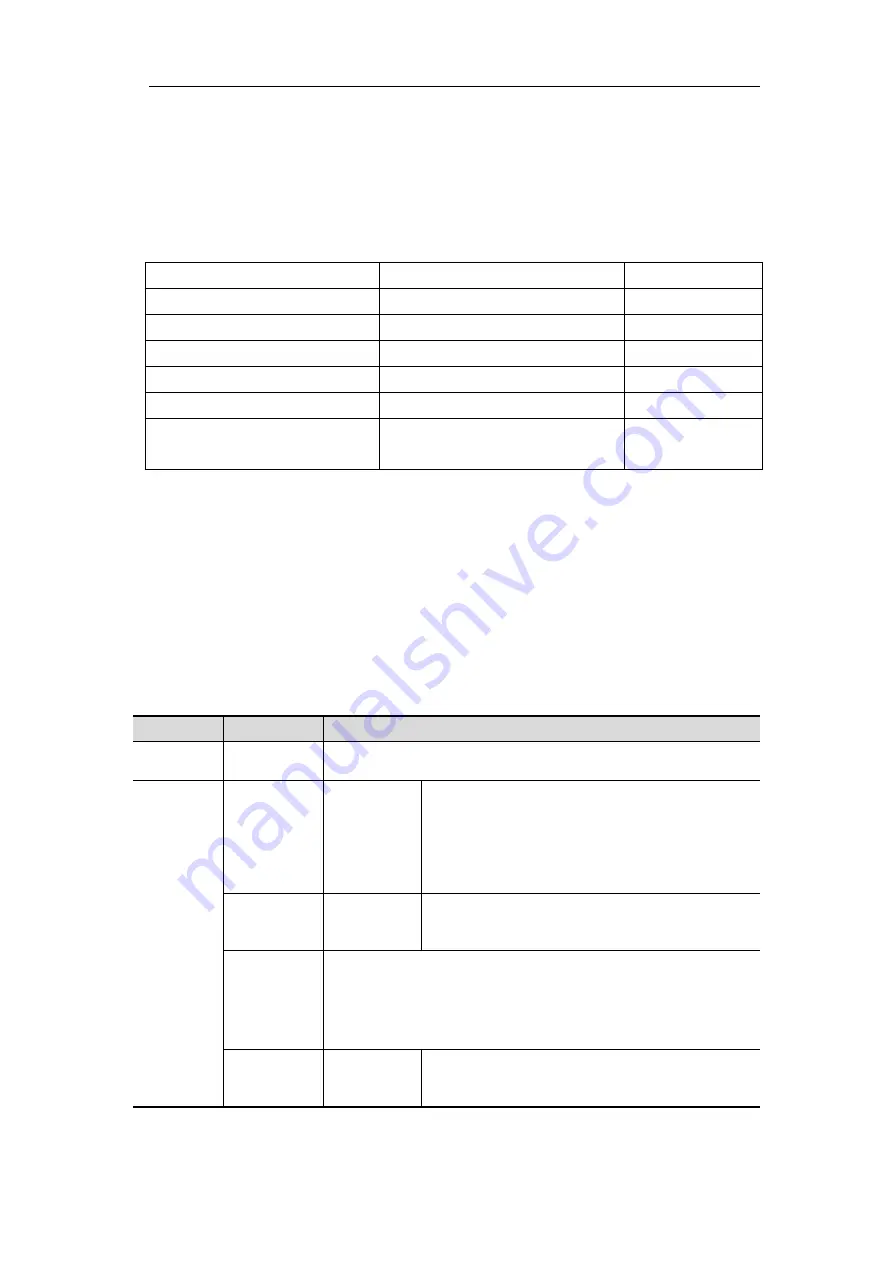
Decoded information interpretation:
Information
Abbreviation
Background
Identifier
I, ID, or do not display
Green
Overload Frame
OF
Green
Error Frame
EF
Green
Data Length code
L, DLC, or do not display
Blue
Data
D, Data, or do not display
Black
Cyclic Redundancy Check
C, CRC, or do not display
Valid: Purple
Error: Red
Note
:
Use the
Trigger Level
knob to adjust the thresholds of bus trigger and bus
decoding.
When the ACK (ACKnowledge Character) of Data Frame or Remote Frame is
not met, two red error marks will be
displayed in the corresponding position in
the waveform.
Error Frame, Remote Frame, and Overload Frame will be identified in the "Data"
column in the event table (Data Frame will not be identified).
CAN Decoding menu
list:
MENU
SETTING INSTRUCTION
Bus Type
CAN
Set bus type of decoding as CAN.
Display
Format
Binary
Decimal
Hex
ASCII
Set the display format of the bus.
EventTable
ON
OFF
Select "ON" to display the event table.
Save
EventTable
If a USB storage device is currently connected to the
instrument, save the event table data
in a .csv
(spreadsheet) formatted file on the external USB storage
device.
ASCII
Table
ON
OFF
Select "ON" to display the ASCII table.


