VIP Vision Residential IP Intercom Installation Guide - v1.3 Issued April 2017
28
2.6.2
Door Station 2 Configuration
1.
Connect the second Door Station to
the network, then log in to the Door
Station's Web Interface.
(Refer to Section
1.2 for how to log in.)
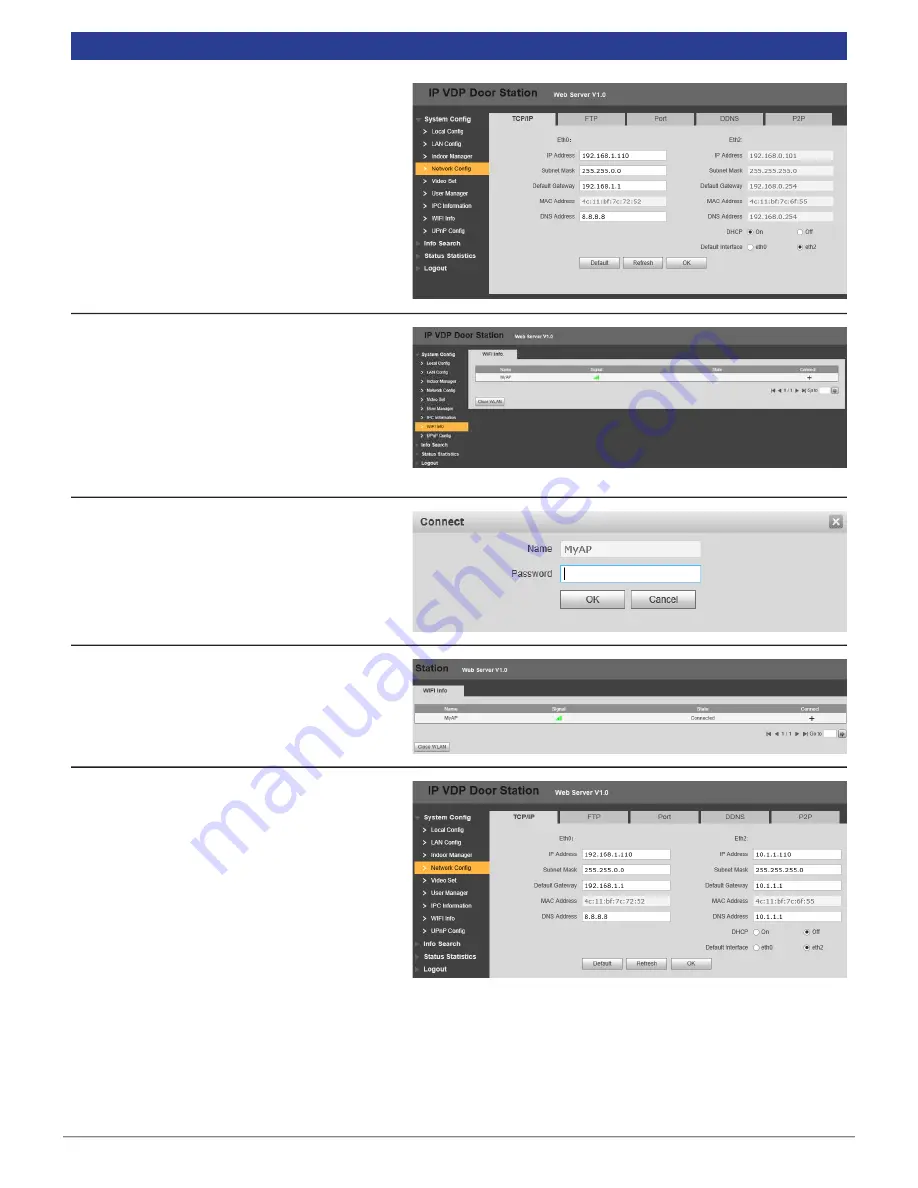
2. Navigate to "System Config" > "Network
Config"
3.
Under "Eth2", set "DHCP" to "On"
and
confirm with "OK"
4.
Select "Wifi Info", then select "Open
WLAN".
5.
Select the Access Point you wish to
connect to, and select the “+” button. In
this example we are going to connect to
“MyAP”.
6.
When prompted, enter the password for
the Access Point, then select “OK”.
7.
After 30 seconds, your Door Station will
connect to the Access Point.
8.
Select “System Config” > “Network
Config”, Under “Eth2”, set “DHCP” to “Off”.
9.
Select the default interface as "Eth2".
After this, connection to the Door
Station will be lost, and you will need
to connect your computer to the
wireless access point and reconnect
to the Door Station's web interface.
10.
Under “Eth2”, change the IP address,
subnet mask, and default gateway to
match your local computer network.
Press “OK” to save.
In this example, we are going to change the IP address of the Door Station to
10.1.1.111
, the Subnet Mask to
255.255.255.0
and the Default Gateway to
10.1.1.1
.


