background image

E
N
G
L

I

S
H

  4          ViewSonic E70f/E70fb

Quick Installation

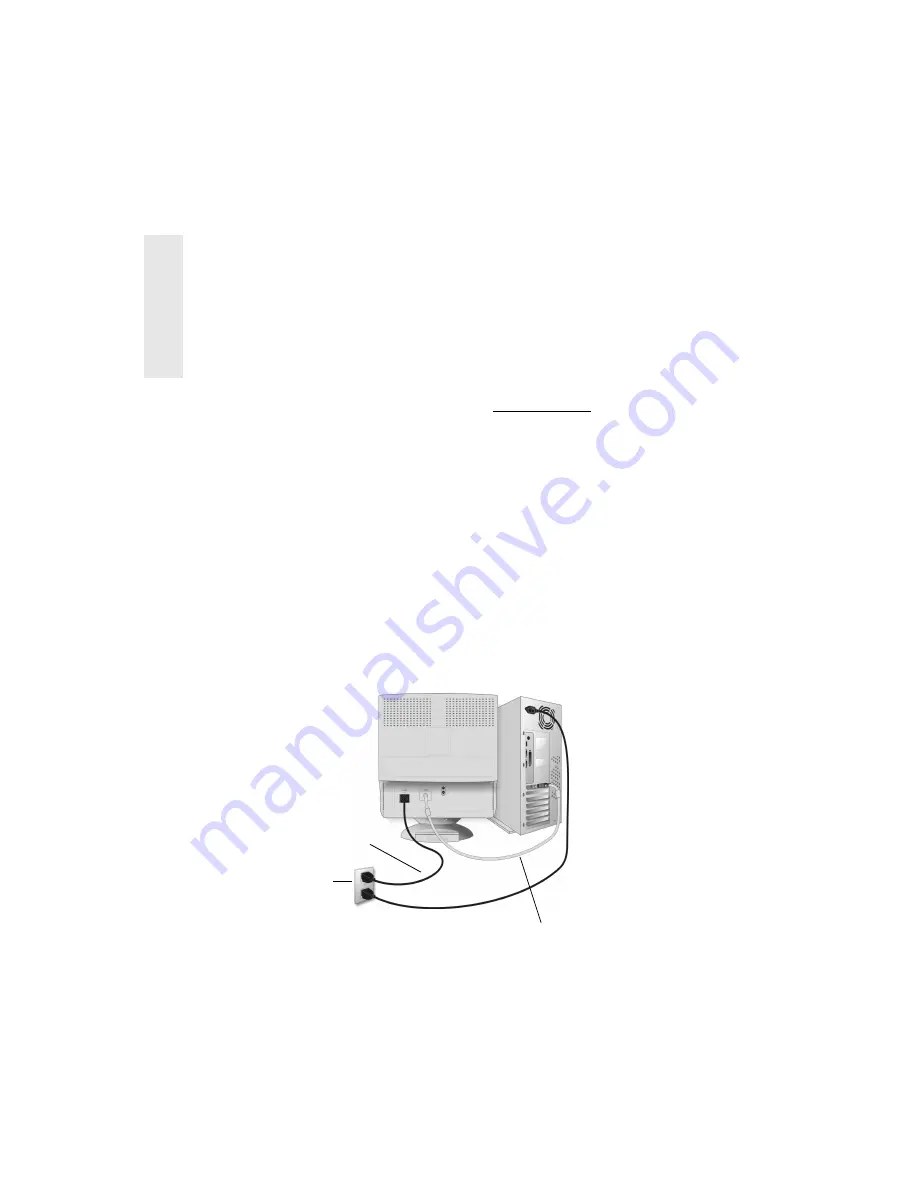
1 Connect video cable

Make sure both the monitor and computer 
are powered OFF. 

Connect the video cable to the computer.

Macintosh

®

 users:

 Models older than G3 

require a Macintosh adapter. Attach the 
adapter to the computer and plug the video 
cable into the adapter. 

To order a ViewSonic

®

 Macintosh adapter, 

contact ViewSonic. See Customer Support 
on page 13.

2 Connect power cord

Connect the power cord to a properly 
grounded AC outlet. 

3 Power-ON monitor and computer 

Power-ON the monitor, then power-ON the 
computer. This sequence (monitor before 
computer) is very important.

NOTE: 

At this point Windows

®


95/98/2000 

users may receive a message asking them to 
install the E70f/E70fb INF file.

4 Install display optimization files 

(INF and ICM files)

(1) Insert the ViewSonic Wizard CD-ROM 
into your computer’s CD-ROM drive.

NOTE

: If your computer does not have a 

CD-ROM drive, see Customer Support in 
this user guide.

(2) Wait for the CD-ROM to auto-start.

NOTE

: If your CD-ROM does not auto-

start: double-click on the CD-ROM icon in 
the Windows Explorer, then double-click on 

install.exe

(3) Follow the on-screen instructions.

5 Windows users: Set the Timing 

Mode (resolution and refresh 
rate) 

Example: 

1024 X 768 @ 75 Hz.

For instructions on changing the resolution 
and refresh rate, see the user guide for your 
computer's graphics card. 

Installation is complete. 

Enjoy your new ViewSonic E70f/E70fb 
monitor.


To be best prepared for any future customer 
service needs: 

• Write the serial number (see back of the 

monitor) in 

“For Your Records” on 

page 2 

of this guide. 

• Register the warranty of your monitor on 

the Internet at:


www.viewsonic.com/registration/

AC wall 
outlet

Video cable

Power cord

Summary of Contents for E70f

Page 1: ...User Guide With Plug Play 17 16 Viewable Diagonal E70f E70fb Color Monitor...

Page 2: ...allation 4 Using the Monitor Setting the Timing Mode 5 Adjusting the Screen Image 6 OnView Main Menu 7 Other Information Specifications 11 Troubleshooting 12 Customer Support 13 Cleaning the Monitor 1...

Page 3: ...r ViewSonic Corporation shall not be liable for technical or editorial errors or omissions contained herein nor for incidental or consequential damages resulting from furnishing this material or the p...

Page 4: ...st viewing conditions sit at least 18 from the monitor AVOID TOUCHING THE SCREEN WITH YOUR FINGERS Oils from the skin are difficult to remove NEVER REMOVE THE REAR COVER The monitor contains high volt...

Page 5: ...optimization files INF and ICM files 1 Insert the ViewSonic Wizard CD ROM into your computer s CD ROM drive NOTE If your computer does not have a CD ROM drive see Customer Support in this user guide...

Page 6: ...00 users select Screen Area in place of Desktop Area 2 Set the refresh rate See your graphic card s user guide for instructions NOTE To minimize the adjustments required for an optimal screen image se...

Page 7: ...tor automatically degausses each time you turn it on removing the buildup of magnetic fields that can affect color purity and convergence To prevent possible damage if you turn the monitor off then im...

Page 8: ...4 To adjust the selected control press the up or down buttons 5 To save the adjustments and exit the menu press button 1 OnView Main Menu The menus shown below are parts one and two of the Main Menu S...

Page 9: ...height and width of screen image Horizontal Size adjusts the width of the screen image Horizontal Position moves the screen image left or right Vertical Size adjusts the height of the screen image Ver...

Page 10: ...g 6500K Adds red to the screen image for warmer white and richer red 5000K Adds blue and green to the screen image for a darker color User Color Individual adjustments for red green and blue H Moire h...

Page 11: ...e original factory setting from any factory preset timing mode Exception This control does not affect changes made with the User Color control Viewmeter displays the frequencies horizontal and vertica...

Page 12: ...Conditions Temperature Humidity Altitude 41 F to 104 F 5 C to 40 C 5 to 95 no condensation 1 312 ft to 9 482 5 ft 400 m to 3 000 m Storage Conditions Temperature Humidity Altitude 4 F to 140 F 20 C t...

Page 13: ...uce the number of devices plugged in Check the ViewMeter from the main menu to verify the refresh rate vertical frequency is 75 Hz or higher See Specifications on page 11 Make sure the graphics card i...

Page 14: ...t Country Region T Telephone F FAX Email United States Canada T 800 688 6688 F 909 468 1202 T 800 688 6688 F 909 468 1202 vstech viewsonic com vstech viewsonic com United Kingdom T 0800 833 648 F 0044...

Page 15: ...o a clean soft lint free cloth and wipe the screen To clean the case 1 Use a soft dry cloth 2 If still not clean apply a small amount of a non ammonia non alcohol based mild non abrasive detergent ont...

Page 16: ...mer Support You will need to provide your product s serial number 2 To obtain service under warranty you will be required to provide a the original dated sales slip b your name c your address d a desc...

Page 17: ...erminal in the plug which is marked with the letter L or coloured RED IMPORTANT NOTICE CONCERNING POWER CORD SELECTION The power cord set for this unit has been enclosed and has been selected accordin...

Page 18: ...ian for help FCC Warning To assure continued FCC compliance the user must use grounded power supply cord and the provided shielded video interface cable with bonded ferrite cores If a BNC cable is goi...

Page 19: ...E N G L I S H 18 ViewSonic EF70f E70fb NOTES...

Page 20: ...ViewSonic Corporation 381 Brea Canyon Road Walnut CA 91789 Tel 909 869 7976 Tel 800 688 6688 Fax 909 468 1202...

Reviews: