C H E C K I N G F O R S O F T F O O T
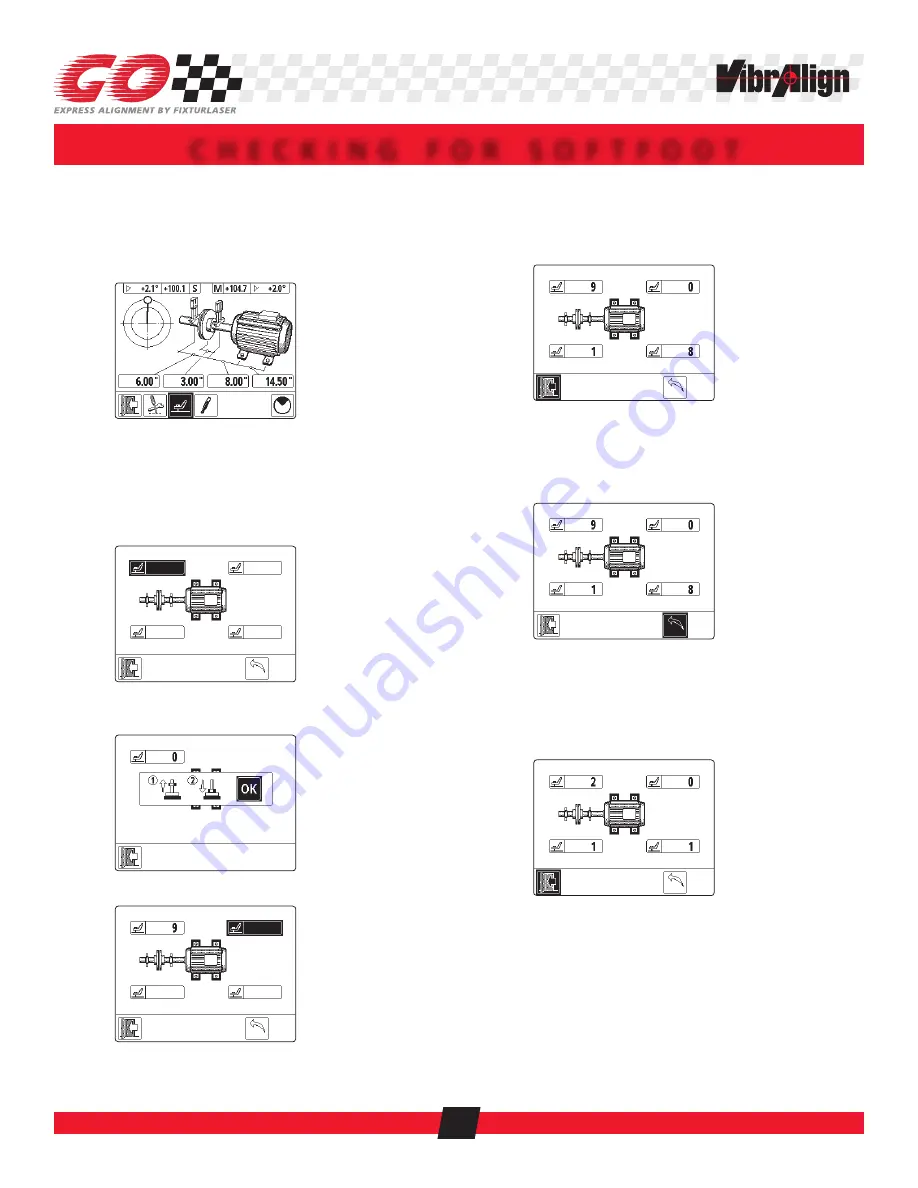
A warning icon will appear if the sensors are not at the
12 o’clock position.
3.1 Use the left arrow button on the right hand key pad
to move the black highlight to the SoftCheck
TM
icon.
Press the “OK” button to select.
Rotate the sensors to 12 o’clock if needed.
Use on screen guidance.
One foot will be highlighted.
Press the “OK” button to select the black
highlighted foot.
3.4 Wait for the foot value to zero. Then, 1) Loosen foot
fully; 2) Tighten foot firmly; 3) Press “OK”.
3.5 Check the remaining feet.
Black highlight automatically moves to next foot.
Values displayed are the approximate soft foot at
each foot.
3.6 Correct softfoot as needed (if any foot is more than
2-3 mils).
Re-check each foot if corrections are made.
Re-measure icon resets foot values.
3.7 Use the right arrow button to move the black
highlight to the Re-measure icon.
3.8 Press the “OK” button to select.
3.9 Repeat SoftCheck
TM
until all feet meet tolerance.
3.10 Use the left/right or up/down arrow buttons on the
right hand key pad to move the black highlight to
the Exit icon.
3.11 Press the “OK” button to select to return to shaft
alignment.
27


