


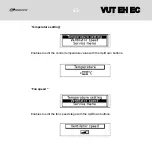


The temperature sensor is integrated in the control panel. Therefore, the installation place
of the control panel must be at least 1 m away from heating equipment, doors and windows.
Attach the control panel to the wall using the supplied screws.
The control panel is supplied to the control unit with the supplied standard four-wire
10 m cable.
The data cable connecting the control panel and the unit shall be routed separately from
the power cables. The recommended minimum distance between the cables is 150 mm.
The control panel is delivered assembled and pre-wired to the control unit. In case of need
to re-assemble the control panel please follow the steps below.
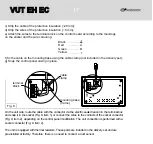
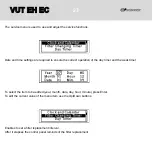
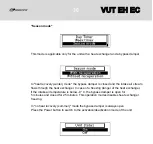
Disassemble the control panel:
a) Press the side latches to open the control panel;
b) Disconnect the cable from the terminal block using the screwdriver (Fig. 8);
c) Open the cable clamp on the mounting frame using cutting pliers;
d) Remove the cable and mount the cable as required.
Complete mounting of the control panel (Fig. 8):
a) Route the cable through the access hole in the bottom lid;
b) Fix the control panel back lid in the installation place and ensure a secure fit of the lid
to the wall by tightening the self-tapping screw.
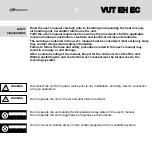
The screw head must not be in contact with the control circuit board, otherwise causing
a risk of equipment damage!
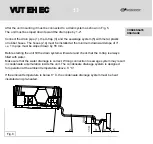
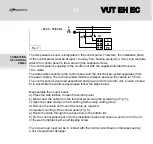
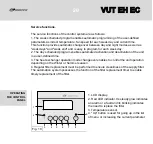
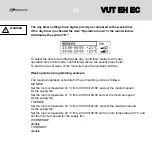
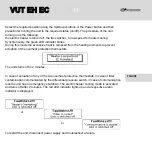
CONNECTION
OF CONTROL
PANEL
16
N
PE
L
N
PE
QF
I
X1
L
~230 V
,
50/60
Hz
Fig
. 7
VUT EH EC
VUT EH EC