ASSEMBLY - MONTAGGIO - MONTAJE - MONTAGE - MONTAGEM
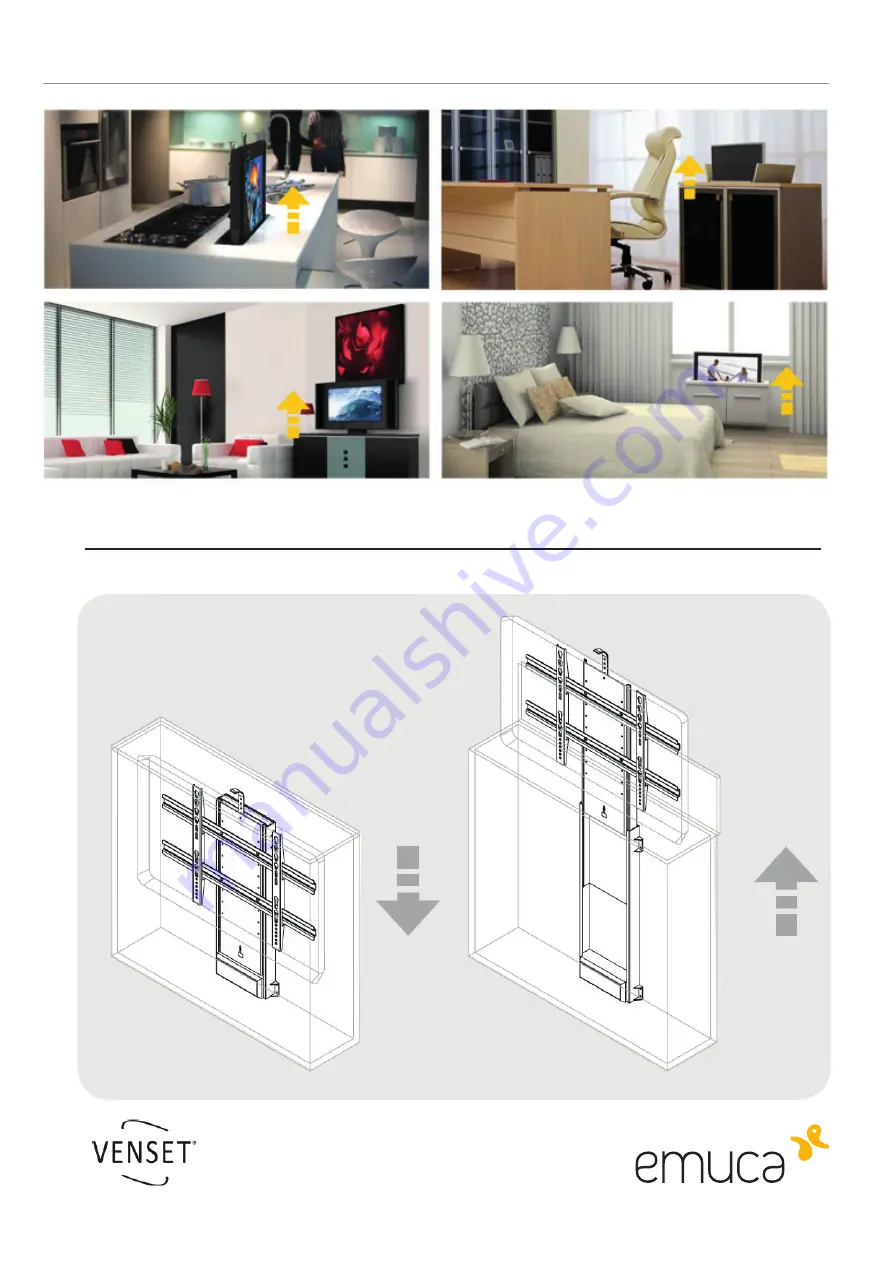
LIFT VISION
Page 1: ...ASSEMBLY MONTAGGIO MONTAJE MONTAGE MONTAGEM LIFT VISION...
Page 2: ...ns and main measures 3 Parts included 4 Installation 5 Adjusting the stroke length of the lift 6 Declaration of conformity WARNING FAILURE TO COMPLY WITH OR OBSERVE ALL ASSEMBLY SAFETY AND OPERATION I...
Page 3: ...lug the lift in the following conditions When the power cord or plug is damaged or frayed If liquid has spilled into the lift power supply or RF module If the lift power supply or RF module has been e...
Page 4: ...ne e mantenete il tutto in sicurezza per non causare danni Scollegare l elevatore se si verificano le seguenti condizioni Il cavo di alimentazione risulta manomesso o danneggiato Se si versato del liq...
Page 5: ...dulo RF o del cable de alimentaci n y mant ngalos en un lugar seguro con el fin de que no resulten da ados Desenchufe el elevador si observa que El cable de alimentaci n se encuentra en mal estado o...
Page 6: ...le d alimentation ils doivent tre plac s dans un lieu s r pour ne pas tre ab m s D branchez l l vateur si vous remarquez que Le c ble d alimentation est en mauvais tat ou ab m Si un liquide a t renver...
Page 7: ...do m dulo RF ou do cabo de alimenta o e mantenha os num lugar seguro com a finalidade de n o resultarem danificados Desligue o elevador da corrente se observar que O cabo de alimenta o encontra se em...
Page 8: ...Peso 17 23 kg Portata minima lift TV 5 Kg Portata massima lift TV 65 Kg 29 Kg 100 Kg Funzionamento Interruttore e telecomando Voltaggio Consumo 110 240 VAC 50 60Hz 100 Watt max per 80 kg IT Mat riaux...
Page 9: ...atore IT 1 Lift unit 2 Lid lifter 3 Lift brackets 4 TV mounting brackets 5 R F Module 6 Remote control 7 AC input wire country configured 8 Power supply bracket 9 Rocker switch 10 Power supply EN 1 Un...
Page 10: ...efer to the separate user instruction for the remote unit next page 5 Mount rocker switch 9 on wanted location by cutting a hole and pressing the switch into place Secure excess wire to keep away from...
Page 11: ...cr er un panneau d acc s aux composants lectroniques FR 1 Retire as pe as da embalagem e verifique que n o falta nenhuma 2 Coloque a unidade elevadora 1 sobre p ex o painel posterior do mobili rio nu...
Page 12: ...te receiver do not respond when pushing the emitter buttons reset the receiver After that code the emitter and receiver together again Coding Push the learner button on the receiver for less than 1 se...
Page 13: ...ar a luz vermelha Interruptor externo Em caso de necessitar uma unidade de controlo fixa o interruptor externo pode ent o ser ligado ao receptor Resolu o de problemas Verifique todas as conex es e lig...
Page 14: ...un mobile appoggiato al suolo Nella posizione sinistra si attiva la funzione inversa con l elevatore montato sottosopra per esempio per abbassare un televisore posto a soffitto Se non si ha la necessi...
Page 15: ...ment non souhait FR O receptor do controlo remoto contem 4 jumpers que podem ser colocados em duas posi es Esquerda ou Direita consoante as fun es que se desejarem para o elevador Jumper A tempo de co...
Page 16: ...ht e g if you don t want the lift to go all the way down into the cabinet 1 Remove the 2 covers 2 Use an allen key to loosen the screw of the wire glider Move the glider to the preferred position and...
Page 17: ...nt the lift to go all the way out of the cabinet Use an allen key to loosen the screw of the wire glider Move the glider to the preferred position and tighten the screw securely again FR R glage du pa...