Go back to top
Go back to TOC
7.8.6 TDR
7.8.6.1 Principles of Operation
The TDR works on the same principle as radar where a pulse of energy is transmitted down a cable. When the pulse reaches a fault or the end of the cable, a portion or all
of the pulse energy is reflected back to the instrument. The TDR measures the time it takes for the signal to travel down the cable, detect the problem, and to reflect back.
The TDR then converts this time to distance and displays the information as a waveform with a corresponding distance reading.
CX350's Time Domain Reflectometer (TDR) is designed for identifying and locating faults on all metallic cables with two or more insulated conductors. There are nine
distance range scales, which automatically configure the pulsewidth appropriate for the range selected. Up to 6000 ft (2 km) is supported. The TDR's deadzone is 2 ft
(0.5m).
There are two modes of operation. The Auto Fault Location (AFL) key moves the cursor directly to the first event or fault, thus eliminating the need to visually interpret the
wave form. When set in Manual Fault Location (MFL) mode, the waveform can be visually scanned similar to conventional TDRs. In both modes, the gain (dB setting) can be
adjusted over a 64dB range to magnify small events identified on the waveform. The TDR has impedance matched circuits for 25, 50, 75 and 100 ohms. Velocity of
Propagation (Vp %) can be manually set from 1 to 99% to match the Vp settings of the cable type under test.
A Cable type selection is available, which will update the Vp% and Impedance settings.
The TDR can be used to:
Locate bad splices and unknown splices
Find in-line components
Locate water or moisture in the cable
Verify new or partial cable reels
Locate crushed, pinched or kinked cables
Locate opens and shorts in the cable
Go back to top
Go back to TOC
7.8.6.2 Setup
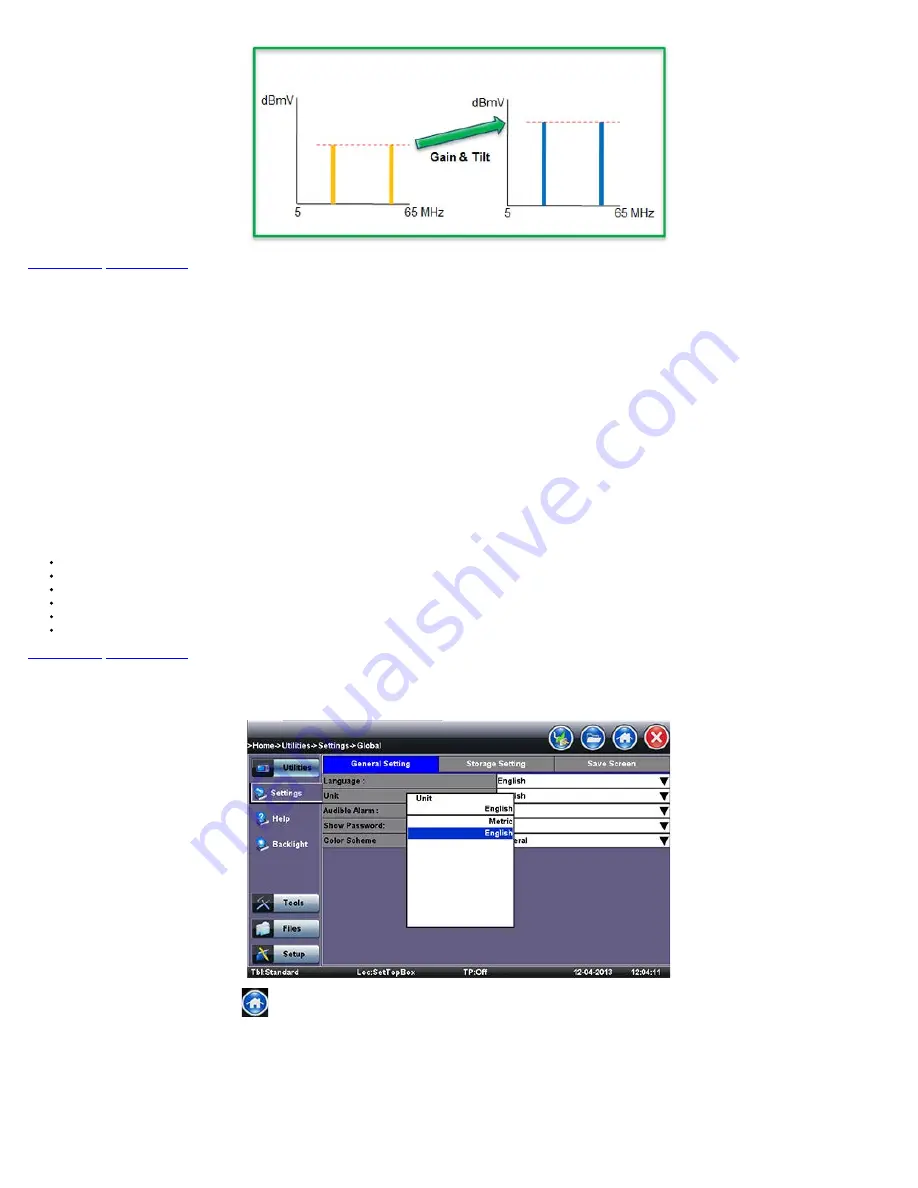
1. Set Units by clicking Utilities > Settings > Global > Units. Select English or Metric in the drop down menu.
2. Go back to home screen by clicking the
icon on top.
3. Select TDR under the Advanced Tools tab on the home screen.
CX350 e-Manual D07-00-037 RevC01
Page 48 of 81
Summary of Contents for VePal CX350
Page 1: ...CX350 e Manual D07 00 037 RevC01 Page 1 of 81...
Page 5: ...CX350 e Manual D07 00 037 RevC01 Page 5 of 81...
Page 13: ...Go back to top Go back to TOC CX350 e Manual D07 00 037 RevC01 Page 13 of 81...
Page 16: ...Go back to top Go back to TOC CX350 e Manual D07 00 037 RevC01 Page 16 of 81...
Page 21: ...Location Editor Location Editor Digital CX350 e Manual D07 00 037 RevC01 Page 21 of 81...
Page 22: ...Go back to top Go back to TOC CX350 e Manual D07 00 037 RevC01 Page 22 of 81...
Page 64: ...Go back to top Go back to TOC CX350 e Manual D07 00 037 RevC01 Page 64 of 81...
Page 73: ...Go back to top Go back to TOC CX350 e Manual D07 00 037 RevC01 Page 73 of 81...


