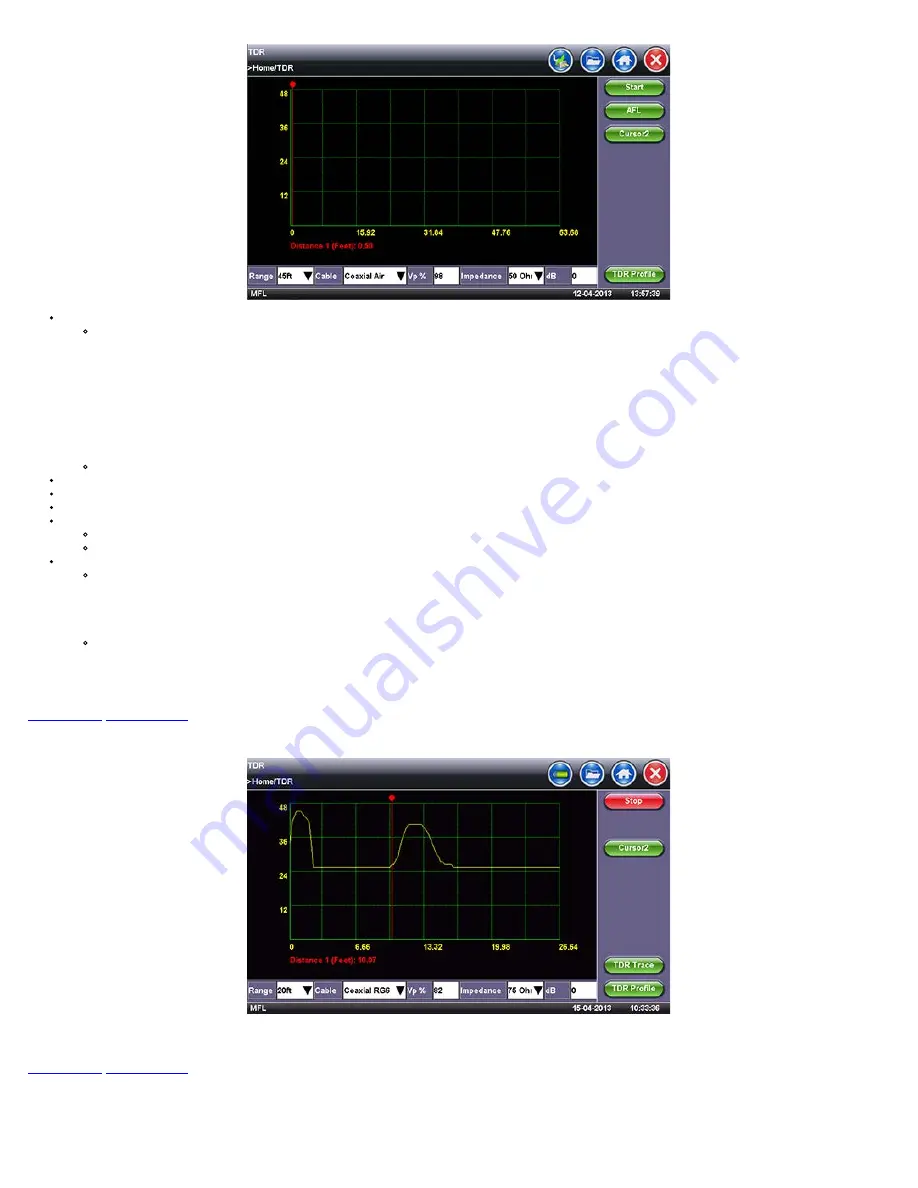
Range:
Select approximate distance Range for measurement. This selection automatically configures the TDR Pulsewidth.
There are nine distance range scales, which automatically configure the pulsewidth appropriate for the range selected:
20 ft (7m)
45 ft (15m)
90 ft (30m)
180 ft (60m)
360 ft (120m)
750 ft (250m)
1500 ft (500m)
3000 ft (1 km)
6000 ft (2 km)
The TDR's deadzone is 1 ft (0.5m).
Cable:
Select Cable Type.
Vp%:
Based on the Cable Type selected, this value will be populated. This can also be manually configured.
Impedence:
Based on the Cable Type selected, this value will be populated. This can also be manually configured.
dB (Gain Settings):
Manual Gain control. The gain can be adjusted to a maximum of 64 dB in 1dB steps.
Tap on the dB area, which brings up a soft alphabet screen.
Input a dB value from 0 to 64 dB and press Apply. Select a value up to 64 dB to magnify small events.
MFL/ AFL:
The TDR may be used in auto or manual fault location modes.
AFL:
When set in auto fault location (AFL) the TDR will scan the cable and the cursor will automatically stop at the first event. To start the scan press the AFL
key, then press Start. If the scan stops within the first meter (3 feet), it will be identified as the connection between the CX350 and the cable under test. Press
the Start key to continue the scan. The end of the cable is normally identified as an open or short. Small events identified in the cable may be enlarged by
increasing
the gain thereby making the fault more noticeable. (refer to section Gain Settings).
MFL:
When set in Manual Fault Location (MFL), the operator needs to visually scan the displayed trace and manually align the cursor to the event identified.
Note:
MFL is the default mode. Press AFL button to switch to AFL mode.
4. Press Start to begin measurement.
Go back to top
Go back to TOC
7.8.6.3 Operation
Distance Cursor:
Tap on the vertical Red Cursor or use the Left / Right Keys to move the marker. Corresponding distance is displayed. Tap Cursor2 to add a second
distance marker. When adding the 2nd Cursor, the delta distance between the two cursors is reported
Go back to top
Go back to TOC
7.8.6.3 TDR Profile
To save current TDR configuration settings, tap on TDR Profile. Highlight 'Save as...'. Input a profile name and press Apply.
To use this Profile, tap on TDR Profile and highlight and tap the saved Profile Name.
CX350 e-Manual D07-00-037 RevC01
Page 49 of 81
Summary of Contents for VePal CX350
Page 1: ...CX350 e Manual D07 00 037 RevC01 Page 1 of 81...
Page 5: ...CX350 e Manual D07 00 037 RevC01 Page 5 of 81...
Page 13: ...Go back to top Go back to TOC CX350 e Manual D07 00 037 RevC01 Page 13 of 81...
Page 16: ...Go back to top Go back to TOC CX350 e Manual D07 00 037 RevC01 Page 16 of 81...
Page 21: ...Location Editor Location Editor Digital CX350 e Manual D07 00 037 RevC01 Page 21 of 81...
Page 22: ...Go back to top Go back to TOC CX350 e Manual D07 00 037 RevC01 Page 22 of 81...
Page 64: ...Go back to top Go back to TOC CX350 e Manual D07 00 037 RevC01 Page 64 of 81...
Page 73: ...Go back to top Go back to TOC CX350 e Manual D07 00 037 RevC01 Page 73 of 81...


