Mag Probe Installation
Installing a Chem-ISO Mag Probe
33
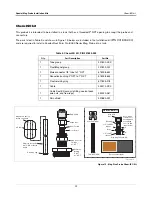
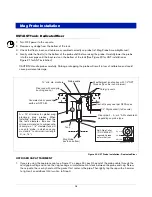
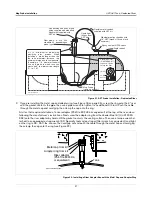
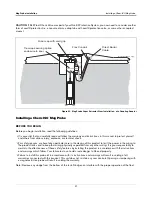
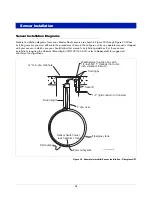
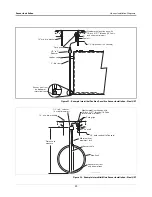
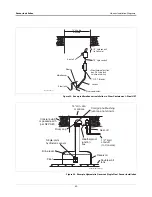
over the top of the gland nut. Note: the rain shield is intended to keep water out from between the probe’s
shaft and the inside of the tube so you don’t want to force the shield down below the top end of the tube (see
Figure 27).
5. Attach the probe cable connector to the mating plug on the top of the probe canister. Hand tighten the
connector securely.
6. If required by local regulations, install a protective housing. A typical housing consists of a reducer, 4-inch
diameter pipe, and union. The final assembly must comply with local codes.
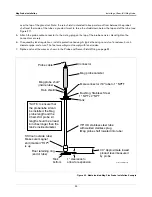
7. Splice and seal the wires as shown in the Probe and Sensor Field Wiring on page 51.
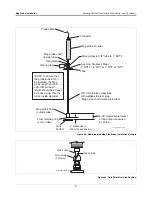
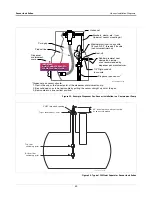
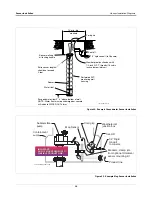
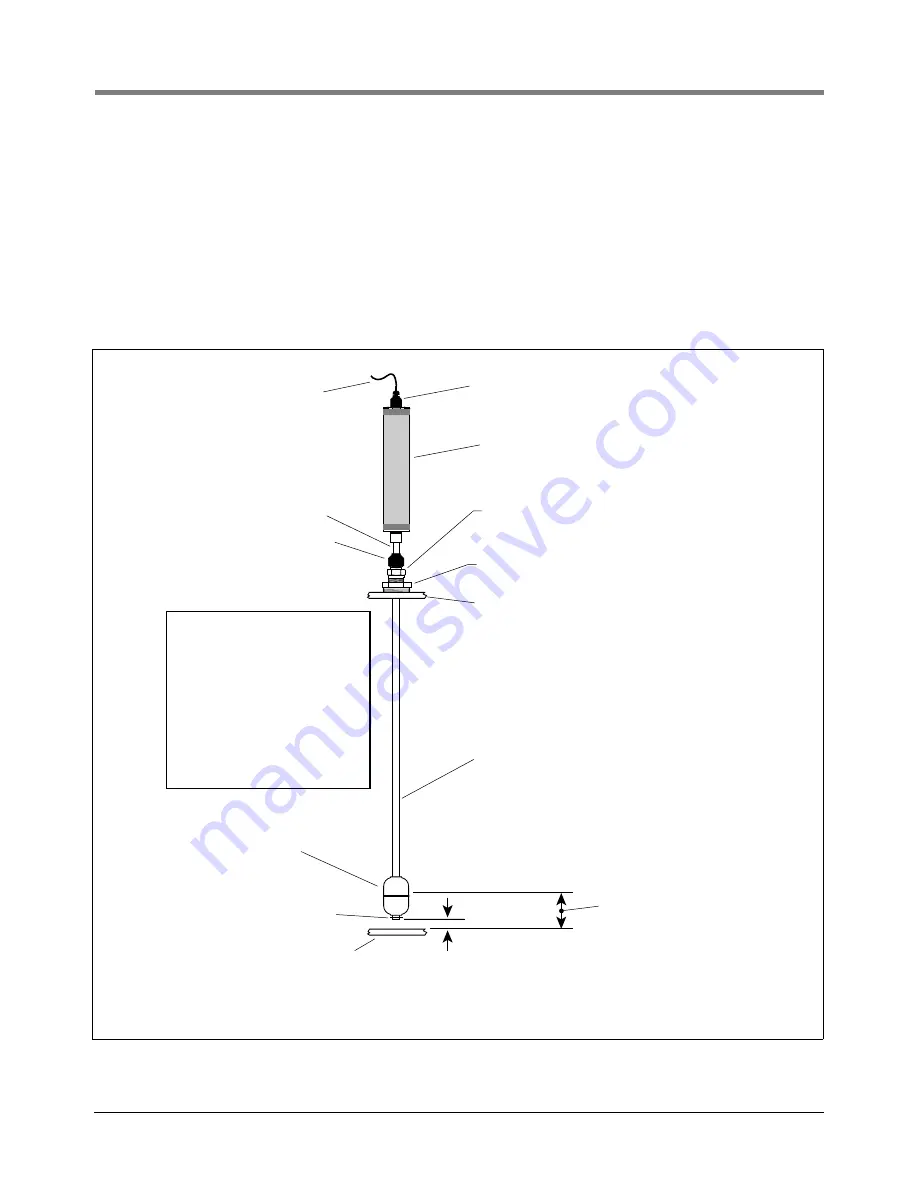
Figure 26. Media Isolated Mag Plus Probe Installation Example
SS float (outside tube)
Float retaining ring
(end of tube)
3.3" Approximate lowest
product level measured
by probe
1" clearance to
allow for expansion
probes/ssfltinst.eps
7/8" OD stainless steel tube
with welded stainless plug
(Mag probe shaft lowered into tube)
Tank
bottom
*NOTE: to ensure that
the probe/tube kit can
be installed, the Mag
probe length and the
Chem-ISO probe kit
length should be at least
6 inches longer than the
tank's inside diameter.
Make sure magnet
end (marked "TOP")
is up
Bushing, Stainless Steel
1" NPT x 2" NPT
Male connector 7/8" tube to 1" NPTF
Mag probe shaft*
(inside tube)
Rain shield
Tank
Mag probe canister
Probe cable
Connector
TOP

