- 17 -
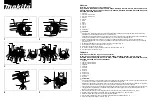
5) Insert the abrasive disc (pos.10) onto the shaft (pos.7) and
place it on the disc hold flange (pos.8). Make sure the disc
hold flange rabbet goes into the disc hole.
6) Follow fig. D to correctly place the disc lock flange (pos.9)
depending on the number of discs you intend to use. Screw
the disc block flange (pos.9) and fix it carefully using the
fixture key (pos.11): while doing so, keep the shaft block
button pressed (pos.5). The locking key should be inserted
with the two pins, in the disc lock flange holes.
7) Rotate by hand and check that the disc is well centred and
well secured by the flanges.
8) Keeping the grinder away from the body, carry out a test run
without a load for 1 minute.
RE-ASSEMBLING THE FLANGES (pos.8-9)
In the event both flanges have been removed, pay attention to
the reassembling sequence:
1. Insert the disc hold flange (pos.8) into the threaded shaft;
this flange has a contoured seat that must be coupled with
the contoured shaft.
2. Screw the disc lock flange (pos.9) into the threaded shaft.
POLISHING AND GRINDING PLATE ASSEMBLY
(pos.19, where fitted)
1) Turn the angle grinder upside down.
2) Temporarily block the rotation of the motor shaft by pressing
the button (pos.5), unscrew the disc lock flange (pos.9),
remove the disc hold flange (pos.8) and put the flanges to
one side.
3) Tighten by hand and at the base of the pad (pos. 19); during
fixing hold the shaft lock button (pos. 5).
4) Apply the disc of paper for grinding (pos.20) or the fabric poli-
shing disc (pos.21) on the velcro of the pad and at the centre.
5) Rotate by hand and check that the backing pad/disc is well
centred and well secured.
6) Keeping the grinder away from the body, carry out a test run
without a load for 1 minute.
ASSEMBLY OF THE ROTATING BRUSH (pos.22, if present)
IMPORTANT! Wear protective gloves.
1) Turn the angle grinder upside down.
2) Temporarily block the rotation of the motor shaft by pressing
the button (pos.5), unscrew the disc lock flange (pos.9),
remove the disc hold flange (pos.8) and put the flanges to
one side.
3) Tighten the brush (pos.22) using the key (pos.23); during
fixing hold the shaft lock button (pos. 5).
4) Rotate by hand and check that the brush is well centred and
well secured.
6) Keeping the grinder away from the body, carry out a test run
without a load for 1 minute.
MAIN HANDGRIP ROTATION (where fitted)
IMPORTANT! It is strictly forbidden to perform the fol-
lowing manoeuvres while the angle grinder is still working.
The main handgrip can rotate to a certain degree to make the
angle grinder easier to use, when combined with the lateral
handgrip.
Press the device (pos.16) and simultaneously rotate the main
handgrip (pos.2) +/- 90° until you reach the stop and block
position; release the device and check that the handgrip stay
firmly in position.
STARTING, STOPPING
AND REGULATING SPEED
IMPORTANT! Before starting the power tool it is compulso-
ry to wear individual protection equipment (not provided).
IMPORTANT! Before starting the tool and during operation,
hold the tool firmly with both hands, using both handgrips,
without ever letting go, so that you can stop the machine
immediately in the case of danger.
IMPORTANT! Make sure nobody is approaching the wor-
king area while the tool is running.
Plug the angle grinder into the electricity supply. If the angle
grinder has a tension indicator (pos.17), the indicator will turn
on in the presence of electrical voltage.
Operate in accordance with on the type of switch installed.
Starting and stopping the device
Single-action switch:
- to start, press the “ON - I” switch forward (pos.3).
- to stop, release the “OFF - O” switch.
Double-action switch:
- to start, press the “ON - I” switch down and then forward
(pos.3).
- to stop, release the “OFF - O” switch.
Switch with safety device:
- to start, in sequence press the safety device (pos. 4) and then
press the “ON - I” (pos. 3) switch.
- to stop, release the “OFF - O” switch.
Continuous operation (where fitted)
For single and double-action switches, you can set the fixed
switch to “ON - I”: when it is switched on, press to block it.
To deactivate this function and switch off, simply press “OFF
-O” for a short while and release immediately.
In the event the electricity supply is cut off, press the “OFF-O”
switch.
Speed control (pos.18, where fitted)
To regulate speed, use the regulator (pos.18, if present) accor-
ding to the scale:
- low number = high speed
- high number = low speed
Follow any other information on the angle grinder and data
sheet attachment.
We recommend repeating these operations several times before
starting work, in order to familiarise yourself with the controls
as far as possible.
If you notice any working defects, switch off the power tool and
consult the chapter “Problems, causes and solutions”.
When not using the tool, turn it off and disconnect the plug
from the socket.


