MC122 - MCP-4J Control Unit Appendix B - System Connectivity
131
Gluer Connection Setup with 2 Network Cards
Hardware Installation
If a second network card needs installation, follow the next steps. If the network card is already placed in the Cabinet,
skip them and go directly to Windows Configuration.
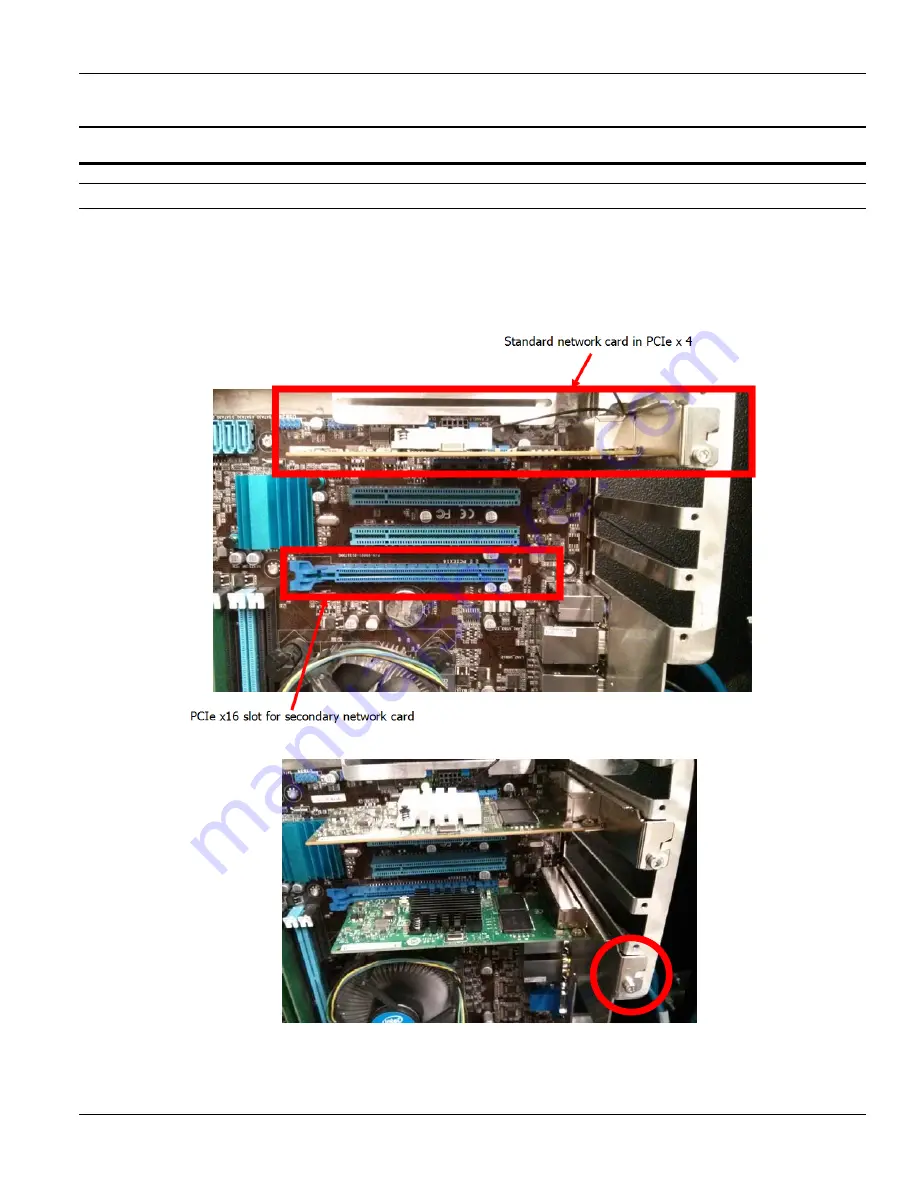
1. With the cabinet powered OFF, insert the new network card into the MBM bottom expansion slot (PCIe
x16) shown here:
2. Fasten the card to the chassis with an M3 screw (eg. 784XX433 – M3 x 4 SS).
3. Power on the BoxChek7 cabinet.
Summary of Contents for MCP-4J
Page 4: ......
Page 10: ...Table of Contents MC122 MCP 4J Control Unit 6 ...
Page 12: ...Section 1 Introduction MC122 MCP 4J Control Unit 2 ...
Page 20: ...Section 2 Safety and Use MC122 MCP 4J Control Unit 10 ...
Page 38: ...Section 3 Basic features MC122 MCP 4J Control Unit 28 Wiring the Scanner Cable Continued ...
Page 59: ...MC122 MCP 4J Control Unit Section 4 Programming 49 Protected Level Mode Continued ...
Page 100: ...Section 6 Maintenance MC122 MCP 4J Control Unit 90 ...
Page 102: ...Section 7 Specifications MC122 MCP 4J Control Unit 92 ...
Page 130: ...Section 8 Part Number List MC122 MCP 4J Control Unit 120 ...
Page 132: ...Section 9 Warranty MC122 MCP 4J Control Unit 122 ...
Page 134: ...Section 10 Service MC122 MCP 4J Control Unit 124 ...
Page 136: ...Appendix A Job Charts MC122 MCP 4J Control Unit 126 Job Number Job Name Description ...
Page 146: ...Appendix C Instruction Sheets for the MCP 4J MC122 MCP 4J Control Unit 136 ...
Page 156: ...MCP 4J Quick Start Guide IS0368 Valco Melton 10 Operator Panel ...


