6.6
Hydraulic following harrow
The following harrow is reached by selecting hydraulic
following harrow in the configuration, see
and activating the following harrow in
the general settings, see
. The
button is now shown on the home screen. Press this
button to open the menu for setting the following harrow.
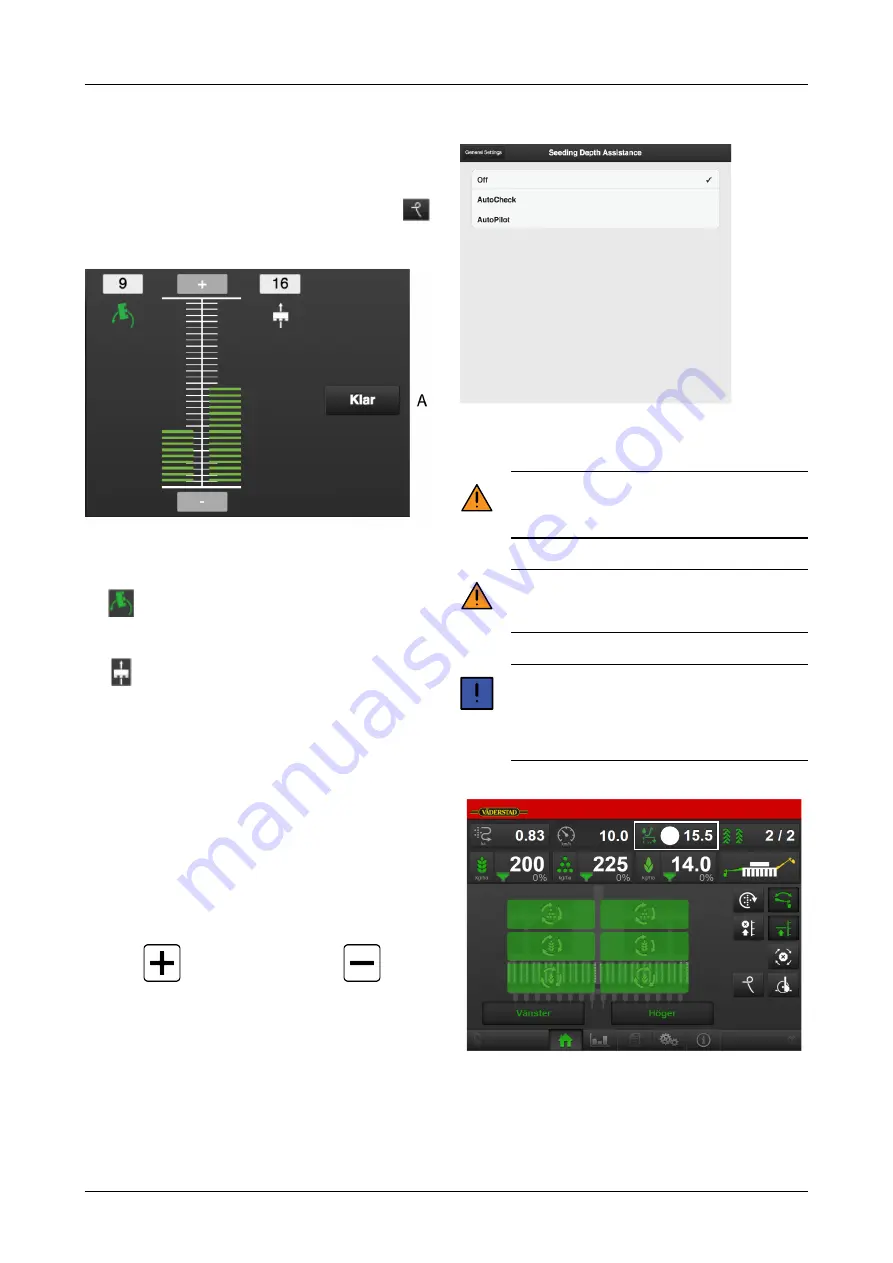
Figure 6.18
Fields on the screen:
•
The field to the centre-left of the scale shows
settings for the following harrow in the Low-Lift
position.
•
The field to the centre-right of the scale shows
settings for the following harrow in drilling position.
The pressure of the following harrow is shown both as a
bar along the scale and as a numeric value above the
symbol. It is possible to adjust the setting for functions
displaying a green symbol.
The drilling position and Low-Lift position functions are
adjustable on a scale of 0 to 30, where 0 means raised
harrow, 1 means lowest pressure and 30 means highest
pressure.
Settings
1. Press the symbol for the function that is to be changed.
2. Press
to increase the pressure or
to
reduce the pressure. The bar and the numerical value
will change.
3. Press the (A) button to save the setting and close the
window.
6.7
AutoPilot/AutoCheck (accessory)
Figure 6.19
6.7.1
General settings for AutoPilot
All driving using AutoPilot is done at the sole
responsibility of the operator, who will also be
required to check correct operation.
Always check that the hydraulic flow to
AutoPilot is turned off before someone gets on
the machine or stands close to it.
When AutoPilot is active and the ordinary
Control function is activated to manually change
the drilling depth, AutoPilot is turned off and
must be activated after the Control function is
deactivated.
Figure 6.20 The home screen
AutoPilot is a drilling depth adjustment system that
measures the drill height above ground and displays this
height on the home screen (F), while also automatically
adjusting the drilling depth to a preselected value.
F
903099-en-gb; 19.01.2021
17


