background image

Pan/Tilt PRO 


Pan/Tilt PRO - Document 341-590 Rev. A  


              Page 4 of 10 

Installation Notes (continued): 
 

Mount the Pan/Tilt PRO in a location where the range of motion of the pan/tilt system will not 
be obstructed by any objects.  The Pan/Tilt PRO head should be mounted upright with the 
base level (use a level when installing the pan/tilt head and mount). 


When using the Pan/Tilt PRO in conjunction with one of the Vaddio mounts, it is important to 
verify that the surface (wall, table, pipe, etc…) can support the weight of the entire assembly 
(camcorder, Pan/Tilt PRO, mount, power supply and other hardware).  Use hardware that 
will adequately handle the weight of the system and account for additional stress that the 
system may be subjected to because of the movement of the camera.   


STEP BY STEP INSTRUCTIONS: 


Step A:  Canon Camcorders:   

After installing the mount, look at the Pan/Tilt PRO.  The white markers on the pan and tilt hubs (round 
discs protruding from the bottom and side of the head) indicate the home positions.  The Pan/Tilt head is 
shipped with the markers centered on both hubs.  If for some reason the white markers on the hubs don’t 
match up with the markers on the Pan/Tilt head, connect the PowerRite power supply to the Pan/Tilt 
Head.  The system will automatically adjust and find the home positions.  NOTE:  Be sure to disconnect 
power from the head once you have the hubs in their home position. 


Step B:  Canon Camcorders:   

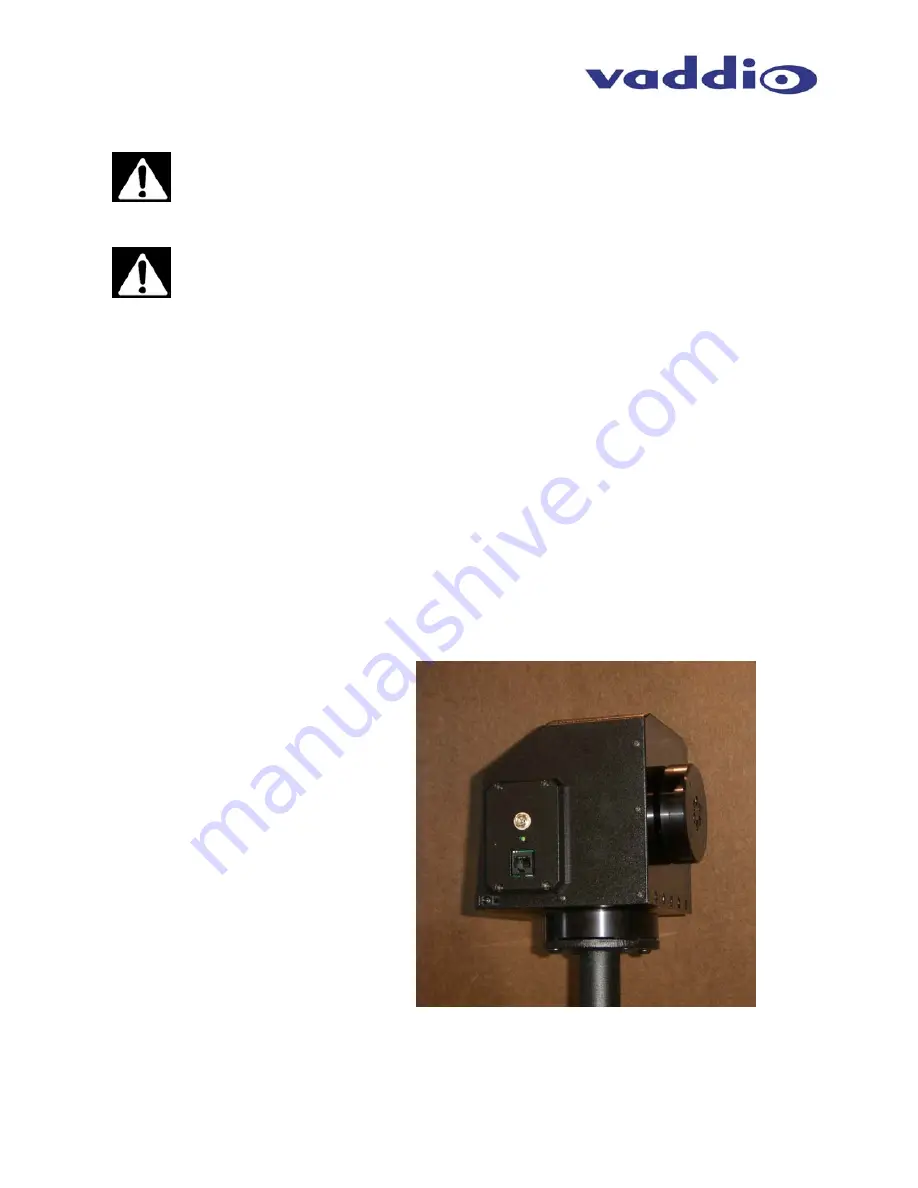
Carefully set the Pan/Tilt PRO head on the mount.  Place the front of the Pan/Tilt head (side with RJ-45 
and power ports) facing the primary viewing area.  Using the four 1” ¼ - 20 button head machine screws 
(supplied with the Pan/Tilt PRO) secure the mount from the bottom of the flange and tighten using the 
supplied Allen wrench (see Figure 4).  If installing the Pan/Tilt PRO on a custom mount provided 
elsewhere, verify that there is enough room to accommodate complete range of motion of the camera 
when panned and tilted in any direction.   


Figure 4: 

Pan/Tilt PRO mounted on optional 
pedestal mount bracket  

Summary of Contents for PAN/TILT PRO

Page 1: ...condition Save These Instructions The information contained in this manual will help you install and operate your system If these instructions are misplaced Vaddio keeps copies of Specifications Installation and User Guides and most pertinent product drawings for the Vaddio product line on the Vaddio website These documents can be downloaded from www vaddio com free of charge Important Safeguards ...

Page 2: ... 6 32 3 8 pan head screw INSTALLATION NOTES Be sure to mount the Pan Tilt PRO unit near an electrical outlet as you will need to plug the PowerRite 24VDC power supply into the Pan Tilt head CAUTION Verify the Cat 5 cable connected between the Pan Tilt port on the EZ Camera PRO Shoe and the Pan Tilt Head is plugged into the correct RJ 45 port Connecting the wrong Cat 5 cable or an incorrectly termi...

Page 3: ...he performance of the camera Place the mount near an electrical outlet because the Pan Tilt PRO requires its own 24 VDC power supply The optional brackets and mounts to be installed on walls fixtures and other locations must be sturdy enough to handle the weight of the mount Pan Tilt head and camcorder Prior to selecting a mounting location on a wall check for studs conduits or obstructions that c...

Page 4: ...lt hubs round discs protruding from the bottom and side of the head indicate the home positions The Pan Tilt head is shipped with the markers centered on both hubs If for some reason the white markers on the hubs don t match up with the markers on the Pan Tilt head connect the PowerRite power supply to the Pan Tilt Head The system will automatically adjust and find the home positions NOTE Be sure ...

Page 5: ...s Using the four 4 6 32 Allen screws lock tooth and flat washers supplied place the arm bracket assembly up against the tilt hub Place two screws in the top left and right holes of the tilt hub Place the remaining screws in the holes just below For the Canon camcorders place the screws into the top two sets of screw holes on the tilt hub at approximately one inch 25 mm for the upper set of screws ...

Page 6: ...ssembly left to right in order to find the center of gravity of the arm Move the bracket left or right in order to get the center of gravity in the middle of the assembly Note that the bracket has been adjusted off center Figure 7 to get the entire assembly s center of gravity to the middle point Step B Non Canon Camcorders Place the entire assembly on the pencil to obtain the other center of grav...

Page 7: ... up against the tilt hub Place two screws holes of the pan hub that match the center of gravity with the center point of the pan tilt hub Place the remaining screws in two other holes of the tilt hub and tighten all four screws Reattach the camcorder and EZ Camera PRO Shoe assembly to the bracket Lifting the Pan Tilt PRO assembly by the camcorder support bracket can damage internal components and ...

Page 8: ...up to down and down to up in a few different locations If shuttering persists during the full tilt test then carefully loosen all four of the Allen screws holding the camcorder bracket to the tilt hub Move the bracket assembly about 6 mm up from the initial position and tighten the screws Try tilting the camera all the way up or down again If shuttering still persists then try moving the bracket d...

Page 9: ... and product serial numbers and describe the reason for repairs or returns as well as the date of purchase and proof of purchase Include your assigned RMA number in all correspondence with Vaddio Write your assigned RMA number on the outside of the box when returning the product Voided warranty The warranty does not apply if the original serial number has been removed or if the product has been di...

Page 10: ... Reproduction in whole or in part without written permission is prohibited Specifications and pricing are subject to change without notice Vaddio EZCamera Add A Cam Quick Connect ProductionVIEW and PowerRite are registered trademarks of Vaddio All other trademarks are property of their respective owners Document Number 341 590 Rev A ...

Reviews: