Operating instructions
CoffeeCenter V6000 45
Automatic built-in coffee machine
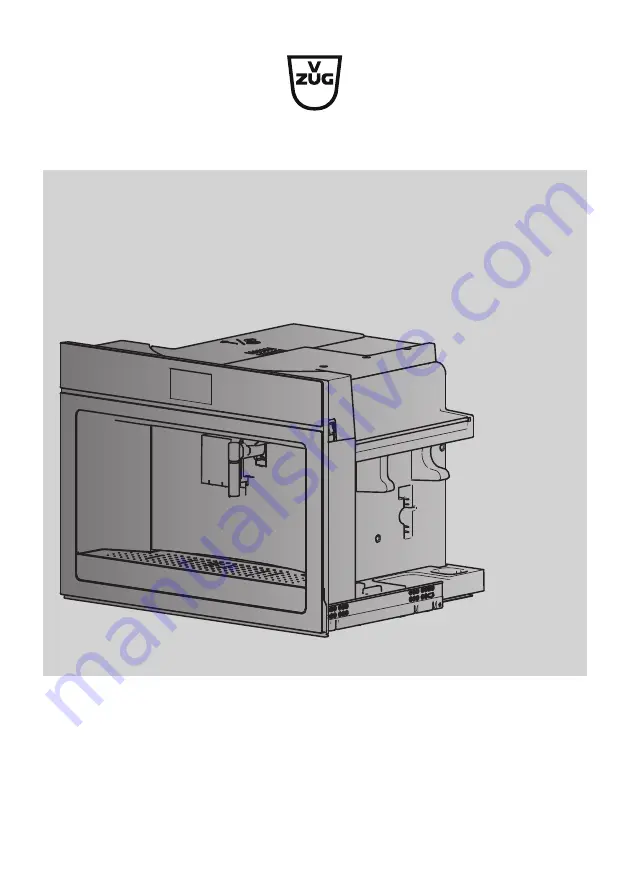
Page 1: ...Operating instructions CoffeeCenter V6000 45 Automatic built in coffee machine ...
Page 2: ...fety precautions Modifications Text diagrams and data correspond to the technical standard of the appliance at the time these operating instructions went to press The right to make technical modifications for the purpose of the further development of the appliances is reserved Validity These operating instructions apply to Model designation Type Size system CoffeeCenter V6000 45 COC6T 25005 60 450...
Page 3: ...round coffee 22 5 4 Making drinks with milk 23 5 5 Customising the aroma and quantity 24 5 6 Hot water delivery 24 5 7 Milk froth steam delivery 25 6 Favourites 26 6 1 Defining profile 26 6 2 Customising drinks settings 26 6 3 Cancelling changes to settings 27 7 User settings 27 7 1 Overview of user settings 27 7 2 Customising user settings 27 7 3 Rinsing 27 7 4 Descaling 28 7 5 Water filter 28 7 ...
Page 4: ...ng the hot water steam spout 38 9 13 Cleaning the connection nozzle 38 9 14 Descaling 38 10 Trouble shooting 41 10 1 Displayed messages 41 10 2 Unsatisfactory results 47 10 3 Other possible problems 48 11 Accessories 49 12 Technical data 50 13 Disposal 50 14 Service Support 51 ...
Page 5: ...ective gloves This appliance conforms to EC Reg ulation 1935 2004 on materials and articles intended to come into contact with food Indicates step by step instructions Describes how the appliance reacts to the steps taken Indicates a list 1 2 General safety precautions Read the operating instruc tions before using the appli ance for the first time Keep these operating instruc tions carefully The m...
Page 6: ... in hotels motels and other residential type environ ments bed and breakfast type environments If the plug or power cable is damaged it must be replaced by customer services only to avoid all risk Appliances with removable cord avoid splashes of water on the power cord connector or socket at the back of the appliance WARNING Models with glass surfaces do not use the ap pliance if the surface is cr...
Page 7: ...gged when necessary Unplug directly from the plug only Never pull the mains cable as you could damage it In order to disconnect the ap pliance completely from the power supply set the main switch on the side of the ap pliance to 0 see page 19 Do not attempt to repair a faulty appliance yourself Switch it off using the main switch see page 19 un plug from the mains socket and contact Customer Ser v...
Page 8: ...he in structions in the manual to guarantee there are no spills when it is pulled out from the cabinet Caution Do not use the appliance when pulled out Make sure the appliance is switched off before pulling it out Excep tion The only exception is adjusting the coffee mill which must be done with the appliance pulled out see page 15 Note Use original or manufacturer recommended accessories and spar...
Page 9: ...dness as soon as possible follow ing the instructions in the Water hard ness section see page 29 Connecting the appliance Danger Check that the mains power supply voltage corresponds to the value indic ated on the rating plate on the right hand side of the appliance Connect the appliance to an efficiently earthed and correctly installed socket with a minimum current rating of 10A only If the power...
Page 10: ...ered When the corresponding message appears in the dis play fill the water tank with fresh water and place back in the appliance see page 14 When the corresponding message appears in the dis play Slide the hot water steam spout 1 on the con nection nozzle 2 and place a 0 5 litre receptacle un der the water spout In the display appears Water circuit empty Press to fill Touch Hot water comes out of ...
Page 11: ... 13 14 15 16 1 Service door 9 Main switch 2 ON OFF button 10 Connection nozzle 3 Interior illumination 11 Cup illumination 4 Display 12 Coffee spout 5 Adjusting knob for coffee mill 13 IEC plug 6 Beans container 14 Mains cable 7 Lid for beans container 15 Measure holder 8 Ground coffee funnel 16 Heatable tray for coffee cups 11 ...
Page 12: ... Tray for milk jug 4 Water tank 9 Tray for hot water steam spout 5 Lid for water tank 10 Infuser assembly 3 2 Operating and display elements 13 51 2 1 Aroma Quantity Profile 1 Hot water Espresso Coffee Cappuccino 1 Display 2 Beverage selection Buttons Display Coffee aroma Coffee aroma Coffee quantity Coffee quantity Favourites User settings Profile 12 ...
Page 13: ...sting knob positions Insert adjusting knob No milk froth A little milk froth A lot of milk froth Clean milk spout and milk frother lid 3 4 Hot water steam spout 1 2 3 4 1 Release button 2 Connection with revolving head 3 Nozzle 4 Delivery spout 3 5 Accessories 1 2 3 4 5 CaCO 3 CaCO 3 1 Water hardness test strips 2 Measure 3 Descaler 4 Cover for connection nozzle 5 Cleaning brush 13 ...
Page 14: ... display Rinsing un derway Hot water from spouts hot water comes out of the coffee spout 1 When rinsing is completed the main menu appears in the display the appliance is ready for use 4 2 Filling the water tank Hold the coffee spout 1 with one hand and pull it for ward The service door 2 opens Remove the water tank 3 Remove the lid and fill the water tank 3 to the MAX level with fresh water Put t...
Page 15: ... be turned when the coffee mill is in operation The appliance must remain pulled out for this Open the lid 1 of the beans container Make the desired coffee drink see page 20 While the coffee mill 2 is in operation turn the adjust ing knob for the coffee mill one position to the left or right Make at least 2 the desired coffee drink using the new coffee mill setting The effect of the new coffee mil...
Page 16: ...er 7 on the connection nozzle 8 Place a large cup under coffee spout 4 Make a drink with milk see page 23 7 8 4 4 6 Water filter Not included in the scope of delivery If the appliance is used regularly the service life of the water filter is 2 months If the ap pliance is left unused the water filter that is in will last a maximum of 3 weeks Inserting the water filter If the appliance is switched o...
Page 17: ...side openings of the water filter 3 1 Touch When the corresponding message appears in the dis play Immerse the water filter 1 in the water tank 4 so that the air bubbles can escape 4 1 Enabling the water filter Touch When the corresponding message appears in the dis play Insert the water filter 1 into its housing in the wa ter tank 4 and push it down to the bottom 4 1 Touch When the corresponding ...
Page 18: ...er filter later The symbol appears in the display and does not go out again until the water fil ter has been replaced Or Touch to replace the water filter immediately We recommend replacing the water filter as soon as the message appears Remove the water tank 1 Take off the lid and remove the exhausted water filter 2 Unpack the new water filter Touch or repeatedly until the user setting ap pears i...
Page 19: ... display Filter re moved Touch The start screen appears in the display 1 2 Water filters should be disposed of at a designated recycling collection point 4 7 Switching the appliance off Danger of burns Hot water comes out of the coffee spout during rinsing Press the ON OFF button In the display appears Turning off underway Please wait The appliance performs a rinse cycle Hot water comes out of the...
Page 20: ...darker variation of the espresso Doppio Larger than a double espresso Made with an extra quant ity of coffee powder and a deep pre infusion Very rich roasted aroma Long Lighter and thinner crema than with an espresso Made with a low brewing pressure Aromatic taste similar to fil ter coffee Americano Espresso diluted with hot water Balanced light taste Espresso macchiato Single espresso shot with a...
Page 21: ... ap pears in the display Touch the desired drink The drink is made as defined in favourites see page 26 A bar in the display gradually fills in as preparation progresses Making 2 coffee drinks When at the start of preparation the symbol appears it is possible to make 2 coffee drinks Place a second cup under coffee spout 1 Touch ð Double the quantity of coffee drink is delivered To end drink delive...
Page 22: ...e funnel 3 see page 35 Place a maximum of one level measure of ground coffee in the funnel 3 Close the lid 2 of the beans container Touch the button repeatedly until appears in the display Touch or repeatedly until the desired drink ap pears in the display Touch the desired drink The drink is made as defined in favourites see page 26 A bar in the display gradually fills in as preparation progresse...
Page 23: ...d in favourites see page 26 A bar in the display gradually fills in as preparation progresses To end drink delivery before time touch To increase the size of the drink as it is being de livered touch the button When the message Turn adjusting knob to ap pears in the display Touch to make more drinks with milk Or Place a cup under milk spout 3 Follow the instructions in the Cleaning the internal tu...
Page 24: ...drink ap pears in the display Touch the desired drink The drink is delivered A bar in the display gradually fills in as preparation progresses 5 6 Hot water delivery Danger of burns Do not leave the appliance unattended while hot water is being delivered If the appliance is switched off Switch the appliance on see page 14 Slide the hot water steam spout 1 on the connection nozzle 2 Place a large c...
Page 25: ...lume Place the jug under the hot water steam spout 1 Immerse the hot water steam spout 1 in the liquid Touch or repeatedly until Steam appears in the display Touch Steam Steam comes out of the hot water steam spout 1 A bar in the display gradually fills in as preparation progresses When the desired temperature or level of froth is reached touch Clean the hot water steam spout 1 after use see page ...
Page 26: ...edly until the desired coffee aroma appears in the display Touch to confirm the selected coffee aroma For drinks with milk Turn the adjusting knob to the recommended position for the milk froth quantity For all drinks Adjust the quantity of milk coffee or hot water The particular liquid is delivered The quantity of liquid appears in the display in the form of a vertical bar which gradually fills i...
Page 27: ...umination Water filter Energy saving mode Background Drinks settings Coffee temperature Factory settings Clock Water hardness Statistics Auto start Language 7 2 Customising user settings Touch the button The user settings menu appears in the display Touch or repeatedly until the desired user setting appears in the display Select the desired user setting Make the desired setting To enable the user ...
Page 28: ...o drinks settings appear Touch repeatedly until the drink to be reset is displayed To cancel touch To reset the drinks settings for profile 2 touch 7 7 Setting the time The time shown in the display can be changed 7 8 Auto start When this user setting is enabled a time can be set for the appliance to switch on auto matically e g every morning This requires that the correct time be entered in the u...
Page 29: ...ness and corresponds to the level to be set for the appliance The higher the number of red squares the harder the water The default setting for water hardness is Level 4 Type Water hard ness fH Water hardness dH Water hardness eH Red squares Level Very hard 38 to 50 22 to 28 27 to 35 4 4 Hard 25 to 37 15 to 21 18 to 26 3 3 Medium 14 to 24 8 to 14 10 to 17 2 2 Soft 1 to 13 1 to 7 1 to 9 0 1 1 Measu...
Page 30: ...with this user setting 7 19 Statistics The following statistical data can be retrieved with this user setting Total coffee drinks without milk Total drinks with milk Total litres water delivered Total descales performed Total water filters used 8 Demo mode The demo mode enables specialist retailers to put the appliance into showroom mode for demonstration purposes It allows functions to be demonst...
Page 31: ...demo mode is deactivated The appliance can be started for preparing drinks 9 Care and maintenance Risk of burns from hot surfaces Allow the appliance and the accessories to cool down before cleaning Incorrect handling can result in damage to the appliance Do not use any abrasive acidic or chemical cleaning agents metal scrapers that are sharp or scratch steel wool abrasive scouring pads etc These ...
Page 32: ...he appliance is switched off Switch the appliance on see page 14 Remove the water tank fill with fresh water and place back in the appliance see page 34 Place the receptacle under the coffee spout 1 Touch the button The main user settings menu appears in the dis play Touch or repeatedly until Rinsing appears in the display Touch The rinse cycle starts In the display appears Rinsing underway Hot wa...
Page 33: ...fully removing all residues with the spatula part of the brush Rinse the drip tray 2 grounds container 3 and drip plate 4 with hot water and then put them back Close the service door 1 1 2 3 4 9 4 Cleaning the drip tray Danger of clogging up Whenever the drip tray is extracted the grounds container must also be emptied Otherwise the next time a coffee is made the grounds container may become over ...
Page 34: ...pen the service door 1 Remove the drip tray 2 and clean with a damp cloth Clean coffee residues from the inside of the appli ance using a brush and sponge as necessary Remove any residues from the inside of the appli ance using a vacuum cleaner Put the drip tray 2 back in the appliance Close the service door 1 1 2 9 8 Cleaning the water tank Open the service door 1 Remove the water tank 2 Remove t...
Page 35: ...Switch the appliance off see page 19 Open the service door 1 Remove the drip tray 2 Press the coloured release buttons 3 inwards and simultaneously remove the infuser 4 1 2 4 3 Cleaning the infuser Incorrect handling can result in damage to the appliance Do not clean the infuser with detergent as it will dissolve the lubricant on the inside of the piston Do not clean the infuser in the dishwasher ...
Page 36: ...arts of the milk frother out of the reach of children Cleaning the internal tubes Risk of burns Hot water and steam come out of the milk spout Be careful to avoid any splashes Place a cup under milk spout 1 Turn the adjusting knob 2 to position The internal tubes are cleaned In the display appears Cleaning milk frother un derway Place a receptacle under milk spout A bar in the display gradually fi...
Page 37: ...ermal casing 3 with a soft cloth only Clean the other parts of the milk frother in the dish washer or with hot water and a mild detergent Make sure there are no milk residues stuck to the milk spout 4 or milk tube 5 Remove any milk residues from the groove of the ad justing knob 6 with a toothpick Clean the adjusting knob seat 7 and the milk frother connector hole 8 Insert the adjusting knob 6 in ...
Page 38: ...pending on the hardness of the local water supply i e the limescale content of the water limescale is deposited in the boiler A system in the appliance automatically detects when descaling is necessary and indicates this whenever the appliance is switched on with the following message Descaling necessary Press to start 45 mins We recommend descaling the appliance whenever the message appears in th...
Page 39: ... the dis play Add the quantity of descaler supplied to the wa ter tank 2 and then top up with water to level B Touch 2 CaCO 3 A B When the corresponding message appears in the dis play Remove empty and put back the drip tray 3 and grounds container 4 Touch 1 3 4 When the corresponding message appears in the dis play Place an empty 2 5 litre receptacle under the coffee spout 5 and hot water steam s...
Page 40: ...the water filter in its housing When the corresponding message appears in the dis play Empty the rinsing solution out of the 2 5 litre re ceptacle and repeat the rinse cycle If the water tank has not been filled to the MAX level the appliance requests a third rinse cycle This ensures that the descaler solution is completely eliminated from the appliance s internal circuits Completing descaling Whe...
Page 41: ...t water in the water tank Fill the water tank with water and push back in until it clicks into place Close service door The service door has not been closed cor rectly Hold the coffee spout with one hand and push the ser vice door shut Insert water tank The water tank has not been inserted cor rectly Push the water tank back in until it clicks into place Empty grounds container The grounds con tai...
Page 42: ...s been se lected without placing any ground coffee in the funnel Place a maximum of one level measure of ground cof fee in the funnel see page 22 Make the desired coffee drink The funnel is clogged Clean the funnel see page 35 A long coffee using ground coffee has been selected Place a maximum of one level measure of ground cof fee in the funnel see page 22 Touch and complete the coffee delivery F...
Page 43: ...er steam spout on the connection nozzle Deliver hot water until the flow becomes regular see page 24 Select a milder taste or reduce pre ground coffee quantity The quantity of coffee beans in the beans container is only suffi cient for a milder taste Select a milder taste see page 24 Or Fill the beans container see page 15 Too much ground coffee has been placed in the funnel Open the lid of the be...
Page 44: ...age ap pears again Push the water tank back in until it clicks into place Press to start cleaning or turn the adjusting knob to a milk position The adjusting knob of the milk frother has been turned to the position To start the cleaning process touch The cleaning of the milk frother starts To make coffee with milk turn the adjusting knob of the milk frother to the or pos ition see page 23 Turn adj...
Page 45: ...y see page 28 Or Touch to replace the water filter later see page 28 General alarm See in structions The inside of the ap pliance is very dirty Clean the inside of the appli ance see page 34 The grounds con tainer drip tray water tank and or infuser assembly have not been inserted cor rectly Set the main switch to 0 The appliance is discon nected from the power supply Insert the appliance parts co...
Page 46: ...ttings sec tion see page 27 The energy saving mode user setting is enabled To disable the energy saving mode follow the instructions in the Customising user set tings section see page 27 The user setting for the water filter is en abled To remove the water filter fol low the instructions in the Permanently removing the water filter section see page 19 The demo mode is enabled and the ap pliance ca...
Page 47: ...e see page 29 The coffee is too weak or not creamy enough The coffee is ground too coarsely During the preparation of the coffee turn the adjusting knob for the coffee mill anti clockwise one position to wards 1 see page 15 The coffee is unsuit able Use coffee for espresso ma chines The coffee is delivered a drop at a time or too slowly The coffee is ground too finely During the preparation of the...
Page 48: ...8 The milk does not come out of the milk spout The lid of the milk frother is dirty Clean the lid of the milk frother see page 36 The milk tube has not or not correctly been inserted Insert the milk tube into the milk frother lid see page 13 10 3 Other possible problems Problem Possible cause Solution The appliance does not come on The plug of the mains cable is not plugged into the mains socket T...
Page 49: ...t see page 38 Continue with the descaling process The appliance emits noises or small puffs of steam while not in use The appliance is ready for use or has been recently switched off Condensate is drip ping into the vapor iser This is normal To limit this empty the drip tray 11 Accessories Milk frother Hot water steam spout Water hardness test strips Measure CaCO3 CaCO3 Descaler Cover for connec t...
Page 50: ...prevent accidents caused by improper use e g through children playing Disconnect the appliance from the mains With a fixed appliance this is to be carried out by a qualified electrician Then cut the mains cable off flush with the appliance 13 3 Disposal The crossed out wheeled bin symbol requires the separate collection of waste electrical and electronic equipment WEEE Such equipment can contain h...
Page 51: ...erial number SN and appliance designation to register your appliance You will find them on the identification plate of your appliance My appliance information SN __________________________ Appliance ______________________________ Please have this appliance information to hand when contacting V ZUG Thank you The rating plate is located on the left hand side of the appliance Your repair order Call t...
Page 52: ...V ZUG Ltd Industriestrasse 66 CH 6302 Zug Tel 41 58 767 67 67 Fax 41 58 767 61 61 info vzug com www vzug com Service Centre Tel 0800 850 850 1097910 02 ...