


24
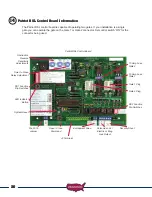
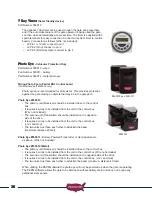
Control Board Dipswitch Setting Verification
NOTE: This check must be performed before
operating the gate for the first time. Failure to do
so may damage the gate operator.
Before operating the gate lets make sure the
Patriot RSL control board dipswitches are
set correctly for your installation. Locate the
dipswitches on the Patriot RSL control board.
Factory default dipswitch settings are 2 and 3 on.
ON - Down on right
OFF - Down on left
Identify your installation on page 12 and verify the dipswitch settings.
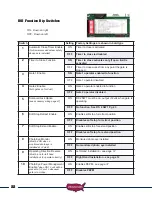
Patriot RSL
Standard Switch Settings
W/ Monitored
Photo Eye
W/ Monitored
Contact Edge
Right Hand Installation
Dipswitches 2, 3 should be in
the ON position
DS1 switch 8
and 10 ON
DS2 switch 4
ON
Left Hand Installation
Dipswitches 2, 3, 9 should be
in the ON position
DS1 switch 8
and 10 ON
DS2 switch 4
ON
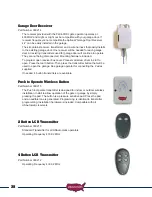
Optional Soft Stop for Open or Close Position
The Patriot RSL control board is equipped with a selectable soft stop feature for open, close or both
directions, if desired. Understanding how this feature operates is required before turning ON any control
switches or possible control board or gate damage may occur.
This feature reduces the gate speed when turned ON for approximately the last 18 inches of gate travel.
IMPORTANT: Before turning this feature ON the gate open, close or both stop positions must be
adjusted so that the gate is stopping about 24 inches short of the fully open, close or both desired
stop positions.
Once adjusted as stated above identify the installation type and use chart below for dipswitch settings.
Patriot RSL
Open Gate Soft Stop Close Gate Soft Stop
Open & Close
Soft Stop
Right Hand Installation
DS1 switch 6 ON
DS1 switch 7 ON
DS1 switch 6, 7 ON
Left Hand Installation
DS1 switch 7 ON
DS1 switch 6 ON
DS1 switch 6, 7 ON
16
15


