


VIDOORA Installation and Operating Instructions
Page | 15
At the door station
Switch on the power supply of the door station.
ATTENTION
:
When the device is switched on for the first time, it is already in configuration mode (after approx.
30 seconds, the blue LED border of the bell push button starts to flash and you will see "Configuration" on the
display.
If the door station does not flash and does not display "Configuration":
Press the programming
button on the bottom of the door station 4 times to start the configuration mode. The blue LED border of
the bell push button flashes and you will see "Configuration" on the display.
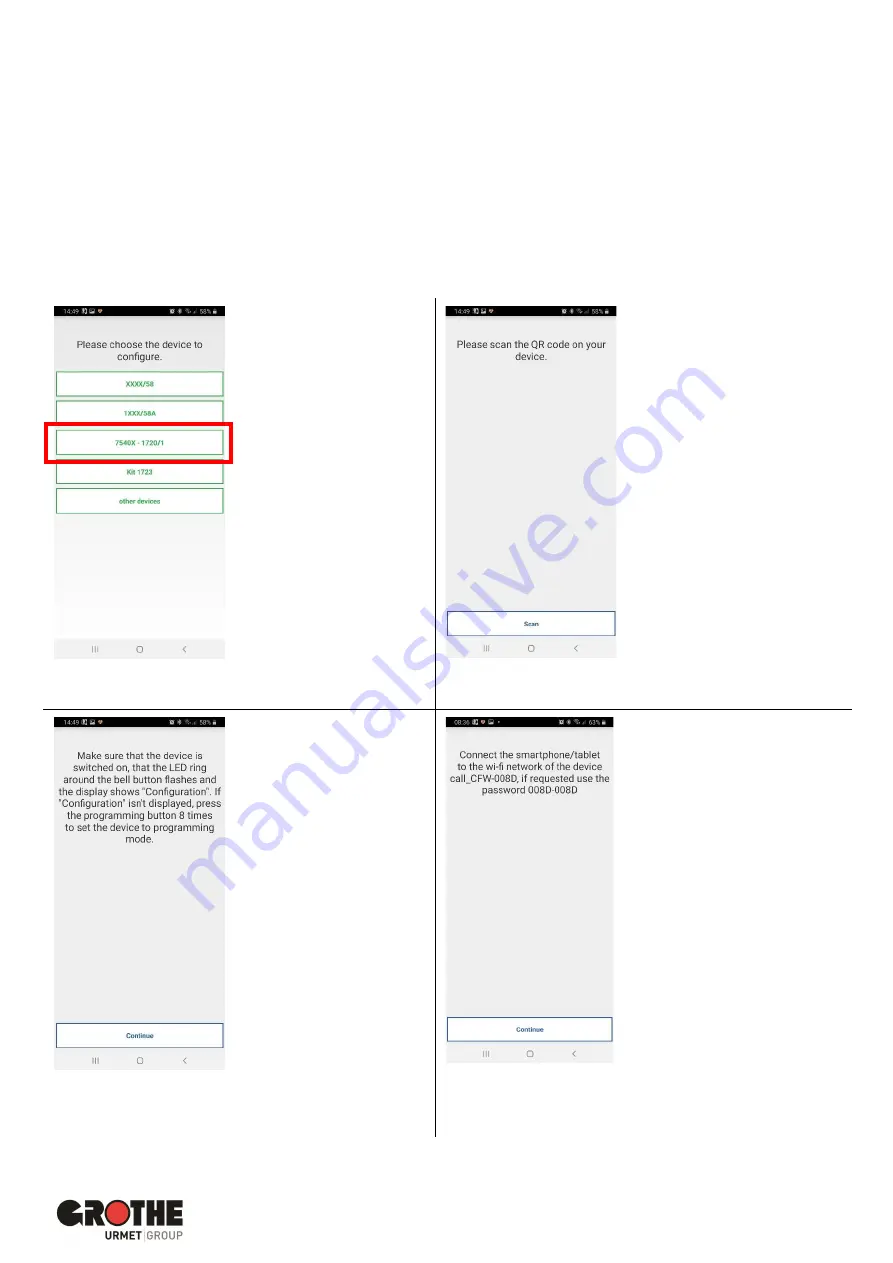
Start configuration
In the "Installation and
Maintenance" menu, press
the "
7540x
" button (part
number VIDOORA) to start
the configuration in the
app.
Figure 29: Device configuration
Figure 30: Scan QR code
Scan QR code
To start the configuration,
first scan the QR code on
the door station. To do this,
press the “
Scan
” button in
the Android version.
The camera of the
smartphone is activated.
Now scan the QR code by
holding your smartphone
over the QR code on the
back of the circuit board so
that it can be seen in the
camera cutout.
The smartphone now scans
the code of your VIDOORA
to assign the door station
to your user account.
After checking the
instructions, press the
"
Continue
"
button.
Figure 31: Configuration
Figure 32: Example connection
with the VIDOORA
Hotspot door station
1.
Activate the WLAN
connection on your
smartphone (if it is not
activated).
2.
Exit app, but without
closing it (Android - left
arrow, iOS via home
button).
3.
VIDOORA creates a WLAN
hotspot "VIDOORA_CFW-
xxxx".
4.
Connect your
smartphone to the WLAN
hotspot "VIDOORA_CFW-
xxxx".


