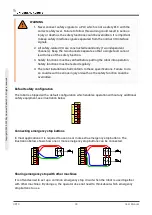
WARNING
1. Make sure that all equipment not rated for water exposure remains dry. If
water is allowed to enter the product, lockout and tagout all power and then
contact your supplier.
2. Use original cables supplied with the robot only. Do not use the robot for
applications where the cables will be subjected to flexing. Contact your
supplier if longer or flexible cables are needed.
3. Negative connections are referred to as
GND
and are connected to the
shield of the robot and the controller box. All mentioned
GND
connections
are only for powering and signalling. For PE (Protective Earth) use the M6
sized screw connections marked with earth symbols inside the control box.
The grounding conductor shall have at least the current rating of the
highest current in the system.
4. Care must be taken when installing interface cables to the robot I/O. The
metal plate in the bottom is intended for interface cables and connectors.
Remove the plate before drilling the holes. Make sure that all shavings are
removed before reinstalling the plate. Remember to use correct gland
sizes.
CAUTION
1. The robot has been tested according to international IEC standards for EMC
(ElectroMagnetic Compatibility). Disturbing signals with levels higher than
those defined in the specific IEC standards can cause unexpected behavior
of the robot. Very high signal levels or excessive exposure can damage the
robot permanently. EMC problems are found to happen usually in welding
processes and are normally prompted by error messages in the log.
Universal Robots cannot be held responsible for any damages caused by
EMC problems.
2. I/O cables going from the control box to other machinery and factory
equipment may not be longer than 30m, unless extended tests are
performed.
NOTE
All voltages and currents are in DC (Direct Current) unless otherwise specified.
1.9.3. Controller I/O
This chapter explains how to connect equipment to I/O inside the control box. This I/O is
extremely flexible and can be used for wide range of different equipment; including pneumatic
relays, PLCs and emergency stop buttons.
UR10
30
User Manual
C
o
p
yr
ig
h
t
©
2
0
0
9
–
2
0
2
0
b
y
U
n
iv
e
rs
a
l
R
o
b
o
ts
A
/S
.
A
ll
ri
g
h
ts
re
s
e
rv
e
d
.
Summary of Contents for UR10/CB3
Page 1: ...Universal Robots User Manual UR10 CB3 Original instructions en...
Page 28: ...UR10 20 User Manual Copyright 2009 2020 by Universal Robots A S All rights reserved...
Page 30: ...UR10 22 User Manual Copyright 2009 2020 by Universal Robots A S All rights reserved...
Page 36: ...UR10 28 User Manual Copyright 2009 2020 by Universal Robots A S All rights reserved...
Page 56: ...UR10 48 User Manual Copyright 2009 2020 by Universal Robots A S All rights reserved...
Page 62: ...UR10 54 User Manual Copyright 2009 2020 by Universal Robots A S All rights reserved...
Page 64: ...UR10 56 User Manual Copyright 2009 2020 by Universal Robots A S All rights reserved...
Page 72: ...China RoHS UR10 64 User Manual Copyright 2009 2020 by Universal Robots A S All rights reserved...
Page 73: ...KCC Safety User Manual 65 UR10 Copyright 2009 2020 by Universal Robots A S All rights reserved...
Page 92: ...UR10 84 User Manual Copyright 2009 2020 by Universal Robots A S All rights reserved...
Page 116: ...UR10 108 User Manual Copyright 2009 2020 by Universal Robots A S All rights reserved...
Page 124: ...UR10 116 User Manual Copyright 2009 2020 by Universal Robots A S All rights reserved...
Page 164: ...UR10 156 User Manual Copyright 2009 2020 by Universal Robots A S All rights reserved...
Page 214: ...UR10 206 User Manual Copyright 2009 2020 by Universal Robots A S All rights reserved...


