UltraVision Security, Inc. • Salem, New Hampshire 03079 USA • Tel 866.374.9732 • 603.685.0303 • Fax 603.898.1840
www.UltraVisionSecurity.com • [email protected]
Rev 031109
18
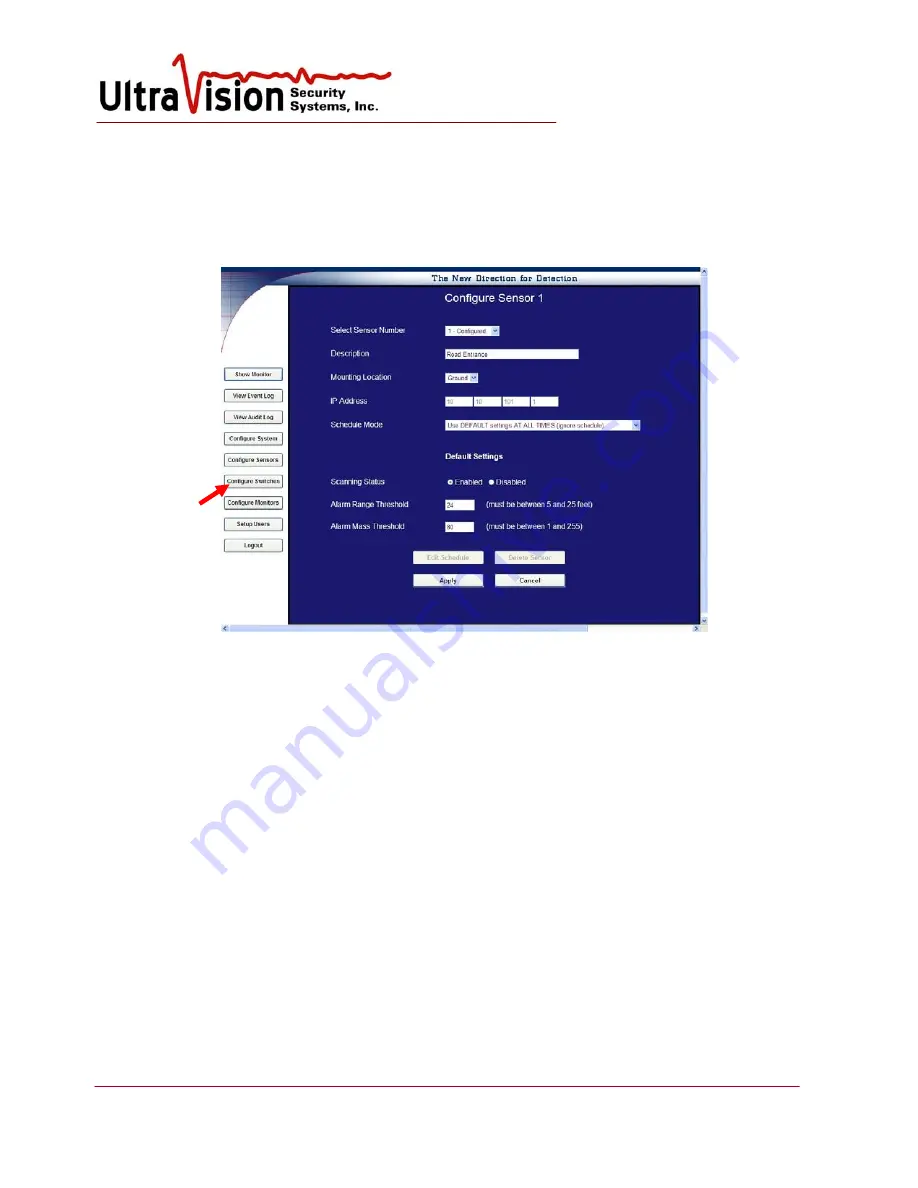
Configure Sensors
1.
From Menu Screen, click
Configure Sensors
.
2.
From the drop down box at the top of the screen, select the number of the Sensor to be
configured. The
Sensor number
is the last digit of the Sensor IP address.
(ex. 10.10.101.25 is sensor #25)
3.
Enter the text
Description
of the Sensor (e.g., north walkway, front garden, southwest
perimeter, etc.)
4.
Select either Wall or Ground for
Mounting Location
.
5.
Correct
IP address
will be automatically entered by the System.
6.
Select
Schedule Mode
. Using drop down box select timed settings for this sensor or “always
on” as default.
a.
Use DEFAULT Settings AT ALL TIMES
(ignore schedule)
i.
For
Scanning Status
, Select
Enabled.
ii.
Enter A
larm Range Threshold
. [Minimum 5 foot/1.5 meter, maximum 25
feet/ 7.6 meters.]
iii.
Enter
Alarm Mass Threshold
. [A setting of 1 will detect all possible motion,
255 the least. 60-75 is a “normal” setting.]
iv.
Click
Apply
. Message asks to confirm this step, if correct click “Yes.”
v.
Repeat procedure for additional sensors
b.
Use ALTERNATE settings as SCHEDULED
, otherwise DEFAULT
i.
Select Enable and set alarm range threshold and alarm mass threshold as
above.
ii.
Click
Apply
, then
Yes
to confirm.
iii.
Return to Configure page for same sensor and select
Edit Schedule
. Note:
Select
Alternate schedule
mode and
Apply
before
edit schedule
.
iv.
Use the Alternate settings table so turn sensors on and off to a schedule.


