AeroCut nano+ SERVICE MANUAL
39
7- (3) Touch panel update
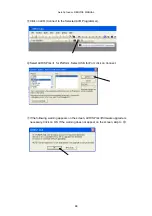
(a) Connecting to a computer/Terminal GTWIN operation
If any changes are made to the touch panel content, we will send the data to you most
likely by e-mail. The data format will look like “AeroCut_eco100.IOP” with a file extension of
“.IOP.” The figure “100” refers to a version, which means Version 1.00. Save this data in a
folder of your choice in your computer and upgrade the version as follows:
①
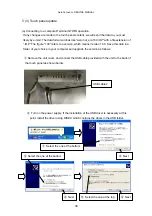
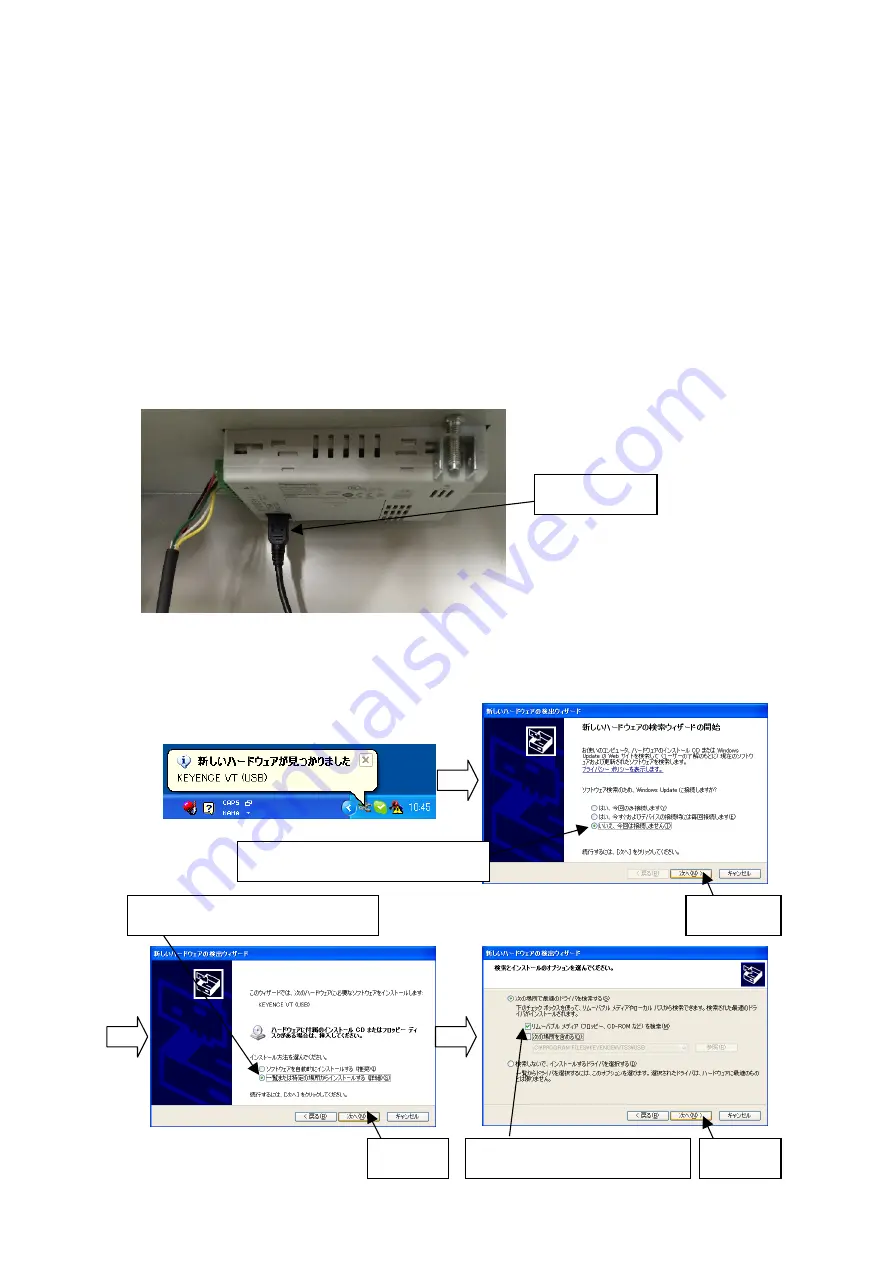
Remove the unit cover, and connect the USB cable provided with the unit to the back of
the touch panel as shown below.
②
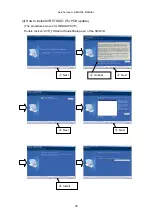
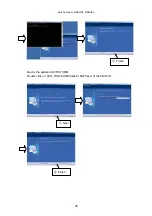
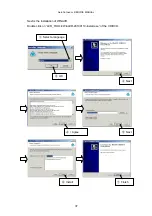
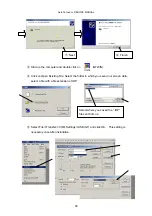
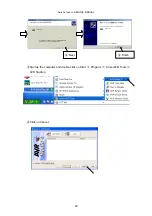
Turn on the power supply. If the installation of the USB driver is necessary at this
point, install the driver using DISK2, which contains the driver in the USB folder.
②
Next
①
Select the one at the bottom
④
Next
③
Select the one at the bottom
⑥
Next
⑤
Select the one at the top
USB cable 2
Summary of Contents for AeroCut nano+
Page 1: ...SERVICE MANUAL UCHIDA YOKO CO LTD TOKYO JAPAN V2 00 ...
Page 16: ...AeroCut nano SERVICE MANUAL 16 5 2 Slitter ...
Page 38: ...AeroCut nano SERVICE MANUAL 38 Close the Window ...
Page 55: ...AeroCut nano SERVICE MANUAL 55 12 Drawing 12 1 Drawing ...
Page 56: ...AeroCut nano SERVICE MANUAL 56 ...
Page 57: ...AeroCut nano SERVICE MANUAL 57 12 2 Board Details a PCB CPU board ...
Page 61: ...AeroCut nano SERVICE MANUAL 61 UCHIDA YOKO CO LTD TOKYO JAPAN ...

