


In the Media list, press the “Publish” button.
The system will search for devices and services it
can publish to and display this interface.
By default, you can publish to USB, an FTP
server and the EasyCast MediaServer associated
with your EasyCast Studio.
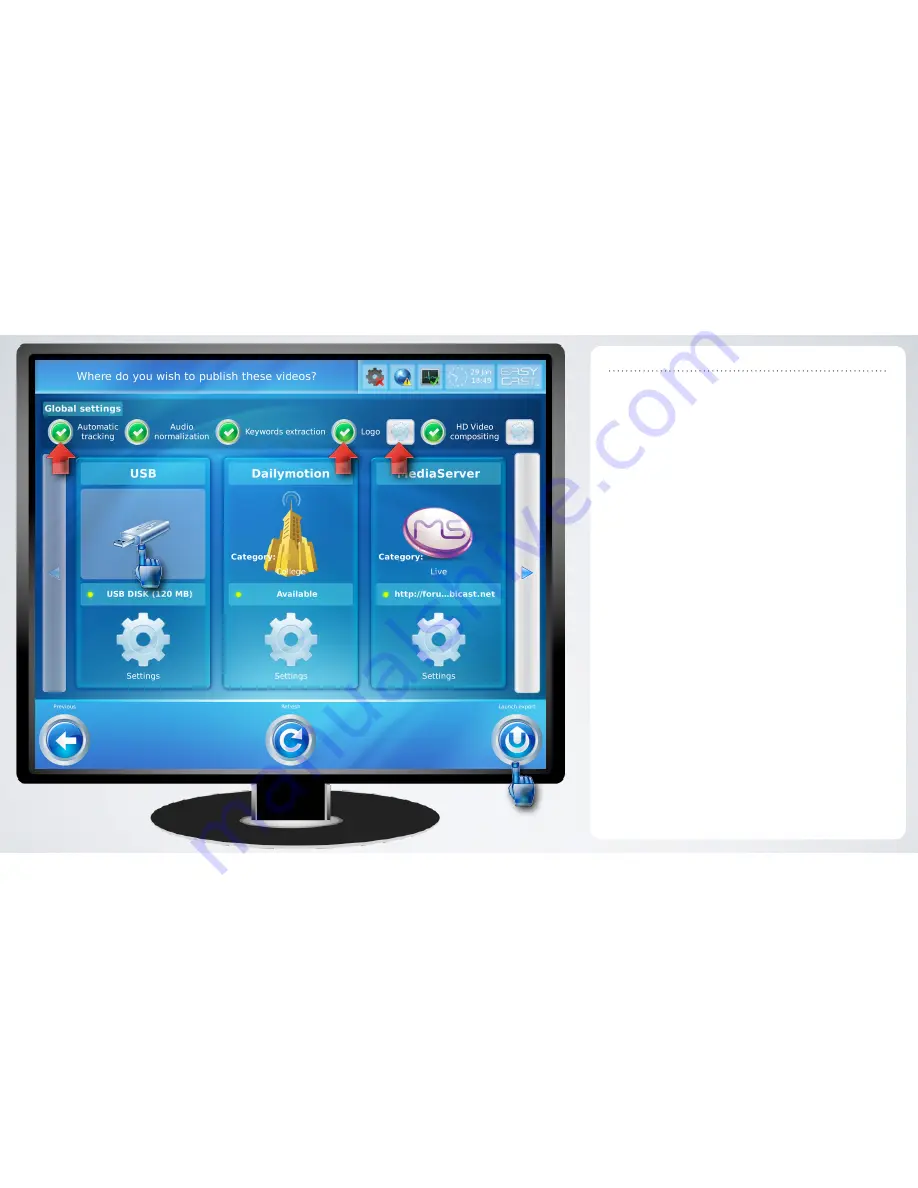
If you haven’t done any of the Autocam setup
steps, you can simply press “Automatic
tracking”(1). The system will use the previously
defined analysis zone, analyze and extract.
To add a logo that will be burnt into the video
upon export, insert a USB stick containing a JPG,
PNG, TIF or BMP image and tap the Logo
settings icon (2). Select the desired image and
modify at will the proportion of the video width
that the logo should take and placement. Prefer
the use of large logos, they will be downsized.
You only need to add a logo once : for
subsequent uses, selecting the logo button (3)
will add the last used logo image.
Insert a USB stick in any of the system’s lateral
USB ports, select USB (4) and press
“Launch” (5).
Publishing content
1
2
3
4
5
Summary of Contents for EasyCast Studio
Page 1: ...EasyCast Studio user manual version 2 6 ...
Page 3: ...Step 1 Setup cables and connections ...
Page 6: ...Step 2 Recording a presentation ...
Page 11: ...Step 3 Editing and publishing ...
Page 24: ...Step 4 Viewing content ...
Page 29: ...Step 5 Advanced settings ...


