


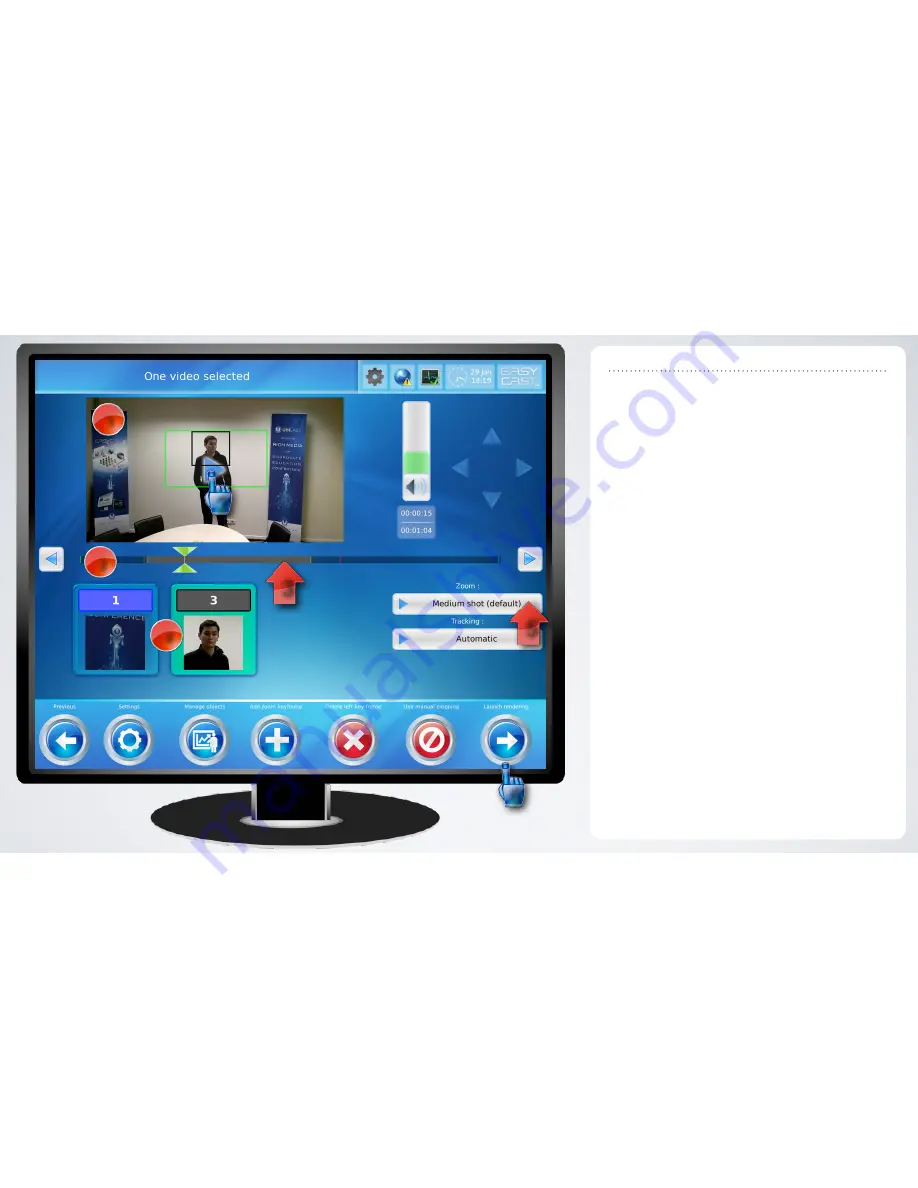
Zone (1) shows a preview of the frame that will be
extracted (green rectangle) from the original
video. By pressing the play button (2) you can
see that as the subject moves, so does the
extract.
On the video timeline (2), entry/exit of
“objects” (presenter walking in and out of frame)
is shown by vertical red bars. The green vertical
bars indicate a change in frame, typically going
from wide angle (original video) to tracked frame.
Segments (3), shown in grey, are created from
one green bar to the next. On each segment you
can :
•
activate/disactivate the tracking of detected
objects (4) by simply tapping their image
•
modify the zoom level, using the default
“Medium shot” or the “Custom shot” (frame
size defined in Settings)
You can manually create and delete segments if
you wish to manually change zoom levels during
media.
Press “Launch rendering” (6) to go back to the
Media list and start the actual extraction of the
green rectangle.
Autocam preview
1
2
2
3
4
5
6
Summary of Contents for EasyCast Studio
Page 1: ...EasyCast Studio user manual version 2 6 ...
Page 3: ...Step 1 Setup cables and connections ...
Page 6: ...Step 2 Recording a presentation ...
Page 11: ...Step 3 Editing and publishing ...
Page 24: ...Step 4 Viewing content ...
Page 29: ...Step 5 Advanced settings ...


