


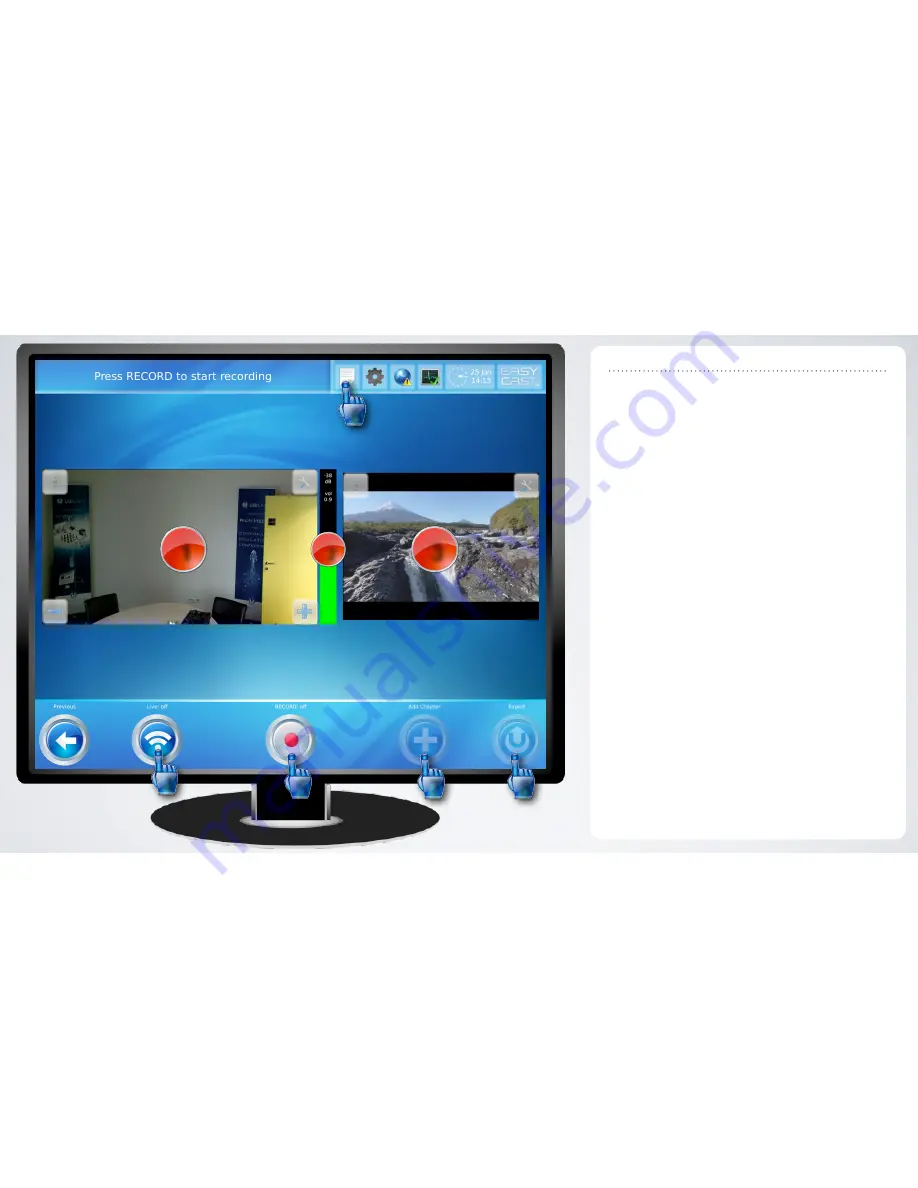
Sources are previewed in zones 1 to 3,
respectively video, audio and data.
In order to start a live stream, the user must press
the Live button (4) then start a recording (5). This
is a
security
measure built into the system : if the
local network were to fail, at least we have a
recording of the content for later use. Also, it is
important to note that even if live streaming is in
low quality because the upload connexion is
weak, the recorded content is in full quality.
Before or during a manned recording, the user
can enter metadata concerning the recording by
tapping (6). This information can also be entered
later on of course.
During a recording, a user can also manually add
chapters (7) that will assist especially for media
trimming : for example during a conference,
press this button when a new speaker starts a
talk, this will enable to quickly cut out each talk.
For most users the only interaction here should
be just Start/Stop record.
Launch a recording, stop the recording and
press Export (8) to proceed. You can record as
many presentations in a row as the local hard
disk enables.
Recording screen
1
2
3
4
5
6
7
8
Summary of Contents for EasyCast Studio
Page 1: ...EasyCast Studio user manual version 2 6 ...
Page 3: ...Step 1 Setup cables and connections ...
Page 6: ...Step 2 Recording a presentation ...
Page 11: ...Step 3 Editing and publishing ...
Page 24: ...Step 4 Viewing content ...
Page 29: ...Step 5 Advanced settings ...


