


If you’ve pressed the “Configure and launch
analysis” button you will arrive on this screen.
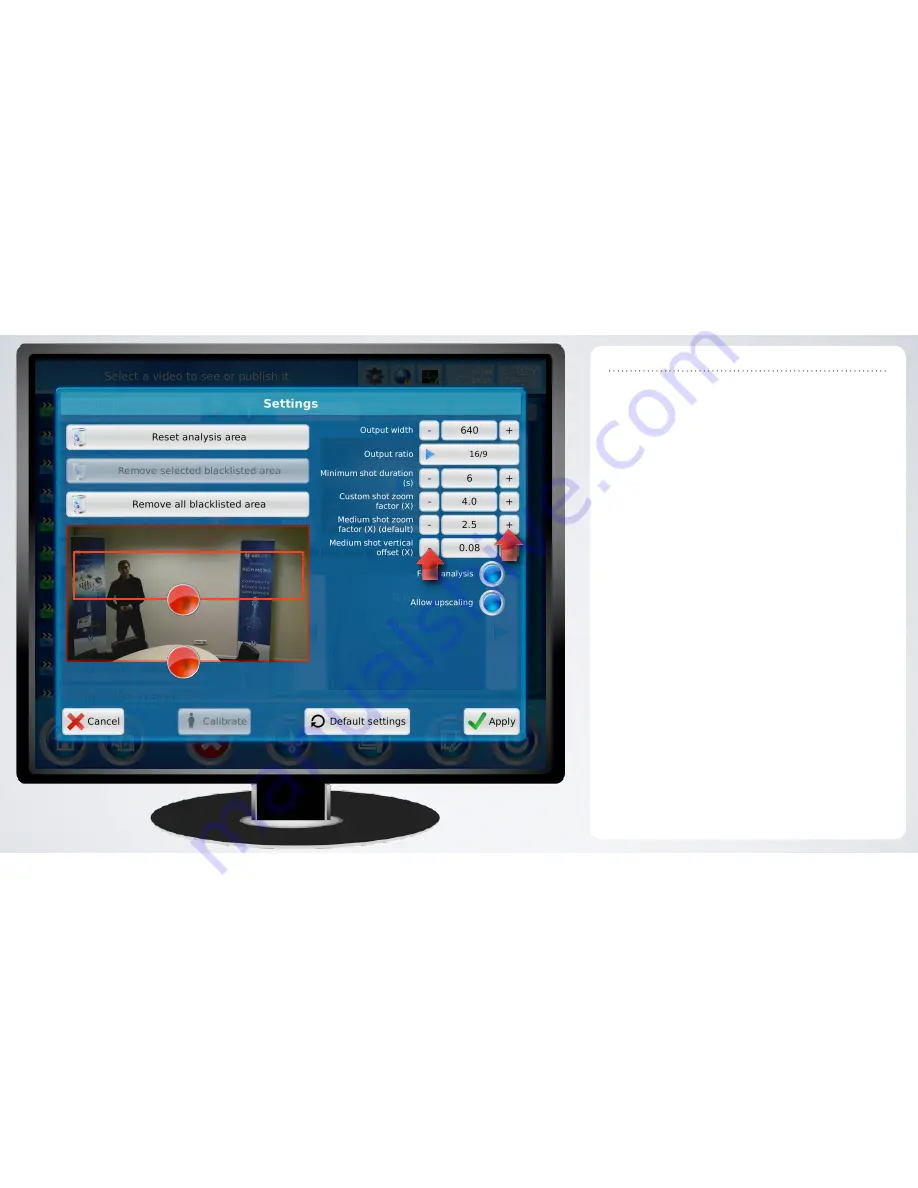
By factory default, the analysis zone – the area in
which EasyCast will look for the presenter(s) – is the
entire video frame (zone 1). You can redefine this
zone by drawing a new rectangle. A few points :
•
the smaller this zone is, the faster analysis time
will be
•
to avoid detecting people sitting in the room, the
zone should contain only the presenter
•
EasyCast looks for shoulder shapes (not faces),
so the suggested analysis zone should just
contain the presenter’s bust area (in this case for
example, zone number 2)
•
the analysis zone should cover all the space the
presenter will be moving around in, so define wide
areas.
The default extracted frame’s size is defined by the
“Medium shot zoom factor (X)”. You can modify the
size of the frame using the “+” and “-” buttons (3).
You can also modify the vertical position of the
extracted frame (adapt to “unusual” body shapes)
by using the “Medium shot vertical offset” button (4).
Press “Apply” when you have the right settings. The
system will return to the Media list and start the
analysis process.
Autocam setup (2/3)
1
2
3
4
Summary of Contents for EasyCast Studio
Page 1: ...EasyCast Studio user manual version 2 6 ...
Page 3: ...Step 1 Setup cables and connections ...
Page 6: ...Step 2 Recording a presentation ...
Page 11: ...Step 3 Editing and publishing ...
Page 24: ...Step 4 Viewing content ...
Page 29: ...Step 5 Advanced settings ...


