http://www.tyan.com
42
5.
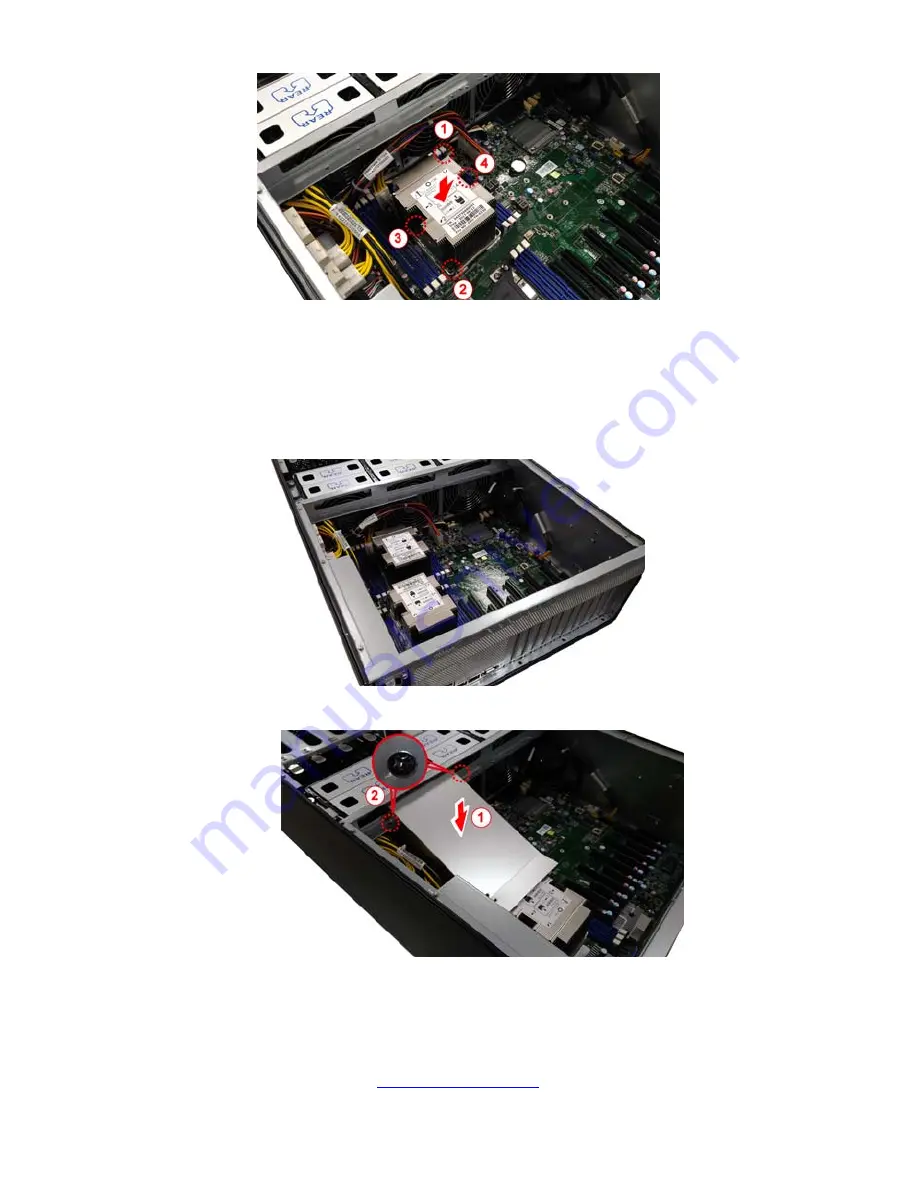
To secure the heatsink, use a T30 Security Torx to tighten the screws in a
sequential order (1
2
3
4).
NOTE:
When disassembling the heatsink, loosen the screws in reverse order
(4
3
2
1).
6.
Repeat the procedures described earlier to install the second processor and
heatsink.
7.
Place the CPU air duct back and screw it to the chassis.
Summary of Contents for FT48T-B7105
Page 1: ...1 http www tyan com FT48T B7105 Service Engineer s Manual ...
Page 2: ...2 http www tyan com ...
Page 34: ...http www tyan com 34 NOTE ...
Page 38: ...http www tyan com 38 2 Unscrew to remove the CPU air duct from the chassis ...
Page 47: ...http www tyan com 47 DIMM Location ...
Page 55: ...http www tyan com 55 3 Screw the footstands to the chassis both front and rear ...
Page 78: ...http www tyan com 78 NOTE ...
Page 82: ...http www tyan com 82 ...
Page 86: ...http www tyan com 86 BIOS Temp Sensor Name Explanation ...
Page 90: ...http www tyan com 90 NOTE ...


