1 9
GB
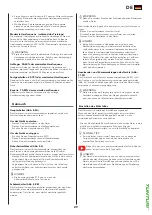
Use
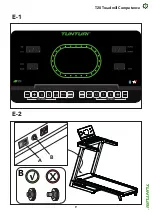
Master power switch (fig. E-2A)
The equipment is equipped with a master power switch to shut down
the equipment completely.
To start the equipment:
- Insert the mains plug into the equipment.
- Insert the mains plug into the wall socket.
- Set the master power switch to the on position.
To stop the equipment:
- Set the mains power switch to the off position.
- Remove the mains plug from the wall socket.
- Remove the mains plug from the equipment.
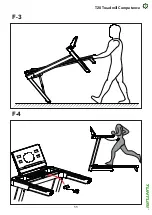
Safety key (Fig F-4)
The equipment is equipped with a safety key that must be properly
inserted into the console to start the equipment. If you remove the
safety key from the console, the equipment will stop immediately.
- Insert the safety key into the slot in the console.
- Make sure that the clip of the safety key is properly attached to
your clothing.
Make sure that the clip is not removed from your clothing before
the safety key is removed from the console.
‼ NOTE
• Console will show E7 code when safety key is not in (correct)
position.
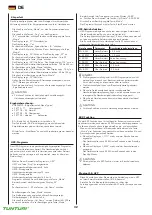
Circuit breaker (Fig. E-2B)
The equipment is equipped with a circuit breaker that interrupts the
circuit when the electricity load is above the maximum capacity. When
this occurs, the circuit breaker must be pressed.
⚠ WARNING
• Before pressing the circuit breaker, remove the mains plug from
the equipment.
If the equipment shuts down, proceed as follows to restart the
equipment:
- Remove the mains plug from the equipment.
- Press the circuit breaker to restart the equipment.
- Insert the mains plug into the equipment.
‼ NOTE
• Some circuit breakers used in homes are not rated for high inrush
currents that can occur when a treadmill is first turned on or even
during normal use. If your treadmill is tripping the circuit breaker
(even though it is the proper current rating and the treadmill is
the only appliance on the circuit) but the circuit breaker on the
treadmill itself does not trip, you will need to replace the breaker
with a high inrush type. This is not a warranty defect. This is a
condition we as a manufacture have no ability to control.
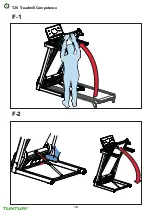
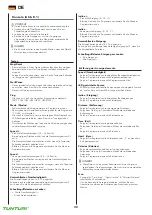
Unfolding and folding the equipment (fig. F1-F2)
The equipment can be unfolded for use (fig. F1) and folded for
transport and storage (fig. F2).
Refer to the illustrations for the correct way of unfolding and folding
the equipment.
⚠ CAUTION
• Before folding the equipment, make sure that the incline is 0. If
the incline is not 0, folding will damage the mechanism.
Adjusting the support feet
The equipment is equipped with adjustable support feet.
If the equipment feels unstable, wobbly, or not levelled well, these
support feet can be adjusted to make the required corrections.
- Turn the support feet in/ out as required to put the equipment in a
stable and as well possible levelled position.
- Tighten the locknut’s* to lock the support feet.
💡 QUICK TIP
• It is easier to do this with two persons, so one person can tilt the
equipment, while the other makes the needed adjustment.
Click to see our supportive YouTube video
https://youtu.be/E_7agKqaUIc
‼ NOTE
• The equipment is most stable when it is as low to the floor as
possible. Therefore, start to level the equipment by turning all
support feet fully in, before turning out the required support feet
to stabilize and level the equipment.
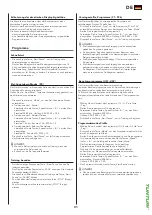
Console (fig. E-1)
⚠ CAUTION
• Keep the console away from direct sunlight.
• Dry the surface of the console when it is covered with drops of
sweat.
• Do not lean on the console.
• Only touch the display with the tip of your finger. Make sure that
your nails or sharp objects do not touch the display.
‼ NOTE
• The console switches to standby mode when the equipment is
not used for 4 minutes.
Buttons
Stop/ Reset
- Press once, stop workout/ treadmill gently.
- Press twice, stop workout/ treadmill more rapidly.
- Reset console when press and hold for 2 seconds in “stop mode”
Start/ Pause
- Start selected workout, or restart pause workout when being in
pause mode.
- Pause active workout.
Prog
- Press to Cycle through the possible programmes.
(P0/ P1~P36/ U01~U03/ HRC1~HRC3/ FAT)
Mode
- Cycle between target setting parameters in programming mode.
- Reset time target when setting time goal for “P1~P36” programs.
- Press to freeze the displayed multi display scanning LED displays
when in exercise mode.
- Press again to unfreeze and activate scanning mode again.
Speed +
- Increases the speed (1.0 ~ 16.0 km/h).
- Pressing once increases the speed 0.1 km/h.
- Pressing and holding for two seconds will increase the speed faster.
- Scroll programs and change values in programming mode.
Summary of Contents for T20
Page 2: ......
Page 3: ...0 5 10 3 T20 Treadmill Competence A ...
Page 4: ...i 4 T20 Treadmill Competence B ...
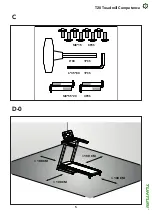
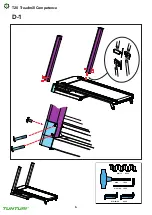
Page 6: ...M8 15 8PCS 6 80 1PCS 6 35 80 1PCS M8 55 20 4PCS 6 T20 Treadmill Competence D 1 ...
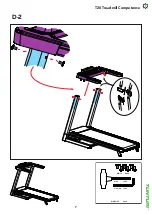
Page 7: ...M8 15 8PCS 6 80 1PCS 6 35 80 1PCS M8 55 20 4PCS 7 T20 Treadmill Competence D 2 ...
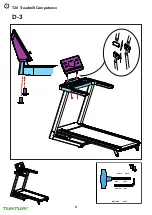
Page 8: ...M8 15 8PCS 6 80 1PCS 6 35 80 1PCS M8 55 20 4PCS 8 T20 Treadmill Competence D 3 ...
Page 9: ...0 5 10 A B O I X B 9 T20 Treadmill Competence E 1 E 2 ...
Page 10: ...1 0 T20 Treadmill Competence F 1 F 2 ...
Page 11: ...1 1 T20 Treadmill Competence F 3 F 4 ...
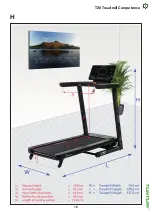
Page 15: ...1 5 T20 Treadmill Competence H ...
Page 102: ...20211221 W ...

