9
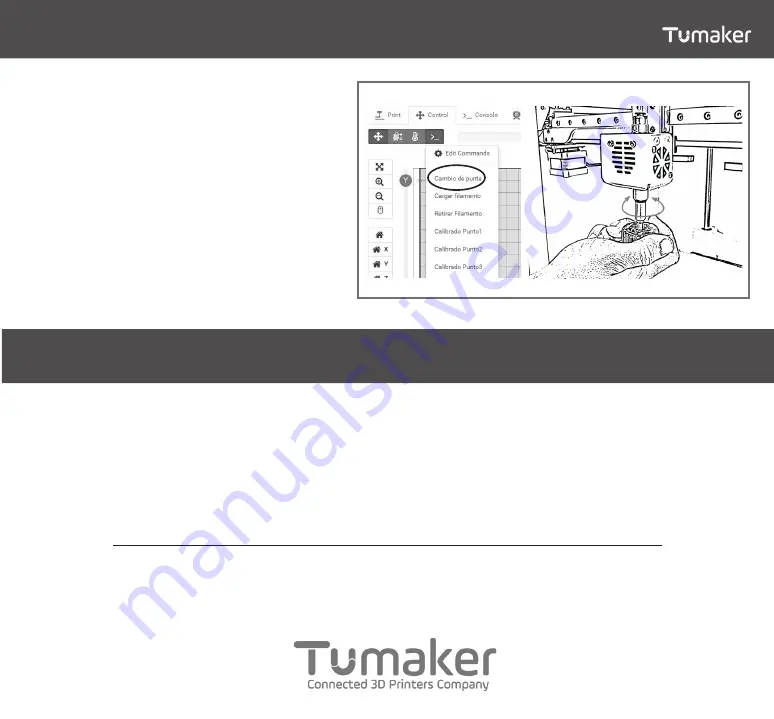
NOZZLE CHANGE
If you have any questions about the use of the Voladora
do not hesitate to write us to the following email:
https://tumaker.com/en/site/support
SIMPLIFY3D PRINTING SOFTWARE
Tumaker’s 3D printing stations include the Simplify3D™
professional manufacturing suite, a software with all the
advanced and optimized characteristics to create the
most complex objects in the highest quality. It includes
a powerful simulator to make you more productive,
visualizing the result of the printing strategy you’re
working on before you start manufacturing. You will be
able to repair the imported designs in Simplify3D itself
and you will love the intelligent support option.
Spectacular functionality with which the software will
create the right support for the most complex parts.
If you have any questions about the use of the software,
please consult the following page:
www.simplify3d.com/support/
1. Enter the Control tab
2. In the drop-down menu select the option
Change Nozzle.
3. The platform will descend and give access to
the nozzle.
4. Extract the current nozzle.
5. Insert the nozzle into the tube until it stops.
6. Squeeze the trigger on the fitting and finish
inserting the nozzle.
7. With the trigger squeezed, thread the tool until
two threads remain in sight.
8. Release the trigger and retighten until the tool
reaches the end of the thread.


