background image

TRUST 922Z POWERC@M OPTICAL ZOOM 

The default setting is ‘Off’ but it can be activated by shifting the OK button right once. 
The symbol for the automatic exposure function will appear in the middle of the LCD 
screen. 
Press the shutter button (2, figure 3) to take a photograph using the automatic 
exposure function.  

U K

While counting down (10 seconds): 
- The count-down will be visible in the LCD screen.  

Note:

  It is recommended to use tripod stand when taking a photograph using the 

automatic exposure function. 

12.3.3 Continuous 

shot 

This camera allows you to take three photographs continuously by pushing shutter 
button down and then release in one time.  

Note:


You can only use this function in the 3.1 Megapixel resolution (3.0 
displayed at 5 in Fig. 8) and flash must be set off -  ! 

1.  Shift the OK button right twice to activate this function. 
2.  Aim your camera to the object. 
3.  Press the shutter button to take continuous photographs. 

In order to take better photographs, please select a proper flash setting. Refer on 
chapter 6.3 for options.  
Meanwhile, you can press the menu button (5, Fig. 2) to enter the menu and adjust 
the photograph settings in the camera. Depending on the environment so it’ll work 
accordingly. Refer on table below for detail:  

Note:  

The option listed on top of the selection menu is the current setting.
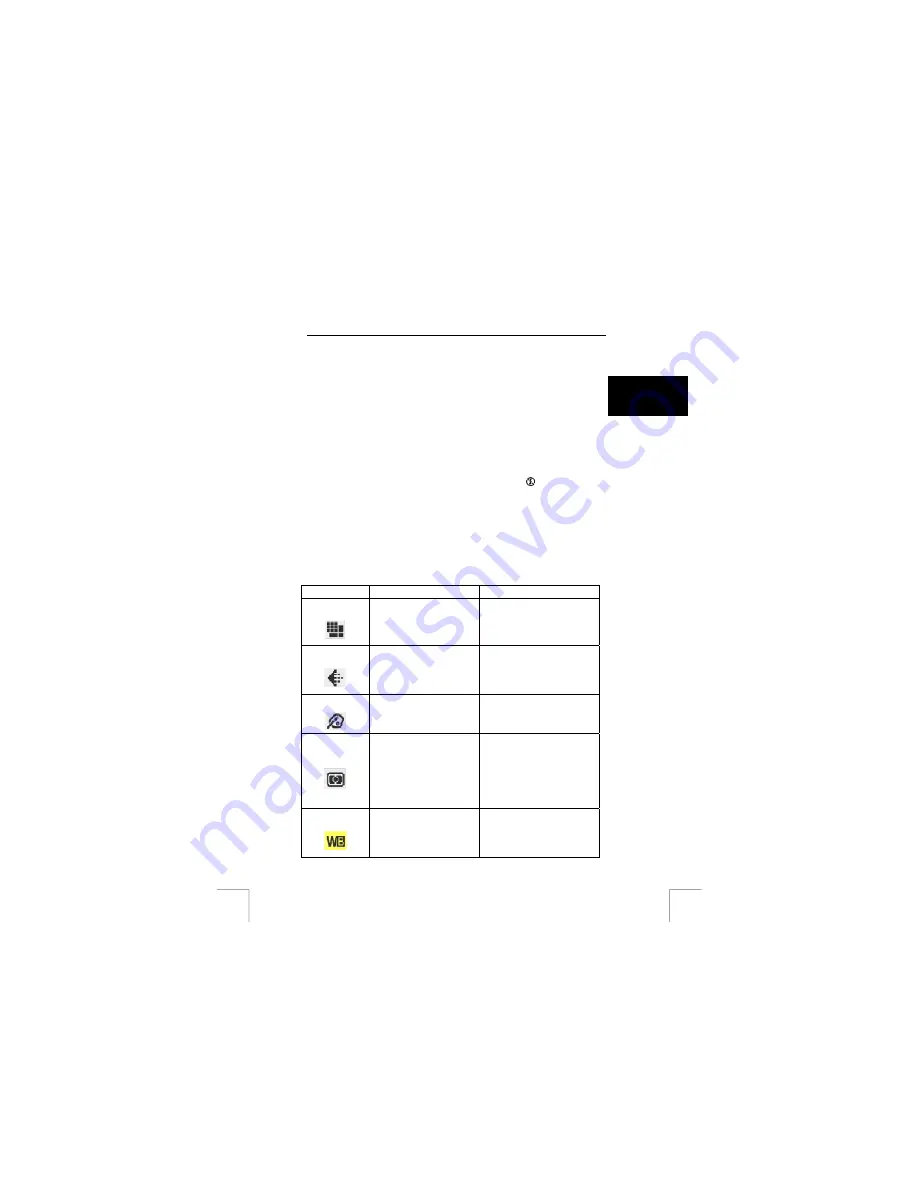
 

Function Option 

Description 

Resolution 


- VGA 
- 1.3M 
- 3.0M [Default] 
- 5.5M 

The size of the photograph. 
The higher the resolution is, 
the better the photograph 
quality is.  

Image Quality 


- Fine (*) 
- Better (**) 
- Best (***) [Default] 

The image quality refers to 
the compression ratio of the 
image. A lower compression 
ratio indicating a better image 
quality. 

Colour Effect 


- Black & White 
- Sepia 
- Normal [Default] 

The tone applied to the 
photograph so you can alter 
as if you were using different 
types of film. 

Metering 


- Center [Default] 
- Spot 
- Matrix  

It defines the best overall 
exposure value. Use spot 
when you want to highlight at 
a certain object; use matrix 
when you want the exposure 
spread averagely on the 
photograph. Otherwise, use 
center.  

White Balance 


- Auto [Default] 
- Shade 
- Sun 
- Tungsten 

It adjusts the relative 
brightness under different 
condition. Shade- for a cloudy 
day. Sun- for a sunny day. 
Tungsten- for incandescent 

11 

Summary of Contents for POWERCAM 922Z

Page 1: ...L I F E I S M O R E T R U S T U S T R U S T C O M 922Z POWERC M OPTICAL ZOOM U K P T User s manual...

Page 2: ...OOM U K P T Thank you for your purchase Register your product via our Internet site at www trust com register so that you will be eligible for optimal guarantee and service support You will also be au...

Page 3: ...922Z POWERC M OPTICAL ZOOM L I F E I S M O R E T R U S T U S T R U S T C O M Fig 1 Fig 2 Fig 3 Fig 4 Fig 5 Fig 6 Fig 7 Fig 8 Fig 9...

Page 4: ...special cleaning liquid for camera lenses Do not use a different type of cleaning product Camera cleaning liquid can be purchased from photography shops Do not use aggressive substances such as white...

Page 5: ...will blink when the 10 seconds timer is counting down 6 Zoom Lens Capture the object to be taken 7 Microphone Used to record the sound Table 2 Functions on the front of the camera Refer on Fig 2 Item...

Page 6: ...ion 1 Power button Turn the camera on or off 2 Shutter button Press this button to take a photograph This button is also used to start and stop recording a video clip 3 Mode dial Dial for camera opera...

Page 7: ...arts to charge the battery Note It s recommended to charge new battery for over 8 hours Note If you plug power without placing battery in the charger the LED on the charger turns green Note If you plu...

Page 8: ...6 2 Zoom in out This camera has 3x optical zoom plus 4x digital zoom The zoom bar can be found on the left side of the LCD display indicating the zoom status while the zoom in or out button is presse...

Page 9: ...amera as a camcorder or set self timer for self recording purpose Note The length of the movie is based on the capacity of your SD card and the internal memory Note You can still zoom in and out while...

Page 10: ...8 Delete photograph or video on camera 1 Make sure the mode dial is at Playback mode 2 Press the menu button 5 Fig 2 3 Shift the OK button till 4 Select either to delete Current or All recordings 9 In...

Page 11: ...tion or name may vary in the Control Panel for different operating systems 11 Downloading recordings to computer 1 Once your camera is connected to the computer 2 Your system will recognize the camera...

Page 12: ...n Off To turn the camera sound effect on or off DPOF Copy Date File no This is a standard for printing the photographs directly from the memory card Users can select 1 Copy the number of the copies of...

Page 13: ...photograph the camera will automatically check if the memory is enough If it s full a warning Memory Full icon will display on the LCD Note The icons can be invisible by pressing the menu button 5 Fi...

Page 14: ...g Refer on chapter 6 3 for options Meanwhile you can press the menu button 5 Fig 2 to enter the menu and adjust the photograph settings in the camera Depending on the environment so it ll work accordi...

Page 15: ...adjust the sensitivity of the camera to the light The higher the number is the higher the sensibility is Table 11 Capture Mode Setup Note A higher exposure value 2 0 produces a brighter photograph Tip...

Page 16: ...5 Fig 2 once and enter the menu Use the option you want and refer on the table below for the detail of the options Function Option Description Protect Picture Protect all Unprotect current Unprotect a...

Page 17: ...The external memory card must first be formatted see chapter 12 7 for optimal use Note The memory card can only be inserted into the camera in one way Do not force the card into the slot This could d...

Page 18: ...n download the latest version of the software here The Trust Photo Upload software is also included on the CD ROM supplied with the camera 13 2 3 Using the Trust Photo Upload software 1 Start Trust Ph...

Page 19: ...wnloaded from your camera 7 Shortly follow the prompts and the images will start be downloaded from your camera Note For the usage of Photo Impression please refer on the Help of the software or check...

Page 20: ...or use a different SD memory card or an MMC memory card The memory card is empty Take some photographs or record some video clips Insert the memory card in the other camera to view the recordings No...

Page 21: ...he external memory The memory card has not been inserted correctly Reinsert the memory card into the camera No photographs or video clips can be found on the external memory An external memory card ha...

Page 22: ...is normal Wait for some time and refresh the contents of the open Windows Explorer window by pressing F5 A removable disk will eventually appear in the list of folders Only then has the driver been f...

Page 23: ...ication provided with the camera to alter the size to fit the frame Video clips cannot be played in Windows Media Player The correct codec has not been installed Install the latest release of Windows...

Page 24: ...period you will receive a similar model if one is available If no similar product is available your product will be repaired Please contact our help desk for missing components such as the instruction...

Page 25: ...s Mo Fr 9 00 17 00 Deutsche Gesch ftsstelle Telefon 0800 00TRUST 0800 0087878 Fax 31 0 78 6543299 Los habitantes de Espa a pueden ponerse en contacto con lun viernes De las 9 00 a las 17 00 horas Ofic...

Reviews: