27
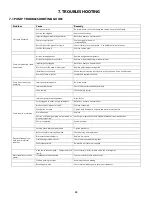
7-2 MECHANICAL SEAL TROUBLESHOOTING GUIDE
Problem
Cause
Remedy
Broken metal bellows
Running too close to vapor point
Identify cause and correct
Chemical attack
Over pressurized back cover plate
High/low viscosity pumpage
Broken ceramic
Ceramics are exposed to different temperatures, thermal
shock
Reduce differential temperatures
Broken metal bellows primary
front ring adapter
Liquids with high pH, chlorides or sulfides
Change material, check temperature
Broken spring
Stress corrosion by over torqueing, high speeds
Change materials and check installation procedures.
Chipped faces on the OD
Face separation because of pressure distortion
Control the pressure
Chipped faces on the ID
Face striking the shaft or sleeves on the ID, temperature
distortion, running dry, poor flush
Confirm the pump alignment, check operating temperature
Clogged springs
Particles collecting in small places
Confirm and check the flush
Coated or discolored metal
Excessive heat or sealed fluid deposits
Eliminate heat, change metal, use a clean flush
Coking
Fluid decomposition
Reduce temperature, use steam quench, use rotating seal
design or use dual arrangement.
Cut elastomer
Damage during installation
Chamfer the shaft shoulder, use assembly lubricant
Elastomer out of shape or
hardened
Excessive heat or chemical attack
Change the elastomer, reduce the heat
Eroded carbon
Flush impingement, chemical attack, incorrect pipe
connections
Redirect or reduce the flush, remove the abrasives
Excessive face wear
Heavy load or poor lubrication
Check seal flush, check springs
Excessive outboard temperature
Inadequate buffer/barrier flow
Check for piping restrictions, check for correct piping plan,
and check pump rotation vs. tangential gland porting, check
for gas entrainment in the barrier fluid.
Frozen Seal
Clogged small springs, wrong seal selection
Use flush injection, select a different seal
Hard face wear
Abrasives trapped between the faces, poor lubrication
Use flush or change face materials
High primary ring wear
Seal chamber too close to product vapor pressure, incorrect
seal selection, product contaminants or gas in barrier fluid.
Decrease seal chamber temperature, increase seal chamber
pressure using throat bushing, examine the flush
arrangements and eliminate air
Heat check
Wrong material or excessive heat
Change materials, reduce heat generation, increase heat
removal
Pitted carbon
Media attack on the carbon
Change the grade of carbon
Pitting and corrosion of metal
parts
Wrong choice of materials, scratched surfaces on passive
stainless steel, galvanic corrosion or stress corrosion
Change materials
Seal leaks
Nothing appears to be wrong
Check for squareness of seal chamber to shaft; align shaft,
bearing, and impeller to eliminate shaft vibration.
Seal locked on shaft
Fretting
Change to a non-pusher seal
Shaft damage under seal
Fretting
Check alignment, change to a non-pusher seal
Steady dripping
Faces not flat, faces blistered, thermal distortion
Check installation dimensions, check for distortion
Secondary seals nicked or scratched during installation, aged
o-rings, chemical attack
Replace secondary seals, check for chamfers burrs, etc.
Sticky or swollen elastomer
Chemical incompatibility with secondary seals
Replace secondary seal

