9
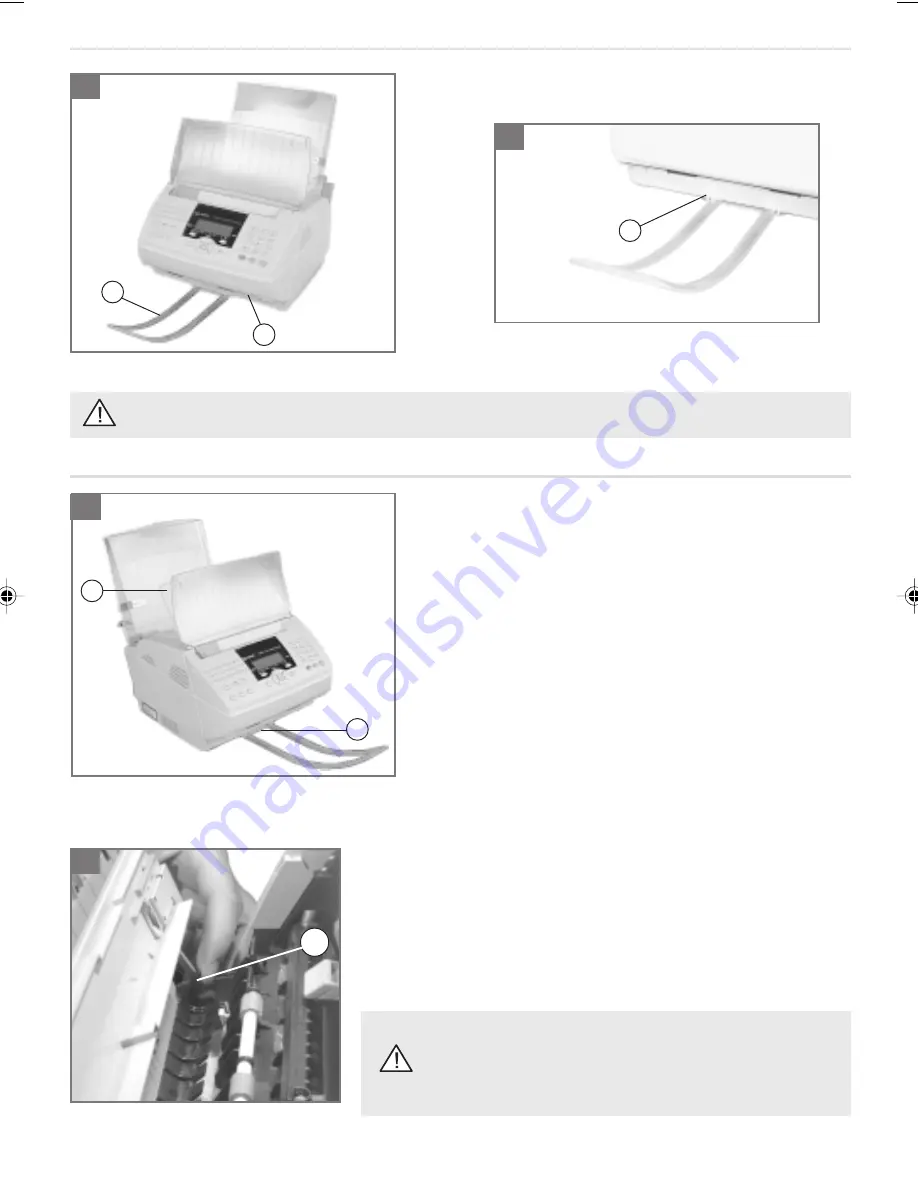
1-2- Clip the scanning out-tray (a) into the two slots (b) of the unit’s base (c).
Ensure you always remove the scanning out-tray prior to opening the cover housing the scanning assembly.
a
c
b
b
a
SELECTING THE PRINTER OUTPUT CONFIGURATION
Your unit directs printed output by default to the tray located above
the unit (a) (incoming documents are printed out in the correct
order).
The capacity of the printer output tray (a) varies between 40 and 60
pages depending on the weight of the paper used.
A sensor warns the user when the paper tray is full.
FITTING THE SCANNING OUT-TRAY
1
2
1
c
Open the cover housing the scanning assembly by pressing on the two
buttons located to either side.
2- Flip the lever (c) to the upwards position
- lever down: paper output to top of unit
- lever up: paper output to front of unit
Finally, close the cover.
With printer output directed towards the front of the unit, pages
received are printed out in reverse order.
Scanned documents may be mixed up with received documents.
2
1- To direct paper output to the front of the unit (b), for special applications, e.g. printing off a PC using headed paper:
CH00-01 23228395-7 A.P65
10/08/2000, 07:40
9


