Maintenance
BASIC OPERATION GUIDE
4-11
6
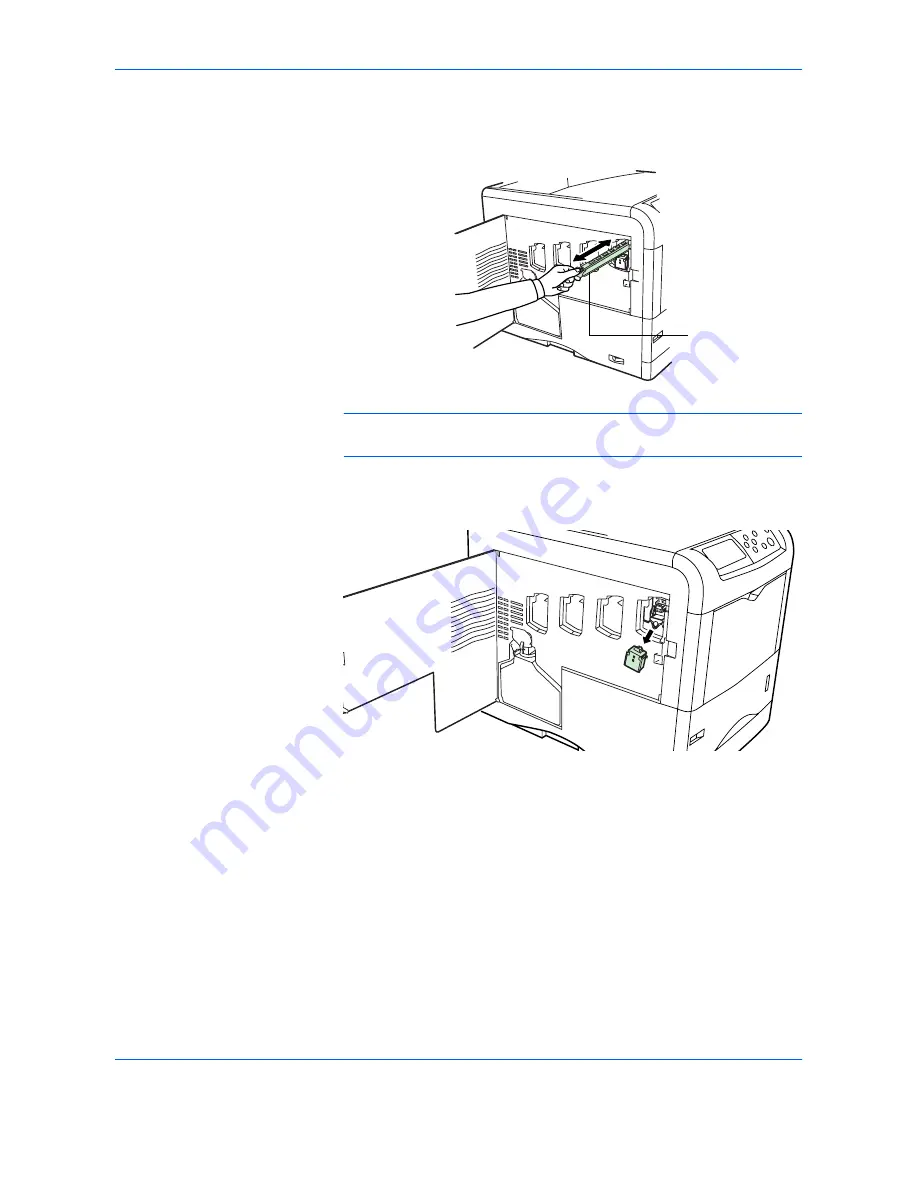
Gently pull the main charger handle out and push it back in. Repeat this 2
to 3 times. These movements clean the grid. After cleaning, make sure you
restore the main charger unit to its home position.
NOTE:
If the main charger unit is not restored to its home position, the
corresponding color will be printed over the whole page.
7
Remove the grid cleaner from the printer and discard it. The grid cleaner
cannot be reused.
Use the same procedure to clean the main charger units for the other toner
containers.
Proceed to the next section and clean the advanced beam array lenses.
Cleaning the Advanced Beam Array Lenses
If lines, etc., appear on printed copies, the printouts appear dirty, or faint or
blurred printouts are produced, clean the advanced beam array lenses.
There is 1 lens on the main charger unit of each toner container. The
following example explains the procedure to clean the lens on the main
charger unit of the black toner container.
Main Charger Unit
Summary of Contents for CLP 4416
Page 1: ...Instruction Handbook Basic CLP 4416 4524 Colour Printer ...
Page 2: ......
Page 4: ...Contents ii BASIC OPERATION GUIDE ...
Page 24: ...xxii BASIC OPERATION GUIDE ...
Page 32: ...Installation 1 8 BASIC OPERATION GUIDE ...
Page 42: ...Printing Operation 3 4 BASIC OPERATION GUIDE ...
Page 60: ...Maintenance 4 18 BASIC OPERATION GUIDE ...
Page 80: ...Troubleshooting 5 20 BASIC OPERATION GUIDE ...
Page 84: ...Specifications 6 4 BASIC OPERATION GUIDE ...
Page 85: ...A1 ...
Page 86: ...UTAX GmbH Ohechaussee 235 22848 Norderstedt Germany ...


