


59
D.
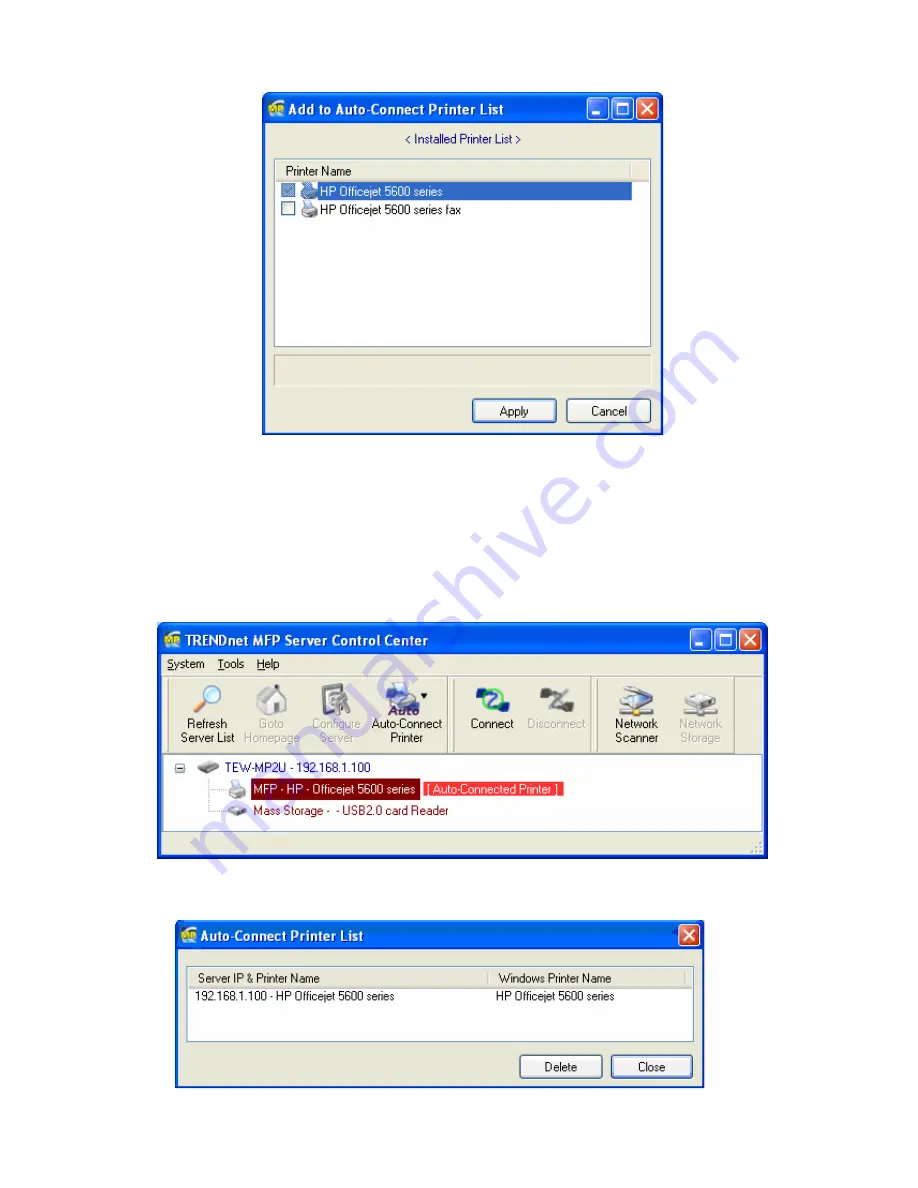
Choose the desired printer. The desired printer must be the Windows printer (this
is a logical printer) that matches the printer attached on the MFP Server (this is a
physical printer). Then click the “Apply” button.
E.
Then, the printer will be marked as an “Auto-Connected Printer” in red. If you
choose “Auto-Connected Printer List” in the “Tools” menu, you can see a newly
created item that describes the association between the Windows printer and the
physical printer on the server.
Summary of Contents for TE100-MP1U - Multi-Function Print Server
Page 1: ...1...
Page 4: ...4 CHAPTER14 UPGRADE FIRMWARE 86 CHAPTER15 THE INIT BUTTON 89...
Page 11: ...11 8 If the wireless network is secured by WPA PSK TKIP the shared key must be set correctly...
Page 15: ...15 7 If the wireless network is secured by WPA PSK TKIP the shared key must be set correctly...
Page 27: ...27 9 Click Finish...
Page 37: ...37 5 Click Next and then continue Windows Add Printer Wizard...
Page 45: ...45 8 Click Finish button...
Page 80: ...80...
Page 91: ......


