


12
9.
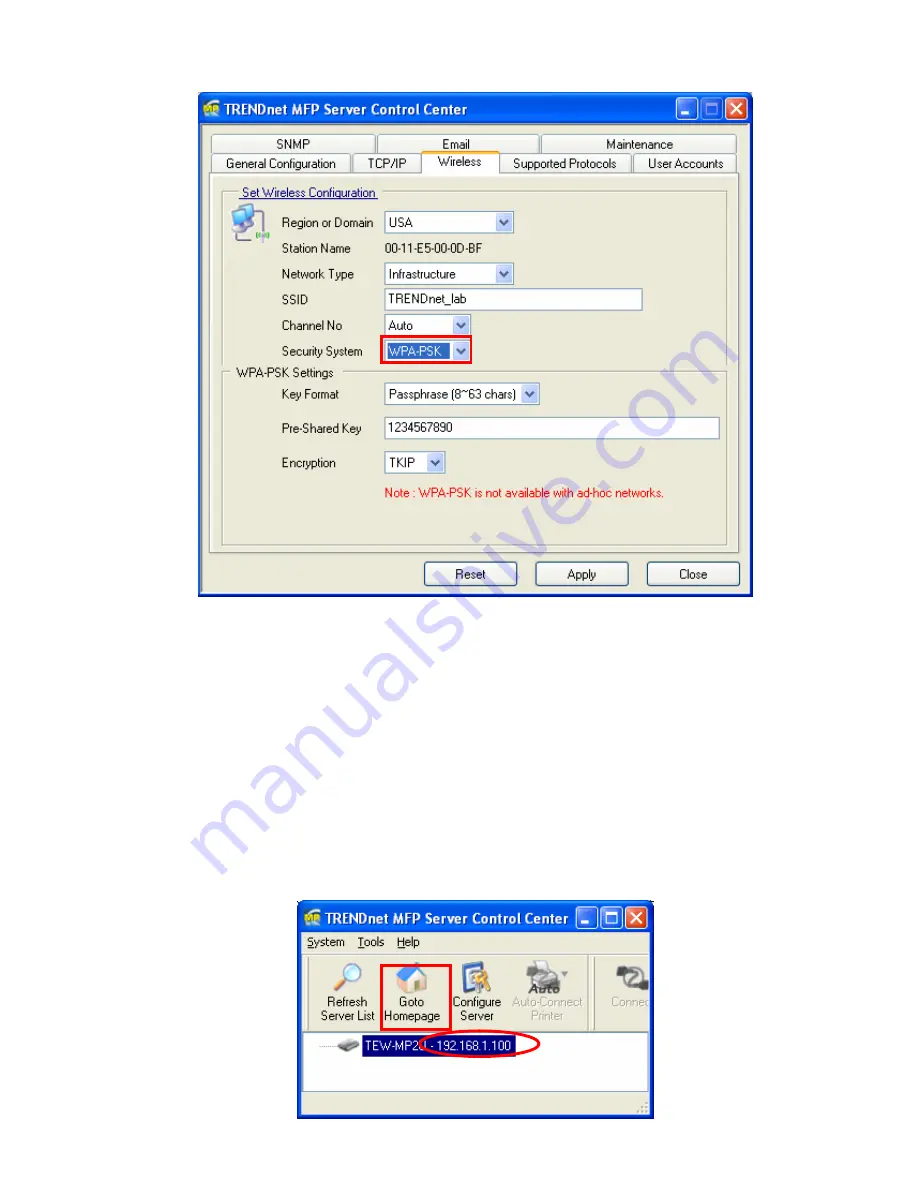
Click Apply to save your settings. And the server will reboot.
10.
You have now finished the procedure of setting the wireless parameters.
#
In infrastructure mode, TEW-MP2U searches all channels to join the matched wireless
service set. In ad-hoc mode, TEW-MP2U searches all channels to join the matched wireless
ad-hoc service set too, however, if none are found, TEW-MP2U creates that service set in the
assigned channel.
#
In ad-hoc mode, WPA-PSK/TKIP is not allowed.
3.2.3 Set Wireless Configuration Using Server’s Web Pages
1.
You can see the IP address of MFP Server in the server list. Open IE Browser and
type server’s IP address or click the Home Icon of MFP Server Control Center.
Summary of Contents for TE100-MP1U - Multi-Function Print Server
Page 1: ...1...
Page 4: ...4 CHAPTER14 UPGRADE FIRMWARE 86 CHAPTER15 THE INIT BUTTON 89...
Page 11: ...11 8 If the wireless network is secured by WPA PSK TKIP the shared key must be set correctly...
Page 15: ...15 7 If the wireless network is secured by WPA PSK TKIP the shared key must be set correctly...
Page 27: ...27 9 Click Finish...
Page 37: ...37 5 Click Next and then continue Windows Add Printer Wizard...
Page 45: ...45 8 Click Finish button...
Page 80: ...80...
Page 91: ......


