TRAX RetroWave Owner’s Manual
< 9 >
Bear in mind that the raw waveforms generated by the RS-1 can be powerful, and can damage your
speakers or amp if the latter’s volume control is set at a very high level for a long period. We recommend
that you use the Aux, Tuner or Line input if using a domestic hi-fi amp, keeping the volume control at a
low to medium setting, and the RS-1’s output level control low. Do not use the phono input, as this is
equalized for magnetic phono cartridges, and will produce a sound lacking in treble.
MIDI Input
The RetroWave can be MIDI controlled by any keyboard instrument or sequencer equipped with a 5 pin
DIN MIDI OUT socket. Connect the external unit to the R-1’s
MIDI IN
socket via a MIDI lead (5 pin plug
to 5 pin plug). Do not use a normal 5-pin DIN audio lead, as these are noise-prone and may degrade the
performance of the unit.
The R-1 can receive MIDI messages over any one of 12 channels; just select which one you want to use
by turning the rotary switch marked
MIDI CHANNEL
to the desired channel number.
A computer can be connected via a USB to MIDI converter cable to allow sequencing, etc. from a
computer program. This is a cable with a USB plug at one end, a 5 pin DIN plug at the other, and a small
box of electronics strung between the two, inside which the computer data is converted into a MIDI
signal that the R-1 can use. They are available at reasonable cost from online suppliers such as
Amazon.
Make sure that the converter lead has been recognised by the computer BEFORE starting the computer
program, otherwise no MIDI signals will be sent to the R-1.
The RetroWave itself does not require any drivers to be installed, and does not need to be recognized by
the computer, as it is only receiving data. Just connect the lead to the computer, start the program,
switch on the RetroWave, and away you go.
OK, let’s prepare for launch! This guide is not comprehensive, but simply runs through some of the unit’s
capabilities without going into too much technical detail. For full technical descriptions of each module,
see “The Sections in Detail” on page 12.
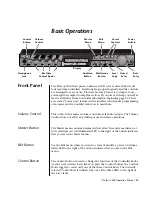
Before applying the power, make sure that the RetroWave’s various knobs and switches are set as
shown on page 9: this will ensure that you hear some sound immediately, without having to fiddle with
the controls to get a signal.
Throughout the guide, we will assume that you have connected a MIDI keyboard, sequencer or
computer (the latter via a USB to MIDI interface lead) to the MIDI input socket.
If at any time you get lost while experimenting, switch off and set the controls as shown in the diagram.
That way, you will have a fresh canvas and can start again from scratch.
Tip:
Some controls, such as LFO FREQUENCY and SHAPE, GLIDE, TUNE, and the W’FORM switch,
can be in any position when re-starting, as they do not affect the audibility of the VCO signal.
Quick Start Guide


