TRANE
R
Maintenance
The maintenance interval periods are
stated, guidelines only. Any large
deviations in the pattern of usage may
necessitate further maintenance
attention.
1. Fan
If the fan / motor assembly is going to
be stored for two weeks before use,
the fan should be rotated by hand at
weekly intervals to avoid bearing
damage.
If storage will be over one month it is
recommended that the belts be
slackened as well.
Check for soiling, damage, corrosion,
and any tendency to bind. Clean as
necessary.
Check that the flexible connection are
securely fixed.
Check the function of all antivibration
mounts.
Check for any obstructions or
blockages of the air intakes and
discharges.
Check the traps for leaks or blockages
and prime as necessary.
2. Bearing Test
Check that the fan bearing is tightened
and is not unduly noisy, by sounding it
using a metal bar as a conductor.
Where a belt guard has been supplied,
check that it is fitted correctly.
If there is any irregular noise or
knocking, renew both bearings. Fan
bearing are greased for life, but larger
units with standard bearings require
annual lubrication. These have grease
nipple. In the case of extreme running
conditions, lubricate in accordance
with the following recommendations:
Recommended lubricants;
ALVANIA
GREASE 3
(SHELL)
MOBILUX 3
(MOBIL)
BEACON 3
(ESSO)
SKF 28
(BALL BEARING
GREASE)
3. Fan Motors
lnspect periodically for excessive
vibration or temperature. Operating
conditions will vary the frequency of
inspection and lubrication. Contact the
motor manufacturer or Trane for
lubrication instruction. Most smaller
frame motors comes without grease
nipple where the bearings are
permanently sealed.
The motors with double shielded
bearings are lubricated for life and
cannot be relubricated.
W.E motors up to 132 frame and TECO
and Brook Hansen motors up to 180
frame comes with sealed for life
bearings, while motors above this
28
WARNING:
DISCONNECT POWER
SOURCE FOR MOTOR
LUBRICATION. FAILURE TO DO SO
MAY RESULT IN INJURY OR DEATH
FROM ELECTRIAL SHOCK OR
MOVING PARTS.
!
To re-lubricate the motor, complete the
following:
1. Turn the motor off. Make sure it
cannot accidentally restart.
2. Remove the relief plug and clean out
any hardened grease.
3. Add fresh grease through the fitting
with low pressure grease gun.
4. Run the motor for few minutes to
expel any excess grease through
the relief vent.
5. Stop the motor and replace the relief
plug.
Table2
Motor Greasing lntervals
Standard condition: 8 hour operation
per day with rated or light loading in a
clean and low vibration environment.
Severe condition: 24 hour operation per
day with rated/light loading or in a dirty/
dusty environment or where the motor
is subject to vibration/light shock
loading.
Grease Type:
TECO/Brook Hansen motor - Use
Esso Unirex Lithium N3 grease.
W.E motor - Use Shell Alvania R3.
range, have open bearings with "flush
through" re-greasing facilities.
IMPORTANT
During maintenance operation
the unit must be compelety
isolated and precautions teken
to prevent any premature restart.
IMPORTANT
Do not overlubricate bearings.
Excessive pressure caused by
overlubrication can displace
bearing grease seals or cause
grease to overheat the bearing,
resulting in premature bearing
failure.
Summary of Contents for TRANE Quantum CLCPEuro
Page 2: ...TRANE R...
Page 6: ...TRANE R 2 CLCPXP Model Nomenclature...
Page 7: ...TRANE R CLCPEURO Model Nomenclature 3...
Page 13: ...TRANE R Assembly Installation CLCPEuro CLCPXP External connection 9...
Page 14: ...TRANE R Assembly Installation CLCPEuro Break Point 25mm Frame to Frame 10...
Page 15: ...TRANE R 11 Assembly Installation CLCPEuro Break Point 25mm Panel to Frame...
Page 16: ...TRANE R 12 Assembly Installation CLCPEuro Break Point 2 50mm Frame to Frame...
Page 17: ...TRANE R Assembly Installation CLCPEuro Break Point 2 50mm Panel to Frame 13...
Page 18: ...TRANE R Assembly Installation CLCPEuro Paneling 14...
Page 19: ...TRANE R Assembly Installation CLCP XP Break Point 15...
Page 20: ...TRANE R Assembly Installation CLCP XP Break Point 16...
Page 21: ...TRANE R 17 Assembly Installation CLCP...
Page 22: ...TRANE R Assembly Installation CLCP 18...
Page 36: ...TRANE R Maintenance 32 Figure 18 Belt Tension Measurement...
Page 39: ...TRANE R 35 Trouble Analysis Pulley and Belt...
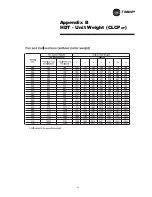
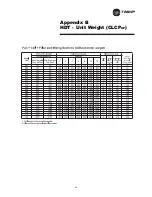
Page 45: ...TRANE R Appendix B HDT Unit Weight CLCPXP 41...
Page 46: ...TRANE R Appendix B HDT Unit Weight CLCPXP 42...
Page 47: ...TRANE R Appendix B HDT Unit Weight CLCPXP 43...
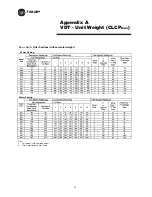
Page 48: ...TRANE R Appendix B VDT Unit Weight CLCPXP 44...
Page 53: ...TRANE R Appendix D Filter and Quantity 49 Filter Dimension and Arrangement Final Filter HEPA...
Page 57: ...TRANE R Typical Wiring Diagram Starter Star Delta 380 420V 3Phase 4Wires ELCB Standard 53...
Page 58: ...TRANE R 54 Typical Wiring Diagram Starter Dol 380 420V 3Phase 4Wires ELCB Standard...
Page 59: ...TRANE R 55 Typical Wiring Diagram Starter Dol 380 420V 3Phase 4Wires Standard...
Page 62: ...TRANE R 58 Typical Wiring Diagram Starter Dol 380 420V 3Phase 4Wires Standard...
Page 65: ...TRANE R 61 Typical Wiring Diagram Starter Star Delta 380 420V 3Phase 4Wires Standard...
Page 68: ...TRANE R 64...
Page 70: ...TRANE R 66...
Page 71: ...TRANE R...


