Installation
CVRF-SVN005C-EN
17
Oil Pressure Transducer Installation
WARNING
Hazardous Voltage w/Capacitors!
Failure to disconnect power and discharge capacitors
before servicing could result in death or serious injury.
Disconnect all electric power, including remote
disconnects and discharge all motor start/run
capacitors before servicing. Follow proper lockout/
tagout procedures to ensure the power cannot be
inadvertently energized. For variable frequency drives
or other energy storing components provided by Trane
or others, refer to the appropriate manufacturer’s
literature for allowable waiting periods for discharge of
capacitors. Verify with a CAT III or IV voltmeter rated per
NFPA 70E that all capacitors have discharged.
WARNING
PPE for Arc/Flash Required!
Failure to wear appropriate PPE could result in death or
serious injury.
On this unit, if the handle shield is cracked the circuit
breaker could arc/flash when reset. To avoid being
injured, technicians MUST put on all necessary
Personal Protective Equipment (PPE), in accordance
with NFPA70E for arc/flash protection, PRIOR to
entering the starter panel cabinet.
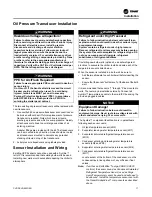
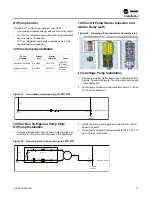
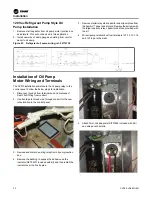
The two existing oil pressure transducers will be replaced with
new transducers.
1. Use Loctite 565 on pressure transducer so connection can
be broken without heat if future replacement of pressure
transducer is required. Note which line is oil pump
discharge pressure and which is sump pressure. Quickly
attach sensors to lines to avoid large quantities of air
entering machine.
Adapter fittings are provided with the kit. The transducers
can be mounted in any direction. Lines should be routed
and transducers mounted to minimize any potential
stacking of liquid on top of the transducers.
2. Label pressure transducers using labels provided.
Sensor Installation and Wiring
Existing UCP2 sensors cannot be used with a Symbio™
retrofit. It is recommended that existing bulb wells be used.
Installing new wells would necessitate opening the chiller to
atmosphere
WARNING
Refrigerant under High Pressure!
Failure to follow instructions below could result in an
explosion which could result in death or serious injury
or equipment damage.
System contains refrigerant under high pressure.
Recover refrigerant to relieve pressure before opening
the system. See unit nameplate for refrigerant type. Do
not use non-approved refrigerants, refrigerant
substitutes, or refrigerant additives.
If installing new bulb wells (optional), use safe refrigerant
practices to evacuate the chiller. Install and wire each of the
temperature sensors listed below.
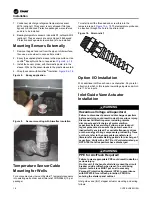
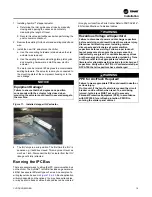
When the sensor is installed in a bulb well, be sure to:
•
Add thermastic paste to each bulb well before inserting the
sensor.
•
Ensure that the sensor “bottoms out” at the base of the bulb
well.
It is recommended that sensors “1” through “3” be mounted in
wells. The rest may be installed externally. Connect all
Symbio™ temperature sensors to the main IPC bus using the
provided pluggable cables.
NOTICE
Equipment Damage!
Failure to follow instruction below could result in
equipment damage. Never route low-voltage leads with
other conductors carrying 30 or more volts.
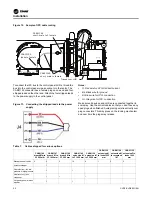
The Symbio™ component identification is in parenthesis
following each sensor name:
1. Oil tank temperature sensor (4R5)
2. Evaporator leaving water temperature sensor (4R7)
3. Evaporator saturated refrigerant temperature sensor
(4R10)
4. Condenser entering and leaving water temperature
sensors (4R8 and 4R9)
5. Evaporator entering water temperature sensor (4R6)
6. Condenser saturated refrigerant temperature sensor
(4R11)
Locate sensor at the bottom of the condenser or on the
condenser liquid line upstream of any orifices or float
valves.
Note:
If unit has an EarthWise™ purge, PRGD (CH530
controls), the sensor bound as Condenser Saturated
Refrigerant Temperature Sensor (used as Purge
Liquid Temperature) cannot be used and will need to
be unbound. Install the temperature sensor sent with
the Tracer® AdaptiView™ components as described
above.


