background image

27

Electrical Installation 

5-3. Electrical System Wiring

 • No additional control element (such as relay) is needed inside the electric control box. It is not allowed to let the power supplies and control 
   lines that do not connect with the electric control box to go through the electric control box. Otherwise, the unit and control elements can break 
   down or being damaged due to electromagnetic interference and the protection will become invalid.
 • All the cables connected with the electric control box should be supported independently instead of being supported by the electric control box.
 • Usually, there is strong current lines going through the electric control box, and 220V AC current going through the control panel, therefore 
   the connections for strong current and weak current should be separated. The distance between power line and control line should be at least 
   100mm.
 • Only 380V, 3N-50Hz rated power supply can be used for the unit, the maximum voltage fluctuation range is 342V-418V.
 • All the electrical lines must comply with local wiring specifications. An appropriate cable should be used to connect the power terminal from 
    the bottom wiring hole of the electric control box. According to the standards in China, user has the responsibility to provide voltage and current 
   protections for the input power supply of the unit. To prevent cable from loosening, please use closed end terminals for wiring.
 • All the power supplies connected to the unit must have a manual switch to make sure that the voltages on all the circuit nodes can be released 
   when the switch is disconnected.
 • User must use cables with proper specifications to supply power to the unit. Independent power supply should be used for the unit. It is pro
   hibited to share power supply with other appliances to avoid overload risks. The fuse and manual switch of the power supply should match 
   with the operating voltage and current of the unit. If multiple modules are connected in parallel, please refer to the figure below for the wiring 
   method and parameter setup of the unit.
 • The internal interface of the electric control box is switching signal which needs power supply provided by user, with rated voltage of 220VAC. 
   User must make sure that all the provided power supplies must be equipped with circuit breaker (provided by user) to make sure that the 
   voltages on all the power circuit nodes can be released when the circuit breaker is disconnected.

5-4. Installation of Modular Controller

 • There are four mounting holes at the back of the modular controller, which can be conveniently connected to the standard 86 box.
 • A 4-core wiring terminal is arranged on the circuit board at the back of the modular controller. Seen from the back of the board, they are 485 
   signal B, 485 signal A, DC power supply ground (gnd) and DC power supply positive pole (+V). The DC power supply is connected with the 
   communication line through the terminal.
 • The modular controller is provided with a 220VAC/12VDC, 500mA DC power accessory.
 • Optimal operating temperature of modular controller: 0-45

5-2. Electrical Specification

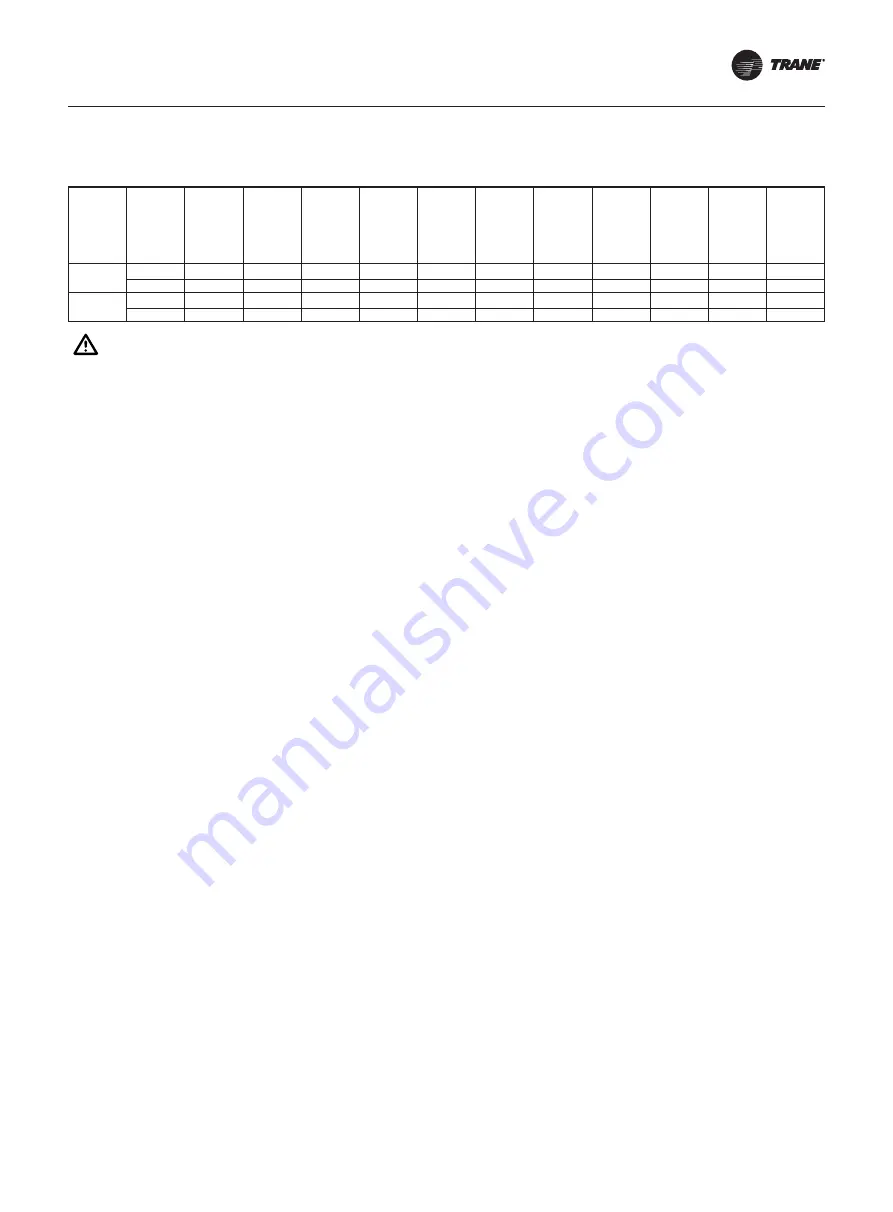
Please refer to the following table for the minimum current, the fuse specification and the electrical specification of motor.

The unit shall be energized for inspection before starting. If the green light is on, it will indicate that the unit is normal; if the red light is on, it 
will indicate that the phases are reverse and any two phases shall be exchanged in the three-phase power supply. If the yellow light is on, 
it will indicate that the power supply is lack of phase and shall be powered off for inspection. In the case of reverse phase or lack of phase, 
the unit will be automatically prohibited from running or starting. The phase loss protection is only for the input power supply of the unit.

20 

PKGP-SVX18B-EN

Electrical Installation

Electr

ical Specification

Please refer to the following table for the minimum current, the fuse specification and the electrical specification of 
motor.

Type

Model

Power 

Supply

(V/Hz/ph)

Max. current 

of No.1 

compressor 

MOC (A)

Max. current 

of No.2 

compressor 

MOC (A)

Max. current 

of No.3 

compressor 

MOC (A)

Max. current 

of No.4 

compressor 

MOC (A)

Rated 

current of 

No.1 fan       

FLA (A)

Rated 

current of 

No.2 fan       

FLA (A)

Max.

operating 

current of unit

MOC (A)

Recommended 

fuse 

specification 

REC(A) 

Recommended 

circuit breaker 

specification

In (A)

Min. specification 

of the power supply 

copper core wire 

diameter

mm

2

Standard

CX(G)AJ0655 380/50/3

24

24


2.1

2.1

55

91

69

16

CX(G)AJ1305 380/50/3

56

56


3.96

3.96

120

207

154

50

High 

Efficiency

CX(G)AJ065 380/50/3

24

24


2.1

2.1

55

91

69

16

CX(G)AJ130 380/50/3

24

24

24

24

2.1

2.1

98.2

143

133

50


Notice


The unit shall be energized for inspection before starting. If the green light is on, it will indicate that the unit is 

normal; if the red light is on, it will indicate that the phases are reverse and any two phases shall be exchanged in the 

three-phase power supply. If the yellow light is on, it will indicate that the power supply is lack of phase and shall 

be powered off for inspection. In the case of reverse phase or lack of phase, the unit will be automatically prohibited 

from running or starting. The phase loss protection is only for the input power supply of the unit.

Type

Model

Power 

Supply (V/

Hz/ph)

Max. current 

of No.1 

compressor 

MOC (A)

Max. current 

of No.2 

compressor 

MOC (A)

Max. current 

of No.3 

compressor 

MOC (A)

Max. current 

of No.4 

compressor 

MOC (A)

Rated 

current of 

No.1 fan 

FLA (A)

Rated 

current of 

No.2 fan 

FLA (A)

Max. 

operating 
current of 

unit 

MOC (A)

Recommended 

fuse specifica

-

tion REC(A)


Recommended 

circuit breaker 

specification 

In (A)

Min. specifi

-

cation of the 

power supply 

copper core 

wire diameter 

mm

2

Standard

CX(G)AJ0655 

380/50/3

24

24

2.1

2.1

55

91

69

16

CX(G)AJ01305

380/50/3

56

56

3.96

3.96

120

207

154

50

High 

Efficiency

CX(G)AJ065

380/50/3

24

24

2.1

2.1

55

91

69

16

CX(G)AJ0130

380/50/3

24

24

24

24

2.1

2.1

98.2

143

133

50

Summary of Contents for CGAJ065

Page 1: ...operly installed adjusted or altered equipment by an unqualified pers on could result in death or serious injury When working on the equipment observe all precautions in the literature and on the tags...

Page 2: ...ction 12 3 1 Cooling System Diagram 12 3 2 Main Components and Function Chart 14 3 3 Unit Appearance and Structure 15 3 4 Control Box Introduction 18 4 Unit Installation Requirements 21 4 1 Outdoor Un...

Page 3: ...6 4 Adjustment and Judgement of Refrigerant Volume 36 6 5 Judgement of Water Flow in Water System 36 6 6 Non fault Phenomenon 36 7 Fault Handling 37 7 1 Fault Alarm Table 37 7 2 Fault Handling for Ou...

Page 4: ...failure damage or personal safety When cleaning the unit do not sprinkle water directly on the unit which may cause electric shock Cut off all power supplies before contacting the wiring device Before...

Page 5: ...nit is not used for a long time please cut off the main power supply of the system to extend the service life of the unit and save electrical energy Do not touch the fins of the heat exchanger Otherwi...

Page 6: ...ust and water refill in water system Make sure the water temperature meets the operation requirements The air condition water pipeline and hot water pipeline must go through pressure test to ensure th...

Page 7: ...FF by default if modular control is needed user should set the code on site as needed The Bit1 5 of the switch is used for code address of centralized control Note The modular host of must set to 00 S...

Page 8: ...changer pipeline at water side is frozen it will be seriously damaged namely the heat exchanger will break or leak Such freezing damage is not covered in warranty therefore user should take anti freez...

Page 9: ...y Digit 12 Controller S Modular Controller units 2 U Unit Controller unit 1 N None Digit 13 Service Sequence F 6th Time Digit 14 Ambient Temperature R Standard Digit 15 Connector Option A Without 2 pc...

Page 10: ...9 2 38 0 Rated Heating Power kW 9 5 19 0 Rated Heating Current A 18 5 34 0 Refrigerant Category R410A Charge kg 13 12 5 2 13 12 5 2 Water Side Category of Heat Exchanger High efficiency shell tube hea...

Page 11: ...2 55 0 98 2 Compressor Category Hermetic scroll No Pieces 2 4 2 4 Rated Cooling Power kW 9 2 9 2 9 2 9 2 Rated Cooling Current A 18 18 18 18 Rated Heating Power kW 9 1 9 1 Rated Heating Current A 18 1...

Page 12: ...ing System Diagram CXAJ065 System Diagram F N F H Heating Cooling Refrigerant reservoir Fin coil condenser Evaporator Discharge temperature sensor TH6 Discharge temperature sensor TH5 4 way valve Suct...

Page 13: ...waterTH1 Outlet water TH2 HP1 LP1 EXVA 1 4 way valve COMP A1 COMP A2 HP2 LP2 28 6 COMP B1 COMP B2 HPS1 HPS2 TH3 EXVB 1 TH8 Refrigerant reservoir Refrigerant reservoir Cooling Facing control box left s...

Page 14: ...ate in the system EXV Control refrigerant flow rate by adjusting opening through pressure or temperature changes Fin coil Heat Exchanger Heat exchange with outdoor air Gas liquid Separator Separate ga...

Page 15: ...20 Water pan 1 21 Compressor 2 22 Liquid receiver 1 23 Gas liquild separator 1 24 Shell tube HX 1 25 Cover plate of shell tube HX B 2 26 Cover plate of shell tube HX C 4 27 Cover plate A 4 28 Support...

Page 16: ...r plate of shell tube HX A 2 17 Compressor 4 18 Tube 4 2 19 Support plate of compressor B 1 20 Shock pad 16 21 Suction tube B 1 22 4 ways valve assembly B 1 23 Drier EXV assembly B 1 24 Tube 5 1 25 Wo...

Page 17: ...15 Suction tube A 1 16 Cover plate of shell tube HX B 2 17 Cover plate C 4 18 Water pan 1 19 Compressor 2 20 Suction tube B 1 21 Cover plate of shell tube HX A 1 22 Support plate of compressor B 1 23...

Page 18: ...al block 1 18 Snap busing A 9 19 Snap busing B 1 R A S B T C Normal Phase reveres Phase loss 98 14 95 11 96 12 O U volt P0010 CN12 U1 CN15 CN14 CN11 CN16 OUT14 OUT13 OUT1 2 OUT12 OUT11 OUT10 OUT9 OUT8...

Page 19: ...xx TH12 TH11 TH10 TH9 TH8 TH7 TH6 TH5 TH4 TH3 TH2 TH1 OUT1 1 EXVA 1 EXVA 2 EXVB 1 EXVB 2 R A S B T C Normal Phase reveres Phase loss 98 14 95 11 96 12 O U volt MFA MFB MCA 1 MCB 1 MCA 2 MCB 2 1 2 3 4...

Page 20: ...xx V0xx TH12 TH11 TH10 TH9 TH8 TH7 TH6 TH5 TH4 TH3 TH2 TH1 OUT1 1 EXVA 1 EXVA 2 EXVB 1 EXVB 2 R A S B T C Normal Phase reveres Phase loss 98 14 95 11 96 12 O U volt MFA MFB OVCA 1 OVCB 1 1 2 3 4 5 6 7...

Page 21: ...on and space for maintenance and repair The unit should be installed on a level surface with reliable load bearing capacity please refer to the parameter table for unit weight and outline dimensions I...

Page 22: ...e inlet and outlet water pipelines Install filter in the inlet pipeline of the evaporator the mesh number of the filter should be 40 Install water discharge value and pipeline at the bottom of water p...

Page 23: ...ly connected to reduce the vibration transmission The pipes shall be connected through welding anges and the secondary galvanization or antiseptic treatment shall be performed on the welding seam and...

Page 24: ...on the cold water side of the unit Two way three way valve installation the two way valve or three way solenoid valve shall be installed at the outlet of the fan coil to avoid complaints of waterway v...

Page 25: ...aving water temperature sensor TH12 if the units are installed in modular mode a place for installing the temperature sensor must be reserved on the main outlet pipe of the water system so as to insta...

Page 26: ...nits shall be safely grounded Improper grounding may cause electric shock Please ensure that the earth wire is firmly connected to the grounding terminal and grounding electrode of the unit 9 There is...

Page 27: ...supply is connected with the communication line through the terminal The modular controller is provided with a 220VAC 12VDC 500mA DC power accessory Optimal operating temperature of modular controller...

Page 28: ...P1 OV FAN M FAN2 H FAN1 RUN IN AL OUT AL IN RUN OUT ADC_OD_CO1 FLOW OVHT HP2 FREZ LP2 C H N COM EN SAVE TH4 CN6 CN2 TH2 TH1 TH3 SW2 A G B A CN4 TH5 TH6 4WV1 CN1 SW1 COMP1 COMP2 HT EV1 A HAT 4WV2 PUMP...

Page 29: ...the communication line The shielded twisted pair must be connected hand in hand and no star connection shall be allowed namely 1 is connected to 2 2 is connected to 3 and 3 is connected to 4 If 1 is c...

Page 30: ...A U N U1 Model Table Model 65 F N 22 U1 65 F H 27 U1 TH4 TH9 Short Short Power Compressor Location Description Pump Overload Switch close Connect 26 and U1 Flow Switch Connect 25 and U1 Code Switch Se...

Page 31: ...Connect 26 and U1 Flow Switch Connect 25 and U1 Code Switch Seting reference IOM Reserved control signal for controlling water pump and heating EN SAVE AL On site wiring Factory wiring FAN PUMP HT EV...

Page 32: ...H TH4 TH9 Compressor Location Description Pump Overload Switch close Connect 26 and U1 Flow Switch Connect 25 and U1 Code Switch Seting reference IOM Reserved control signal for controlling water pump...

Page 33: ...s Starting order of the unit Cooling mode 1 Starting process for cooling mode Select cooling mode start the unit display water temperature the electronic expansion valve reaches initial opening after...

Page 34: ...Do not press frequently 2 Mode selection Includeing cooling mode and heating mode Mode should be selected a fter shut down 3 Value browse Press rstly then press to browse the value 4 Leaving water te...

Page 35: ...opening value in defrost 480step 100step 10step 48 480step 35 Temperature difference of electric heater start 20 0 1 10 36 Temperature difference of electric heater stop 20 0 1 6 45 Mandatory defrost...

Page 36: ...s please drain the pipeline 6 6 Non fault Phenomenon Phenomenon Fault Display Reason The outdoor fan does not operate during heating None Defrosting Part of the fan does not operate None The heating a...

Page 37: ...system A 78 78 Switch off the compressor of the system A If this fault occurs twice switch off and give an alarm 26 CN14 Low pressure overrun of system B 7A 7A Switch off the compressor of the system...

Page 38: ...displays corresponding alarm code Fault reason The interface is loose open short of the sensor the main control interface is disconnected or short circuited Fault handling process Error Error Yes Yes...

Page 39: ...cation failure between modules unable to start the unit Fault handling process In addition if the input voltage of the transformer provided with PCB is too low it will cause low voltage in PCB and the...

Page 40: ...volume is correct Check if the radiator is blocked or inefficient Check if the system is blocked or there is any refrigerant leakage Refill refrigerant or clean the radiator Check if the EEV is closed...

Page 41: ...the required extent Check if the suction gas superheat is too high Replace the electronic expansion value or refresh the control program Error Error Error Error Error Error Error Error System overcur...

Page 42: ...ion See P6 for the ambient temperature range for the reasonable operation of the unit If the range is exceeded before starting the unit the unit will not be able to be started and a fault code will be...

Page 43: ...up of coil 2 Common reasons a There is air and moisture in the cooling system which affects the coil insulation and leads to long term operation under high temperature and high pressure and consequent...

Page 44: ...t on electronic expansion valve body Connect to main board interface Electronic expansion valve coil Electronic expansion valve body Copper pipe interface E Compressor wear Compressor wear is usually...

Page 45: ...ion and repair process of electronic expansion valve If there is a click sound after connecting power Check if the coil is properly fit to the body Check if the conductors are properly connected with...

Page 46: ...f throttle is normal and if the evaporating temperature is normal during normal operation of the unit Check if the temperature sensor and system pressureare normal and if the installation is correct C...

Page 47: ...he cooling system before installation to prevent foreign objects from jamming the valve body again E Notes for use of electronic expansion valve a Do not use valve body and coil with different brands...

Page 48: ...fault for pressure switch is normally open or normally close which means the pressure is always in open or close status and does not respond to pressure changes no matter the system pressure If you u...

Page 49: ...nected with outdoor unit and the other two pipes are also connected to create a cooling cycle When the solenoid coil is on the magnetic effect generated by the solenoid coil will overcome the force of...

Page 50: ...s insufficient pressure difference needed for direction change h The circulation volume of refrigerant in compressor does not meet the requirement for direction change of four way valve i The necessar...

Page 51: ...The controller will display H1 System A or H2 System B otherwise the system will continue running The disconnecting value is 4 4Mpa the reconnect value is below 3 5Mpa In case of this alarm please che...

Page 52: ...ped When the fault occurs the Cooling plate type heat exchanger anti freezing locking time will be triggered when the time is over and the discharge temperature Cooling anti freezing stopping temperat...

Page 53: ...tarted then the remained compressor in the system where the first compressor is picked will be selected as the third compressor to be started the final compressor will be the fourth to be started The...

Page 54: ...pressure switch trips or the discharge water temperature Cooling anti freezing starting temperature fan coil plate type heat exchanger 2 the system will switch from defrosting to heating mode The low...

Page 55: ...1 16 55 63 58 2 60 89 35 6 797 6 916 7 036 86 1 333 1 4 1 47 15 53 07 55 47 57 98 36 6 554 6 673 6 794 87 1 296 1 362 1 431 14 50 65 52 89 55 22 37 6 321 6 441 6 562 88 1 26 1 325 1 393 13 48 35 50 44...

Page 56: ...09 1 323 3 338 353 2 60 23 64 24 8 26 01 121 3 352 3 654 3 982 0 307 9 321 6 335 7 61 22 79 23 92 25 1 122 3 261 3 556 3 877 1 293 3 306 1 319 2 62 21 97 23 08 24 23 123 3 172 3 461 3 775 2 279 5 291...

Page 57: ...For more information please visit trane com or tranetechnologies com Trane has a policy of continuous product and product data improvement and reserves the right to change design and specifications wi...

Reviews: