8
❏
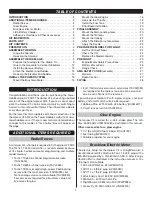
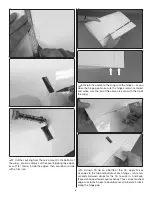
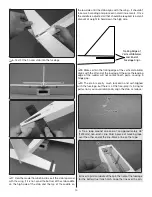
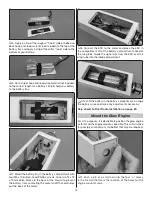
6. Thread a 4" [100 mm] pushrod onto a clevis until a small
portion of the threads appear through the clevis as shown.
❏
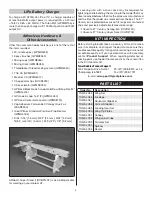
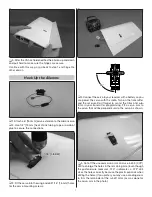
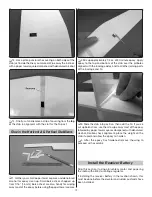
7. Connect the clevis to the middle hole in a control horn
and secure with a silicone retainer.
❏
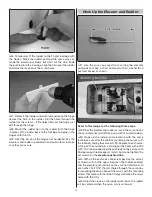
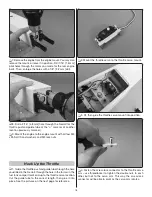
8. Set the horn on the aileron so the pushrod will be in
alignment with the second from the outer hole in the servo
arm (about 1/2" [13 mm] out from center) and the clevis
holes in the horn will be centered over the leading edge of
the aileron. Using the holes in the horn as a guide, drill 3/32"
[ 2.4 mm] holes through the aileron. Mount the horn to the
aileron with two M 2.5 x 15 Phillips wood screws and the horn
backing plate on the top of the aileron.
❏
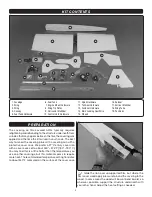
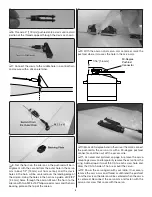
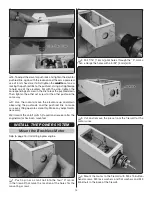
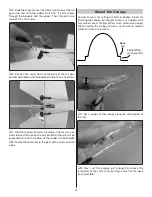
9. With the aileron and servo arm centered, mark the
pushrod where it crosses the hole in the servo arm.
90-Degree
Pushrod
Connector
1/16" [1.6 mm ]
❏
10. Make a 90-degree bend in the wire at the mark, connect
the pushrod to the servo arm with a 90-degree pushrod
connector, and then cut off the excess wire.
❏
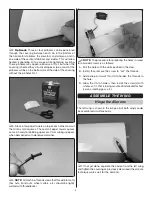
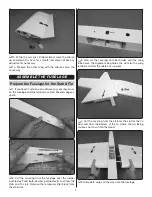
11. As noted and pictured on page 5, remove the servo
mounting screws and temporarily remove the servo from the
wing. Add a drop or two of thin CA to each screw hole, and
allow the CA to harden. Then, re-mount the servo.
❏
12. Power the servo again with your radio. If necessary,
remove the servo arm and thread or unthread the pushrod
from the clevis so the aileron will be centered when the servo
is centered. Reconnect the servo arm and fasten with the
servo arm screw that came with the servo.


