4
ASSEMBLY
Assemble the Bottom Half
CA GLUING TIPS
Assembling lightweight, foam models with CA can
occasionally prove to be frustrating, so here are a few
suggestions to help you end up with a well-fi nished model
free of excess glue, fi ngerprints and smudges:
A.
Most important, be certain to use
foam-safe
CA and
CA accelerators. Some accelerators attack foam more than
others. We have found that Great Planes Pro CA Activator
in
Aerosol
form (GPMP6034) may be used with 3mm “fl at
foam” without any problem.
B.
Even foam-safe CA — used in excess — can generate
enough heat while curing to melt or deform foam, so use
CA and activator sparingly.
C.
CA Applicator Tips (HCAR3780) are highly recommended
and virtually required for use with thin CA. Trim the base
of the tip before pressing it onto the bottle to prevent the
tip from splitting. Simply cut off the end of the tip each
time it becomes clogged until it’s too short, then replace
it with another.
D.
Small paper towel squares cut from two or three paper
towel sheets stacked on top of each other come in handy
for wiping residual CA off your model as you proceed.
E .
Use care when wiping excess CA off the model—you
get only one or two chances before the CA will smear the
colored ink printed on the surface. Using CA sparingly will
minimize the necessity for wiping the airframe.
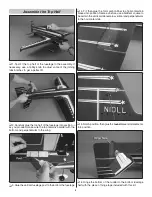
❏
1. Split one of the larger plastic bags that came with the
kit down one edge and unfold it over your workbench. Initial
assembly will be done over this sheet to keep from gluing
parts to your workbench.
❏
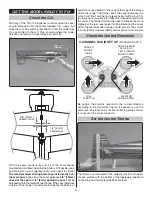
2. Glue the aft end of the fuselage to the wing/front end
of the fuselage — it usually works best to apply medium CA
to one of the pieces, join them together right-side up over
the plastic sheet, hold tightly, wipe off excess CA and lightly
spray with accelerator.
Summary of Contents for Laser 200 Flatty
Page 16: ......


