14
GET THE MODEL READY TO FLY
Check the C.G.
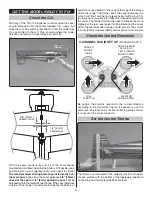
With any of the 2S or 3S batteries recommended the Laser
should balance within the recommended C.G. range, but
since the C.G. has such a great effect on how the model fl ies
it’s a good idea to check it. Plus, knowing where the model
balances will give you a good idea how it will fl y.
3/8" [10mm]
ahead of spar
1/4" [ 6 mm]
behind spar
With the Laser ready-to-fly and all of the components
mounted and installed including the battery, lift it upside-down
positioning it on your fi ngertips until you can get it to sit level.
The recommended, starting balance point is directly over
the main spar,
but as long the Laser balances
3/8" [10mm]
ahead of the spar or 1/4" [6mm] behind the spar
it will be
balanced within the recommended range. If the Laser balances
outside of this range it is advisable to relocate the battery or
add stick-on lead ballast to the nose or tail to get it to balance
within the range. The farther back the Laser balances the
more it will “fl oat” and the more responsive it will be, but if it’s
too responsive it could be too diffi cult for inexperienced pilots
to control. The farther forward the Laser balances the more
stable, but the less responsive it will be. Balancing the Laser
within the recommended range should provide the correct
ratio of stability, maneuverability and response for most pilots.
Check the Control Directions
FULL
THROTTLE
RUDDER
MOVES
RIGHT
ELEVATOR
MOVES DOWN
RIGHT AILERON
MOVES UP
LEFT AILERON
MOVES DOWN
4-CHANNEL RADIO SET UP
(STANDARD MODE 2)
Be certain the controls respond in the correct direction
according to the transmitter inputs. If necessary, use the
servo reversing function in your transmitter to get the controls
to respond in the correct direction.
Set the Control Throws
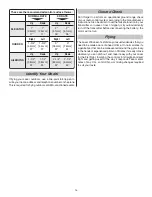
The throws are measured at the widest point (front-to-back)
of each surface with the bottom of the fuselage propped up
so the wing and horizontal stabilizer are level.
Summary of Contents for Laser 200 Flatty
Page 16: ......


