13
Final Assembly
❏
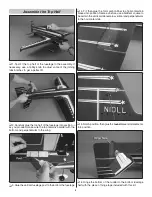
1. Now that the structure is completely assembled, go
back and reinforce any glue joints where necessary — don’t
build up large fi llets of glue — just a drop of thin, foam-safe
CA here-and-there where necessary.
❏
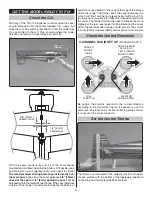
2. Mount the motor with the three included Phillips screws.
Balance the propeller, then mount the propeller to the motor.
❏
3. Take a few minutes to think about the mounting location
of the receiver, ESC and battery and where you will route
and secure the wiring. A 5/16" [8 mm] hole will need to be
cut wherever necessary for passing the power wires from the
battery. (A brass tube sharpened on the end works well for
cutting a perfect hole.)
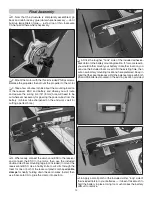
❏
4. When ready, connect the servos and ESC to the receiver
and connect the ESC to the motor, then use the included
double-sided foam mounting tape (not included) to mount the
receiver and ESC. Use a hobby knife to cut slits through the
foam for one or both of the laser-cut plastic U-shaped
cable
clamps
for neatly holding down the servo wires. Install, then
use foam-safe CA to glue the clamp into position.
❏
5. Stick the rougher, “hook” side of the included adhesive-
back Velcro to the battery mounting location. If, for some reason,
you would rather mount your battery in another location you
can use the included foam cover to fi ll the existing hole, then
cut a new battery mounting location where preferred. Keep in
mind that the Laser balances within the balance range with both
2S and 3S batteries mounted in the existing location provided.
❏
6. Apply a small patch of the included softer, “loop” side of
the included Velcro to your batteries — it doesn’t take much to
hold the battery in place. Using too much makes the battery
diffi cult to remove.
Summary of Contents for Laser 200 Flatty
Page 16: ......


