No.
Part name
Procedure
Remarks
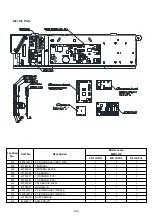
Control P.C.board
3
2.
Attachment
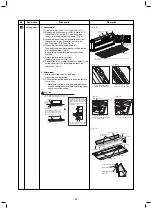
1) Fix the control P.C. board to the card edge
spacer. (4 positions)
2) Connect the connector removed in item 1 as
before and then fix the wiring with the clamp.
3) Following to work of item 2 of
②
, mount the
electric parts box cover and the air intake
grille as before.
3) Unlock the locks of the card edge spacer
(4 positions) and then remove the control
P.C. board.
Note :
Unlock the lock of the housing part and
then remove the connector.
1.
Detachment
1)
Carry out work of item
1 of
①
and
item 1 of
②.
2)
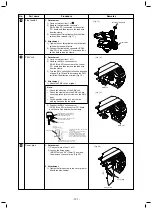
Remove connectors which are connected
from the control P.C. board to the other parts
and then remove wiring from the clamp.
CN510 : Louver motor (20P, White)
CN34 : Float switch (3P, Red)
CN504 : Drain pump (2P, White)
CN100 : TC1 sensor (3P, Brown)
CN101 : TC2 sensor (2P, Black)
CN102 : TCJ sensor (2P, Red)
CN
210
: Fan motor
(7P, White)
CN82 : PMV (6P, Blue)
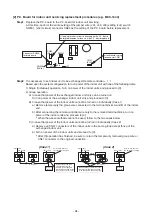
Adjust corner cap
4
1.
Detachment
1)
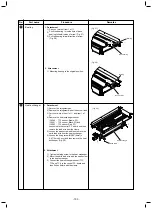
Pull the edge of the adjust corner cap in the
direction of arrow,
adjust corner cap will be
release from ceiling panel
. (Fig. 4)
2.
At
tachment
1)
Hook the strap of the adjust corner cap
securely to the pin.
2) Insert the two claws A of the adjust corner
cap into the rectangular holes of the ceiling
panel in the direction of arrow. (Fig. 5)
3) Push the adjust corner cap so that the two
claws B on the back of the cap are fitted.
CAUTION
Press the two claws B of the adjust corner
cap firmly as far as they will go, and then
check that the adjust corner cap is closely
attached. Failure to do so may result in
water leakage.
Pull
Adjust corner cap Ceiling panel
Pin
Strap
(Fig. 4)
Push
(Fig. 5)
Pin
Strap
Adjust corner cap
Claws A
Claws B
Card edge spacer
- 98 -


