Recording
48
EN
One-touch Timer Recording (cont’d)
4
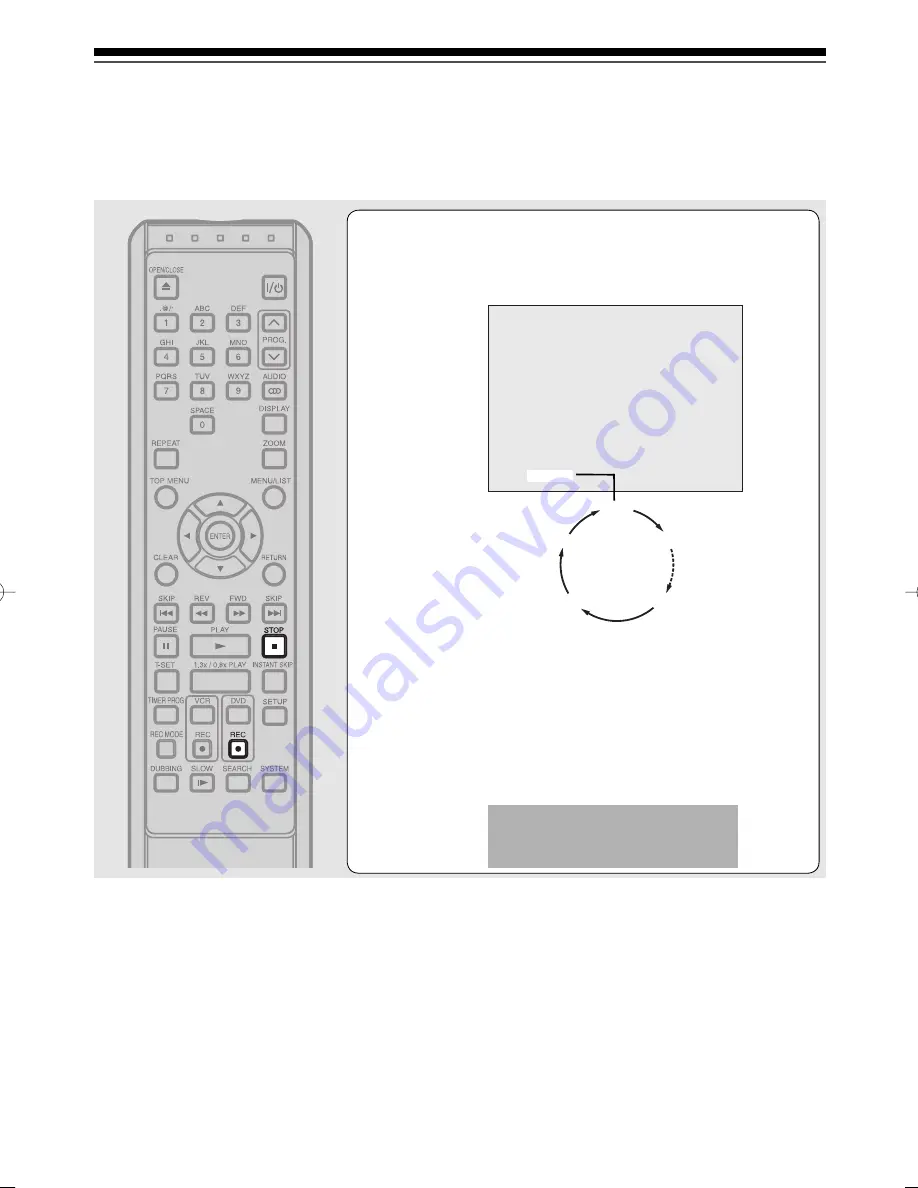
Press [REC
I
] repeatedly until the desired
recording time (30 minutes to 8 hours)
appears on the TV screen.
One-touch Timer Recording will start.
When the unit reaches the specified time, “Writing to Disc” will
appear. It may take awhile to write the data onto a disc and
then it will be turned off automatically.
To change the recording length during the One-touch Timer
Recording, press [REC
I
] repeatedly until the desired length
appears.
To cancel the One-touch Timer Recording within the specified
time, press [STOP
C
].
0:30
(Normal Recording)
8:00
7:30
1:00
I
0:30
“Wait for a moment.” will appear
and the operation may take
awhile to be completed.
Notes
• The remaining recording time will appear on the TV screen during One-touch Timer Recording. Press [DISPLAY] to
see it on the TV screen.
• The remaining recording time will be displayed on the front panel display during One-touch Timer Recording.
• Unlike the timer recording, you can perform the following operations during One-touch Timer Recording.
- Turn off the power.
- Use [REC
I
] or [STOP
C
].
• You cannot use the pause function during One-touch Timer Recording.
• The unit will be turned off automatically under the following conditions.
- No space remains on the disc.
- If a power failure occurs.
• If DVD One-touch Timer Recording is completed during VCR playback or recording, the DVD will be in stop mode and the
VCR keeps the current mode.
• When One-touch Timer Recording is finished and the power is turned off, the unit will switch to the timer-standby mode automatically
if a timer recording has been programmed. Press [T-SET] to cancel the timer-standby mode to use the unit continuously.
• If you want to monitor the programme that you are recording, make sure the device such as a set top box is turned off when
it is connected to AV2.
05̲Recording̲BD.indd 48
05̲Recording̲BD.indd 48
2006/03/24 14:37:45
2006/03/24 14:37:45
Summary of Contents for D-VR16SB
Page 25: ...Connections Connect your recorder to your TV or stereo system Connections ...
Page 36: ......
Page 66: ......


