Power Button / Front Light Button
Press this to turn the device and the front light on/off.
Power button
When the power is off
When the power is on
Press it quickly.
The power turns on.
The power turns off.
Press and hold.
The power turns on.
The front light alternately
turns on/off.
Even if the power is turned off, pressing the program button turns the
power on and the program screen is displayed. (However, you can change
the setting. See “Setting Power” on page 49.)
When using the device under high ambient temperatures and the
temperature inside of the device goes up (to about 144°F or more), the
power is forcibly turned off. In this case, after the temperature inside of the
device cooled down, turn the power on and use the device under
appropriate ambient temperatures. (144°F=62°C)
Battery Switch
The Battery Switch supplies/cuts the battery power to the device. When
shipped, the setting is “Stop.” Before using your device for the first time:
1.
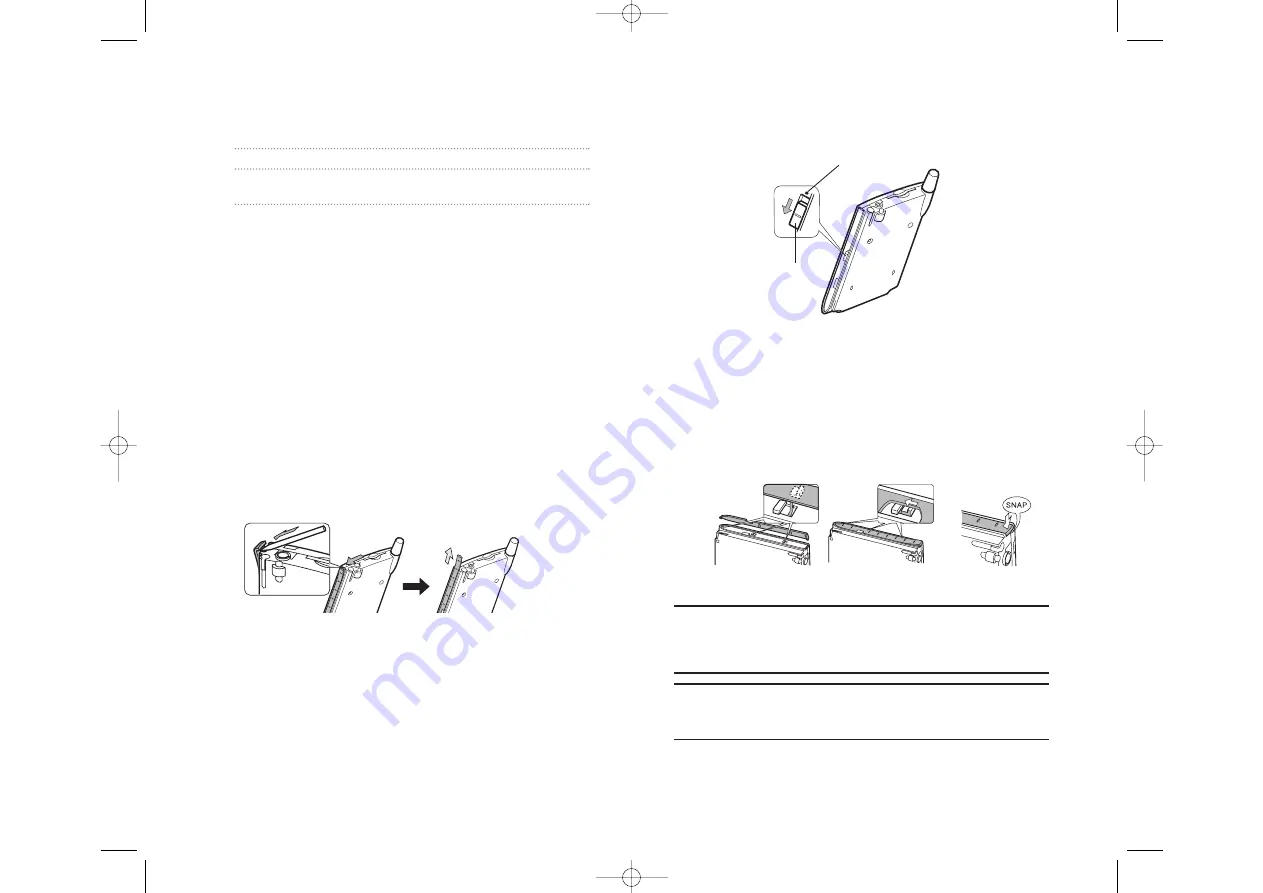
With the device in hand, gently remove the Color Panel on the right side
of the device, using the stylus at the top of the Color Panel.
Section 2: Understanding Your Device
16
2A: Your Device - The Basics
2.
Confirm that the Radio Standby Switch on the left side of the device is
set to the lower side (OFF), then slide the Battery Switch on the right
side of the device to “Supply” (lower side).
3.
Reattach the Color Panel.
The proper way to reinstall the Color Panels is to carefully insert the
two small right angle tabs and the single straight tab at the bottom
while simultaneously holding and bending the very top section away
from the device. After all three tabs are seated and pushed down into
place, then push the top section, that you are holding away from the
unit, back in until you feel a distinct “snap”.
Note:
Returning the Battery Switch to the “Stop” (the upper side) resets
the device back to its factory settings (All stored data will be deleted) -
initial setup will need to be repeated. To move to the “Stop” side, slide the
Battery Switch while inserting the stylus into the Battery Switch Lock.
Note:
Do not use excessive force in detaching or reattaching the Color
Panel. Failure to comply with the above procedures may cause damage
to the tabs or other parts of the device.
Battery Switch
Battery Switch Lock
Section 2: Understanding Your Device
2A: Your Device - The Basics
17
SPRINT~1-S2Aa.QXD 02.8.7 2:29 PM Page 16


