

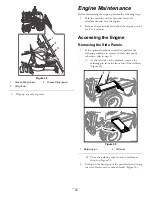
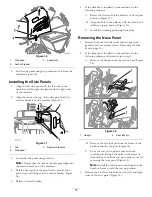


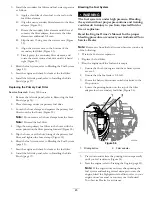

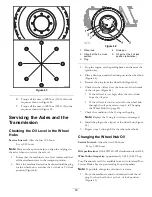


Figure 46
1.
Dust valve
3.
Latch
2.
Air-cleaner cover
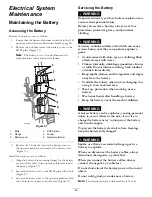
Checking the Restricted Air-cleaner
Light
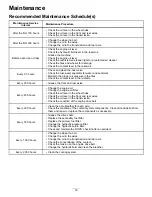
Service Interval:
Before each use or daily
1.
Start the engine; refer to Starting the Engine (page 25).
2.
Check the restricted air-cleaner light on the instrument
cluster (Figure 47).
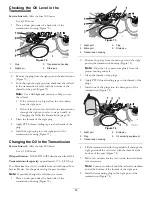
Figure 47
1.
Instrument cluster
2.
Restricted air-cleaner light
3.
Replace the air-cleaner element(s) as follows:
A.
Replace the primary air-cleaner element; refer to
Replacing the Primary Element (page 42).
B.
C.
If the restricted air-cleaner light still comes on,
replace the secondary air-cleaner element; refer to
Replacing the Secondary Element (page 42).
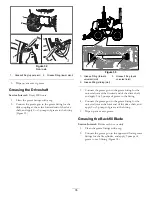
Removing the Air-cleaner Cover
1.
Remove the left side panel; refer to Removing the Side
Panels (page 36).
2.
Pull the latch for the air-cleaner cover outward (Figure
46).
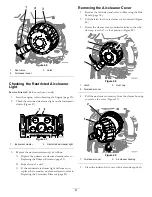
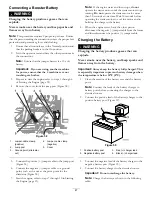
3.
Rotate the cleaner cover counterclockwise so that the
dust cap is at the 7 o’clock position (Figure 48).
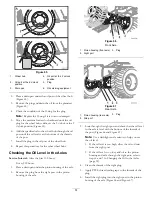
Figure 48
1.
Latch
3.
Dust cap
2.
Air-cleaner cover
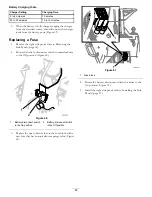
4.
Pull the air-cleaner cover away from the cleaner housing
to remove the cover (Figure 49).
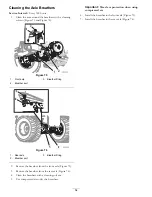
Figure 49
1.
Air-cleaner cover
2.
Air-cleaner housing
5.
Clean the inside of the cover with a clean damp cloth.
41
Summary of Contents for RT600
Page 71: ...Notes 71...


