


3
Adding a Controller
Setting an Irrigation Schedule
4
5
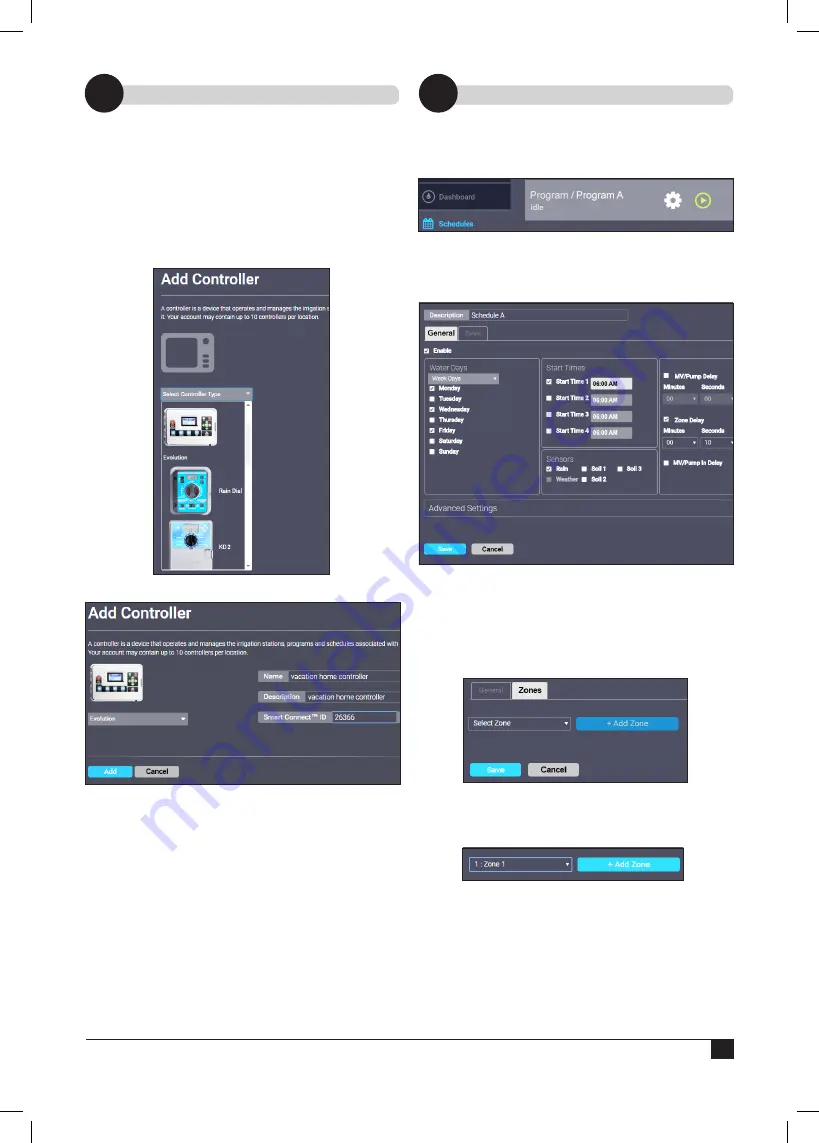
Add Controller to the SMRT Logic
Multiple irrigation / lighting controllers can be added
to a location. Controllers must be added one at a
time.
1. Click
Irrigation
tab then
Controllers
.
Click
+ Add Controller
button.
2. Select the controller from the dropdown list.
For the Quick Start, we will be adding an
EVOLUTION controller to the location.
3. Enter a name and description for the controller.
4.
For the Smart Connect™ ID, go to the
EVOLUTION controller, to
ADVANCED ->
SENSORS -> SMART CONNECT
. The ID will be
visible at the SMART CONNECT screen.
Enter it into the field.
5. Press
Add
. The controller will be added with a
default irrigation schedule already configured.
Schedules
1. Click the
Schedules
tab.
Click the white
gear icon
for the desired
schedule or program.
2. In the
Edit Schedule A
screen, it is possible to
change the description, select the days of week
to water, select start times, add sensors, and
more.
Above, the controller is set to irrigate on
Mondays, Wednesdays, and Fridays with a
start time of 6am. A rain sensor is added to the
schedule and there is a ten second delay between
when one zone stops and the next starts.
3. Switch to the
Zones
tab
(adjacent to the General tab under Schedules).
4.
Add zones to the specified schedule. From the
dropdown list of zones, select a zone to add to
the schedule and click
Add Zone
.
Summary of Contents for A-SMRT-T
Page 15: ...15 Notes...


