


14
KD2
1. Mount and connect the Climate Logic Receiver to
the irrigation controller.
2. From your browser, go to www.smartscape.com
and login to your account.
3. Location and SMRT Logic Gateway should
already be added.
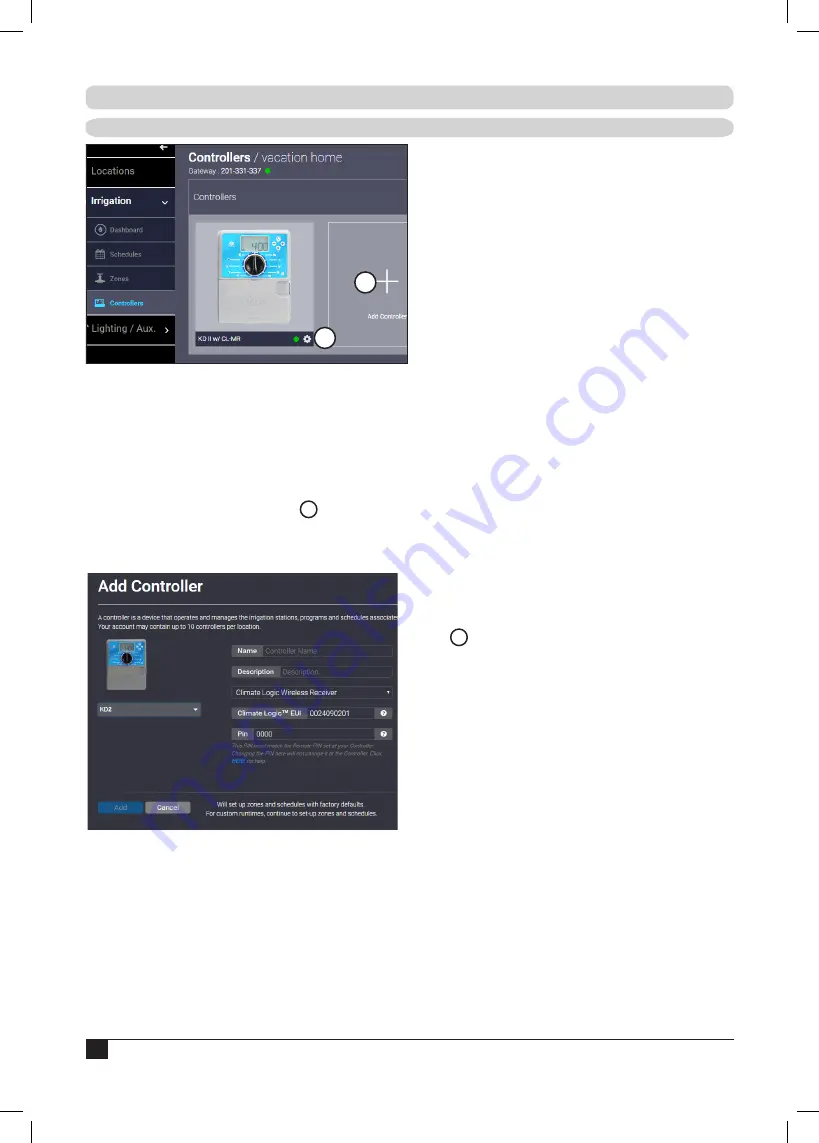
4. Click the
Irrigation
tab then the
Controllers
sub-tab. Click
+Add Controller
(
A
).
5.
Select the Irritrol KD2 from the drop-down menu.
6. Enter a name and description for the controller.
KD2 with Climate Logic Receiver
7. Be sure
Climate Logic Wireless Receiver
is
selected from the dropdown menu.
8. Enter the CL EUI number found in the CL
receiver: Go to
Menu --> Utility --> About
9. Enter the PIN found in the CL Receiver:
Go to
Menu --> Remote
10. Change the default run time, active programs
and stations as desired.
11. Click
Add
when finished.
KD2 with Climate Logic Mini-Receiver
7. From the pull-down menu, select
CL Mini
Receiver
. Press the Activate discovery mode
button on screen.
8. At the KD2 controller, open the controller and
unplug the Mini-Receiver.
9. Plug the Mini-Receiver back into the controller.
You should see text indicating the Mini-Receiver
was found.
10. Press
Add
. After a moment, the controller will
be added to the SMRTscape website.
11. At the Irrigation tab of SMRTscape, you should
see the controller added to the location.
12. It is important to give the controller a PIN for
secure communication. Click the GEAR ICON
(
B
) next to the controller.
13. Enter a 4 digit PIN in the PIN field.
14. Click
Save Changes
.
15. At the Mini Receiver, put the MR into “Learn
Mode” (by pressing the button for 8 seconds
until the LED flashes rapidly).
16. From the SMRTscape website, activate a Station
or Program
17. The Mini Receiver will learn the PIN.
18. Adjust Programs and Station run time as
desired.
Addendum: Adding Supported Controllers
A
B
Configuring a KD2
Summary of Contents for A-SMRT-T
Page 15: ...15 Notes...


